
We-Talent Contest (ROUND 5)_Sleeping Christmas Angel
Hi friends!
Today, included in a contest "We Talent", I want to tell you haw I make a photomontage & animation in Adobe Photoshop.
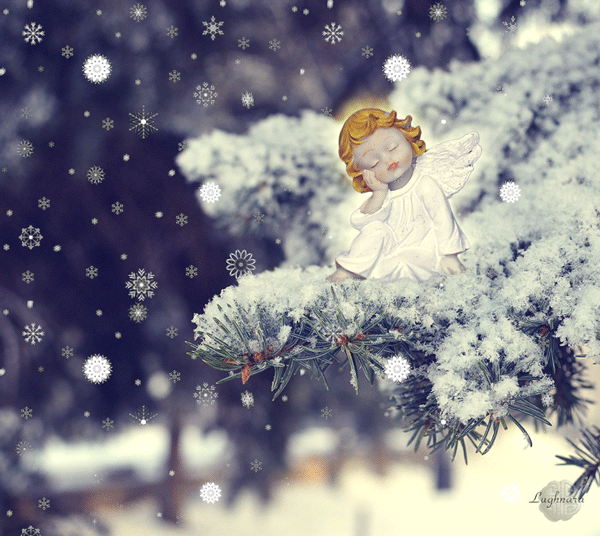
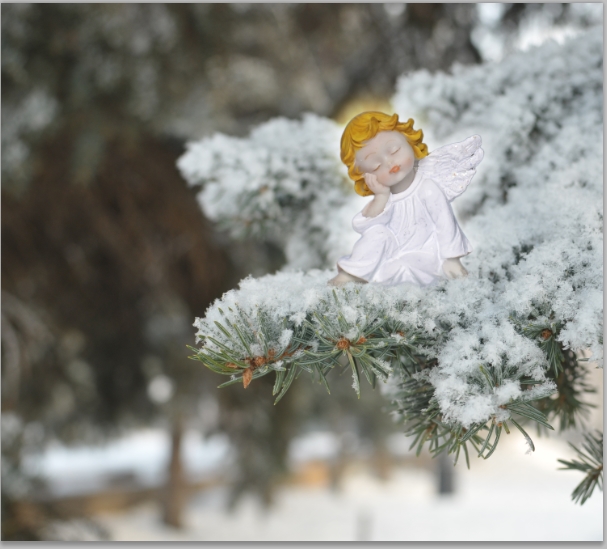
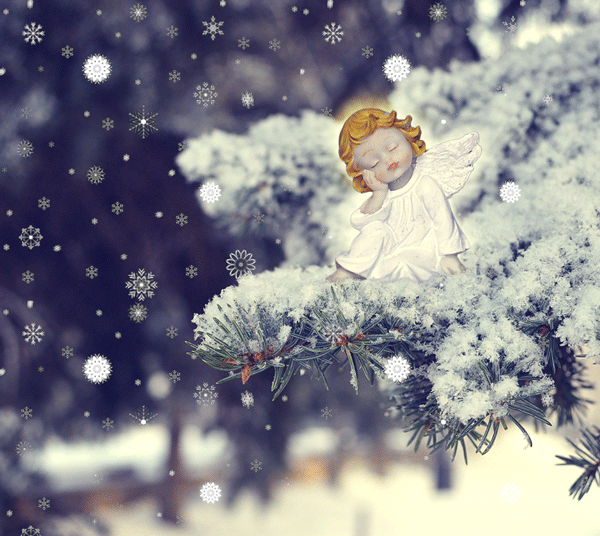
For example, such a picture with little angel sleeping on pine-tree's brunch.
Christmas is coming soon, so this art picture will be relevant.
You'll make an original digital postcards anf send them to your friends.
So...
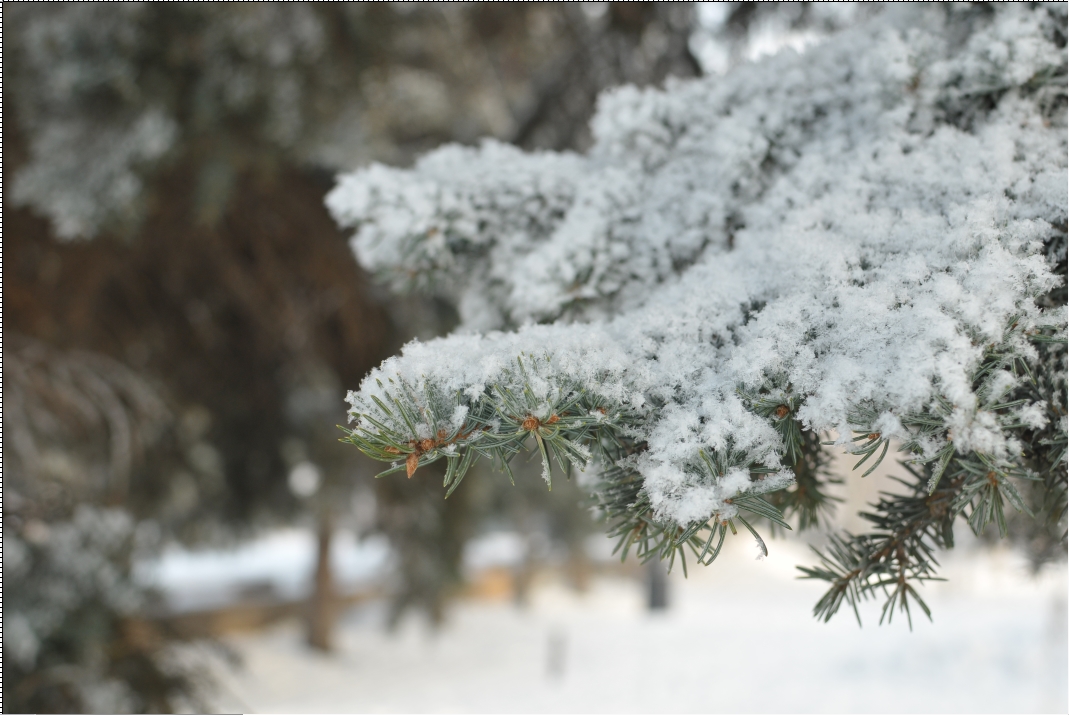
I had a very nice photo with a pine-tree's brunch in a snowflakes.
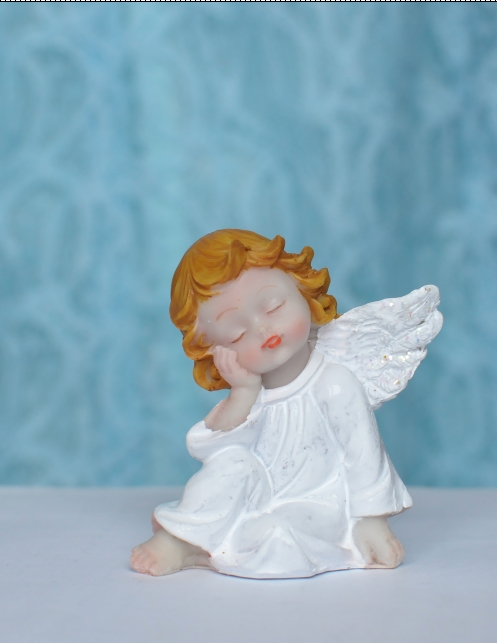
For my photomontage's idea I maked a photo an angel's figurine.
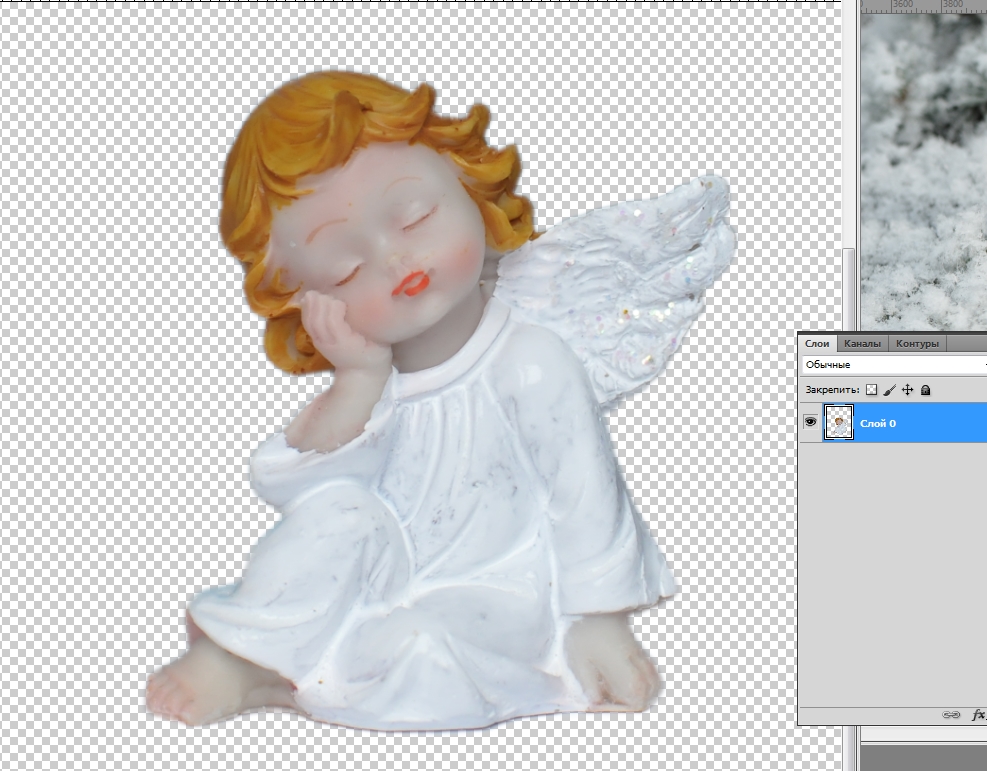
Next step will be a cutting angel from background with Pen Tool
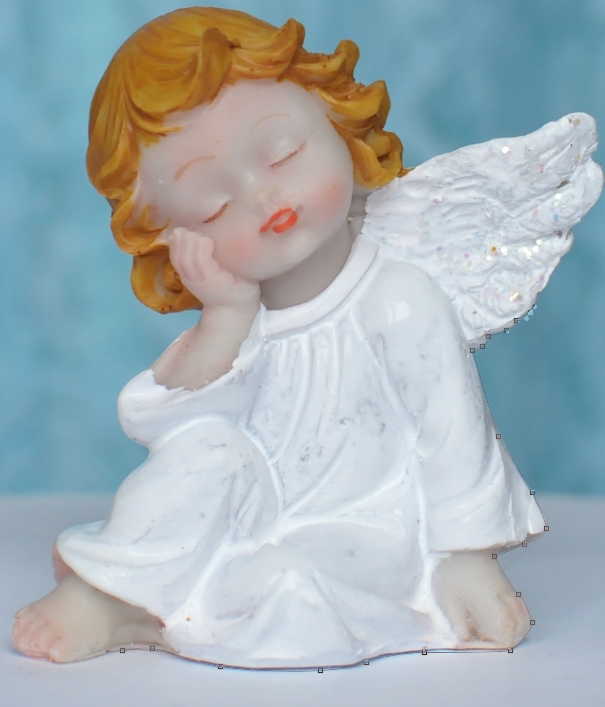
Then choose in menu Selection - Refine Edge
(I've a Russian version of Photoshop, therefore I'm sorry... I'll use many words beside a screenshots.)
Choose value of Edge Detection (marked by red line) about 7,2 pxl and Feather about 3,3 pxl.
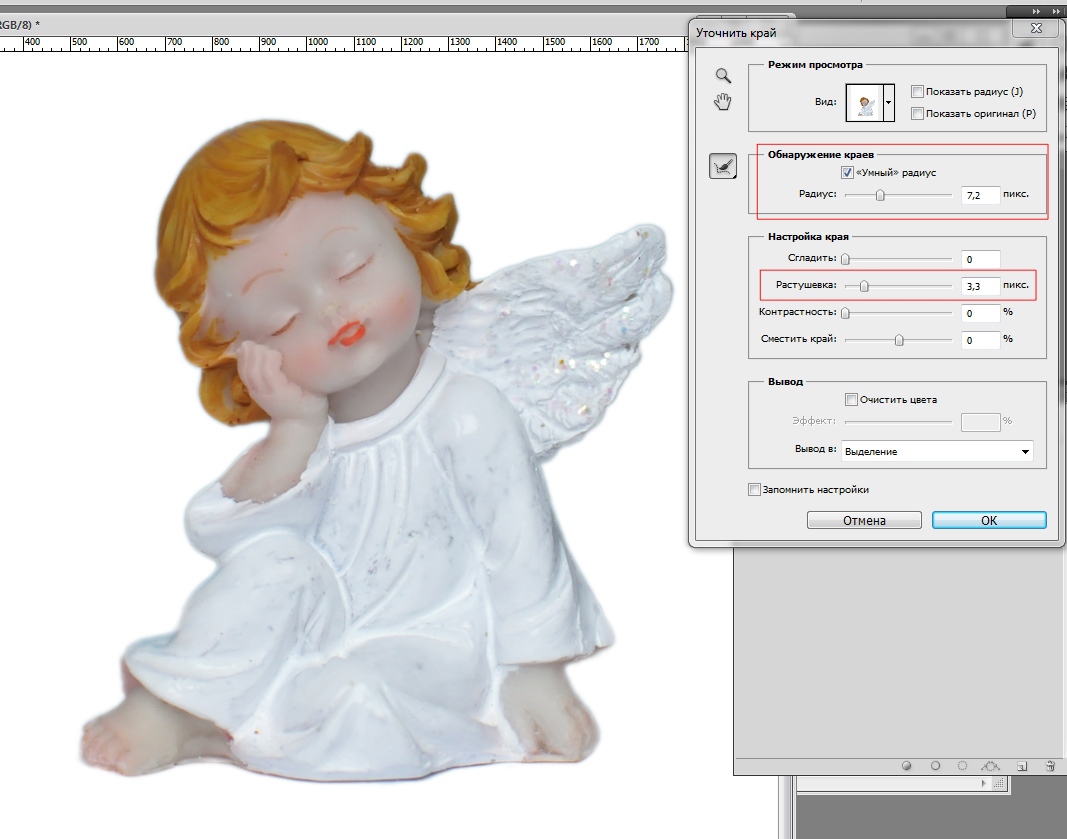
Choose OK and Delete button on keyboard.
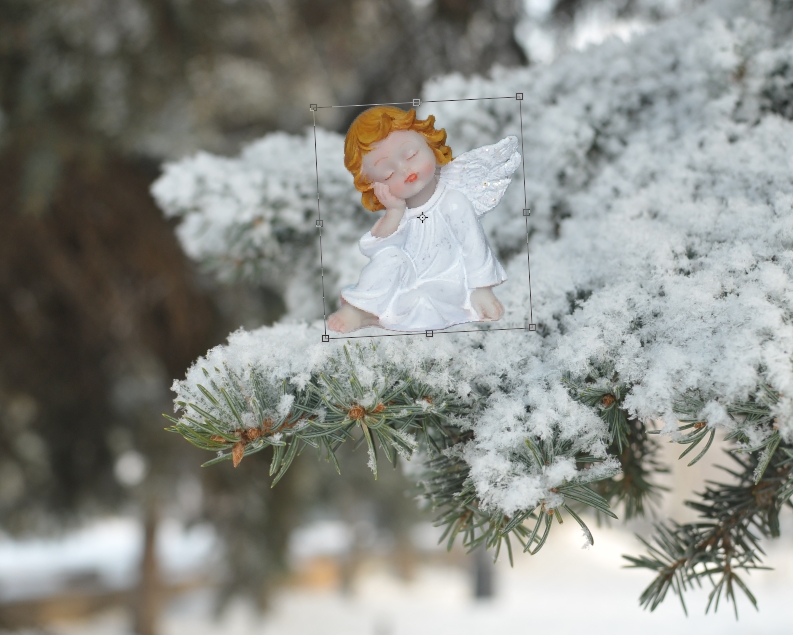
Then place an angel into photo with brunch with Move Tool
Change a size if it need.
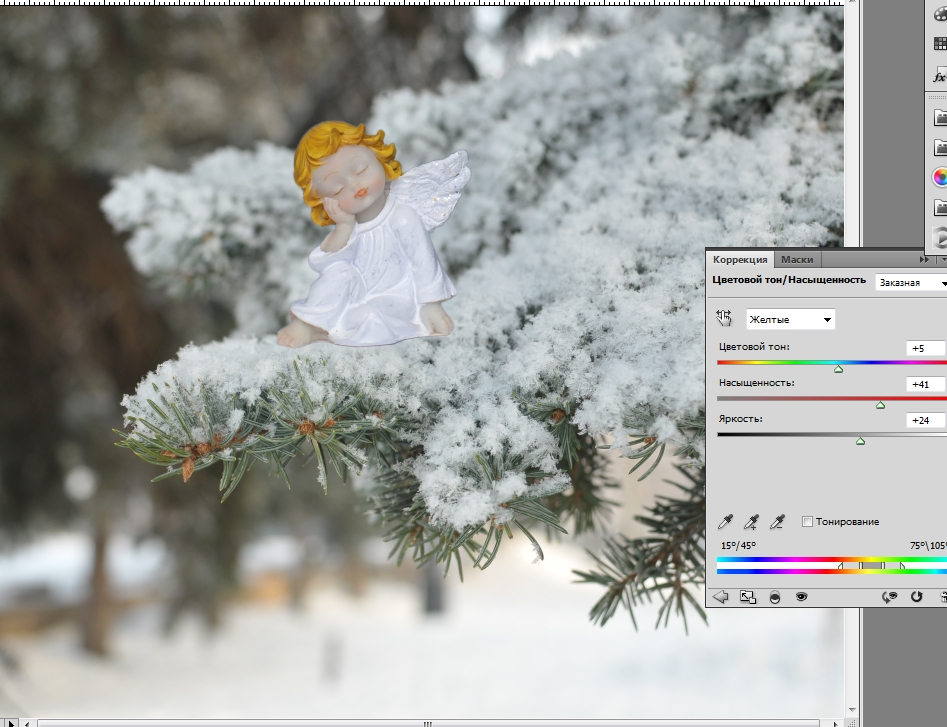
With adjustment layer Hue/Saturation making delicate shades to angel and golden his hair.
Value in Yellow color option must move to right (H +5; S +41; B +24)
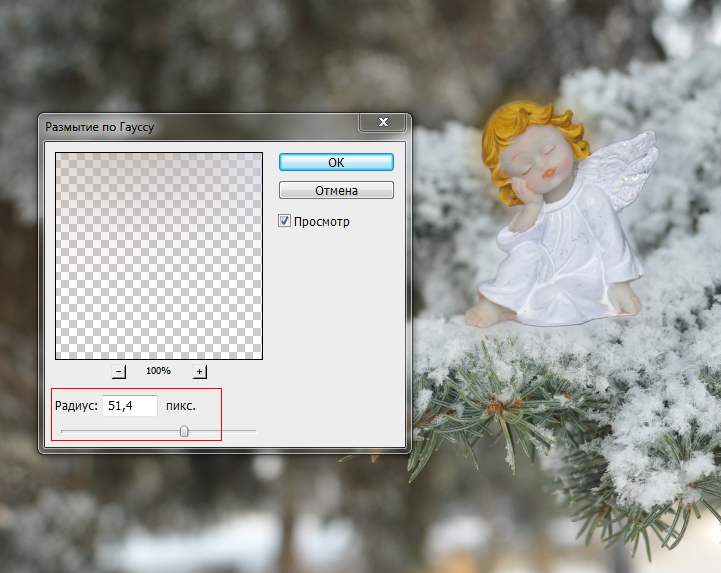
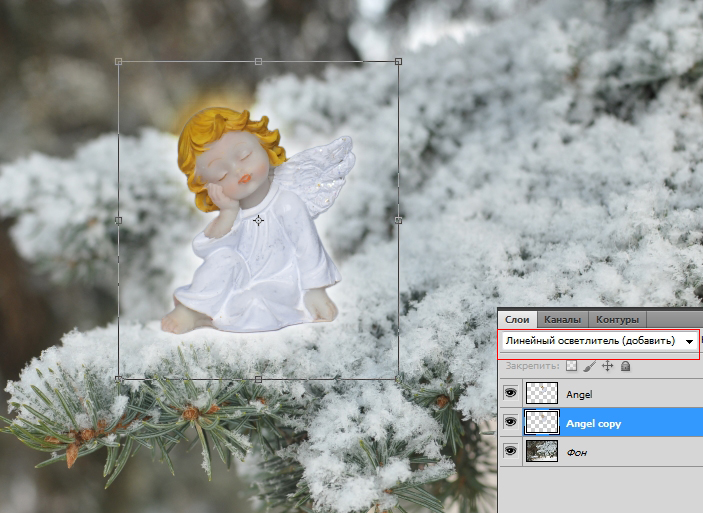
To make an angel's nimbus I make a copy layer of angel and move it behind.
Then choose Filter - Blur - Gaussian Blur with radius of blur as 51,4 pxl
To make a strongest glow I change a layer mode option to Linear Dodge(Add)
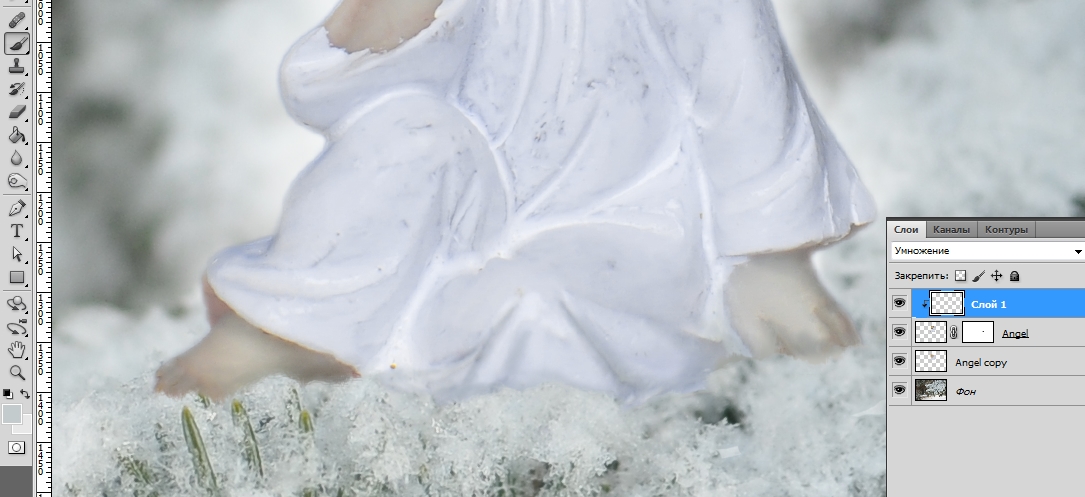
With an Eraser Tool I delete a bottom side of nimbus layer.
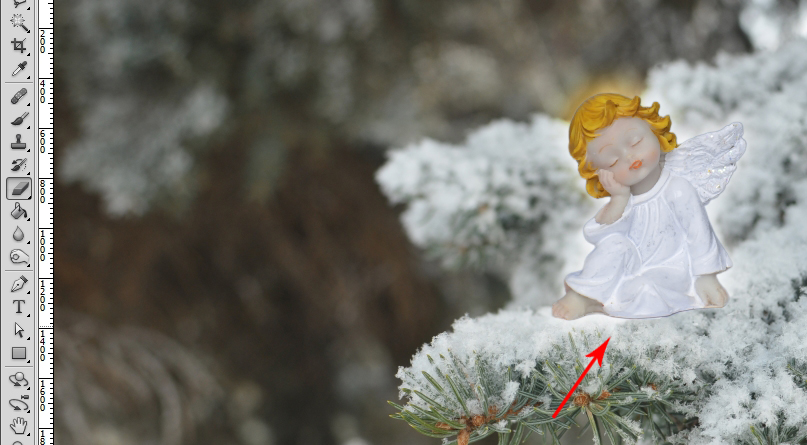
Then I create a mask to angel's layer and with soft Brush Tool & black color erase a little bottom's part to make a view like angel sitting in a snow.
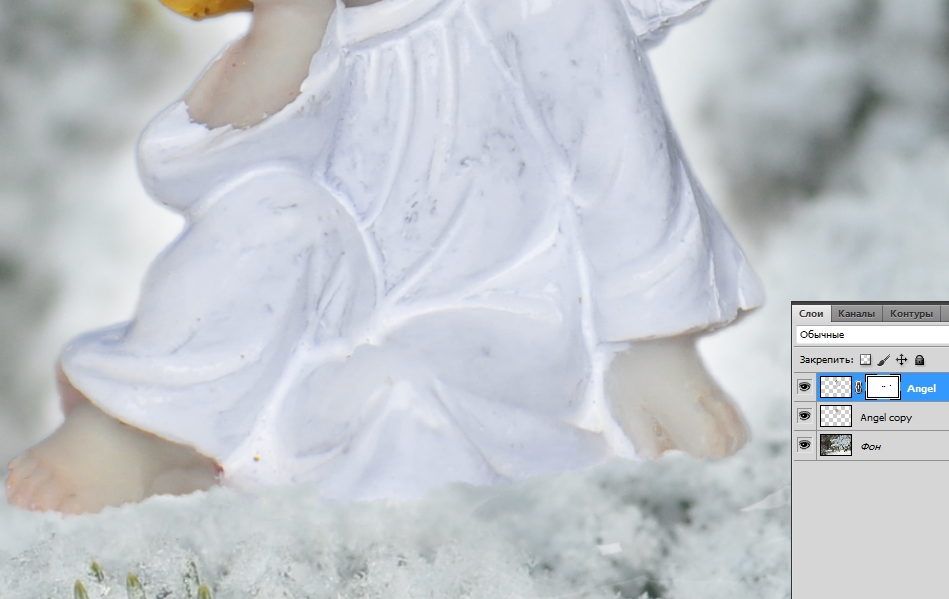
To make a really drop shadow I create e new layer above others and create an clipping mask to lower layer (angel with mask). Then I choose light gray color (like a pleat of angel's chiton) & paint with Brush Tool to hands and lower edge of chiton touching a snow.
Change a layer mode of shadow's layer to Multiply and Opacity option as 70%
This is the result.
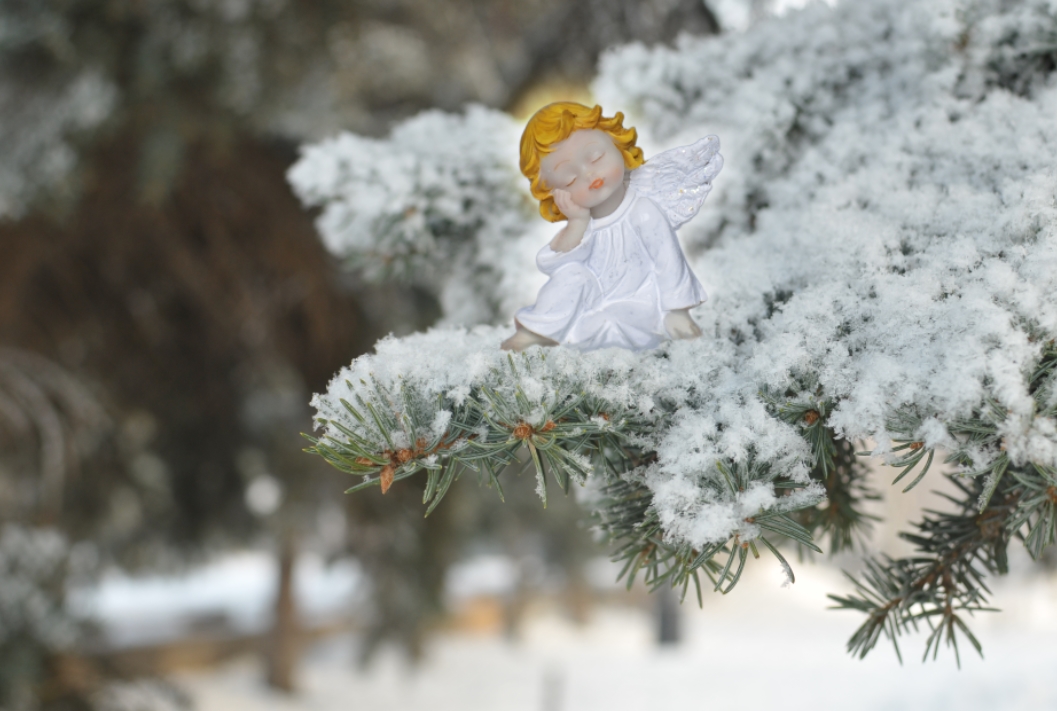
Still, the picture seems to me not realistic enough.
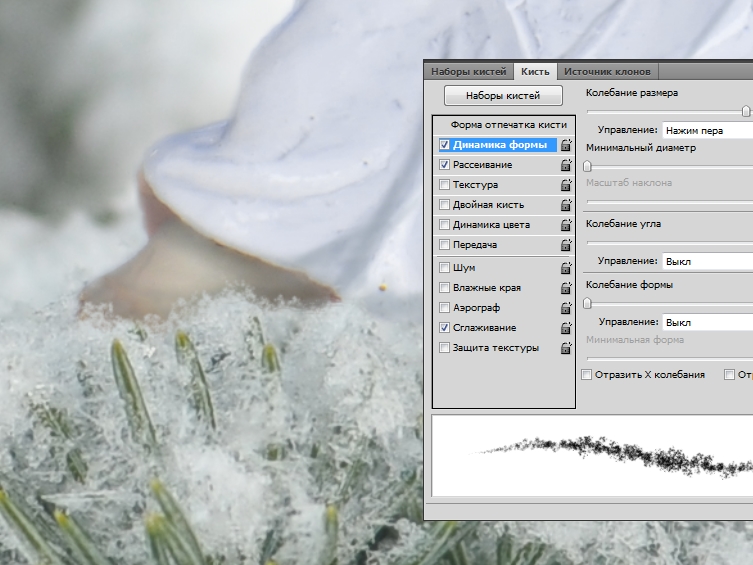
Therefore I choose Brush Tool again (named "spray 24 pxl" with checked options Shape dynamics & Scattering (like on screen) & paint some snowflakes above angel's hands and clothes.
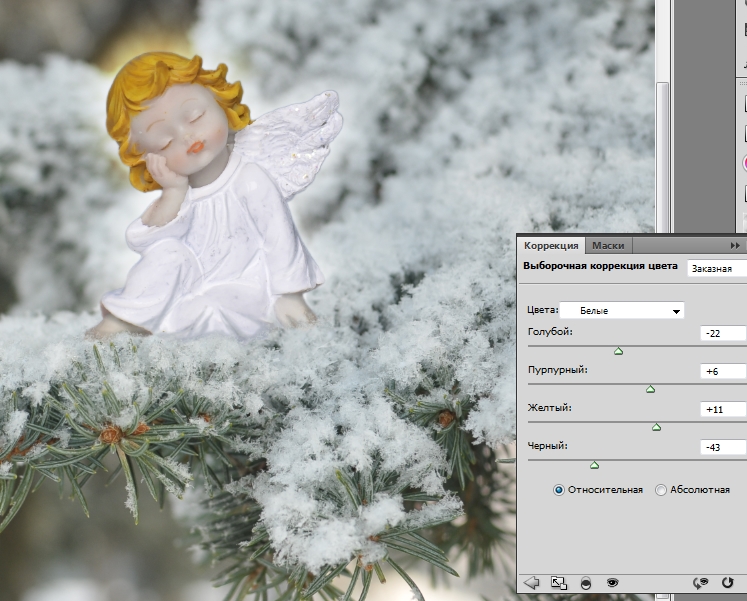
And I make once again angel's color correction with adjustment layer Selective Color so change a shades of white color: Blue -22; Magenta +6; Yellow + 11; Black-43)
Then I crop my picture like I want.
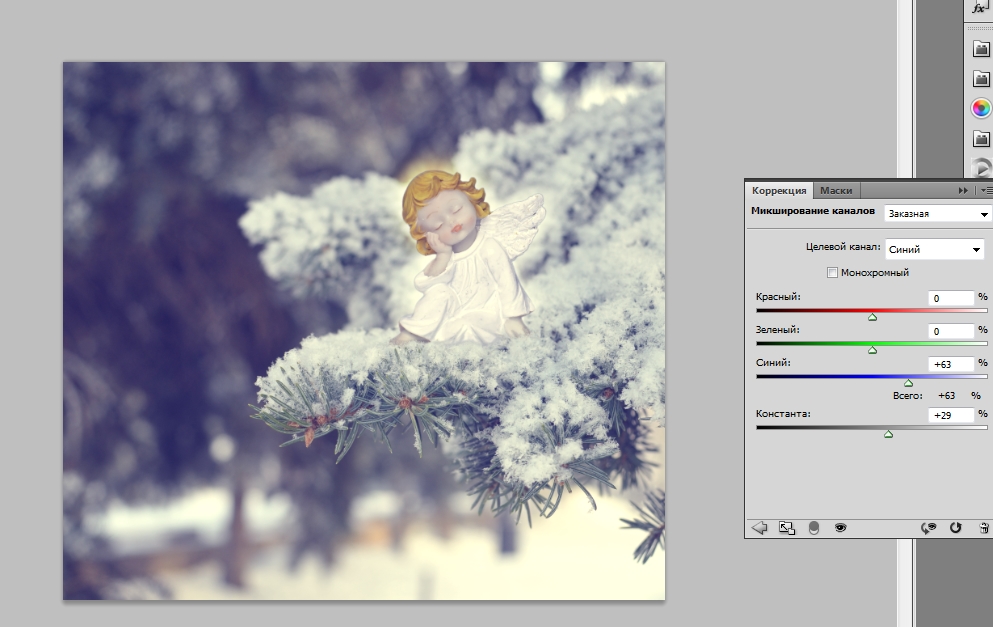
Then I'd like to make color correction on all art picture to take it as whole one view.
On new adjustment layer Channel mixer choose a blue channel & move value: blue +63; Constanta + 29
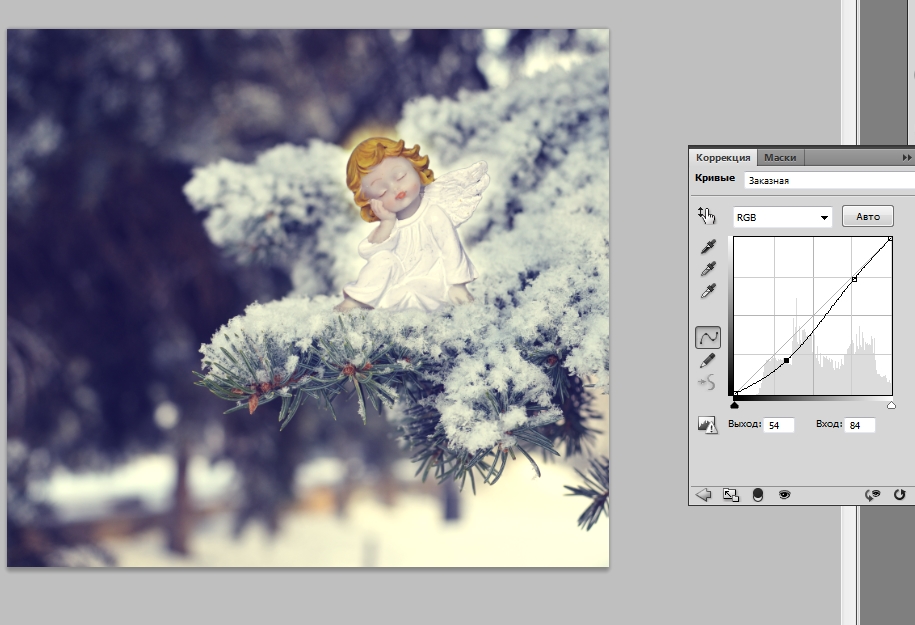
And add adjustment layer Curves to make a contrast.
It's time to create magic - that is add an animation!
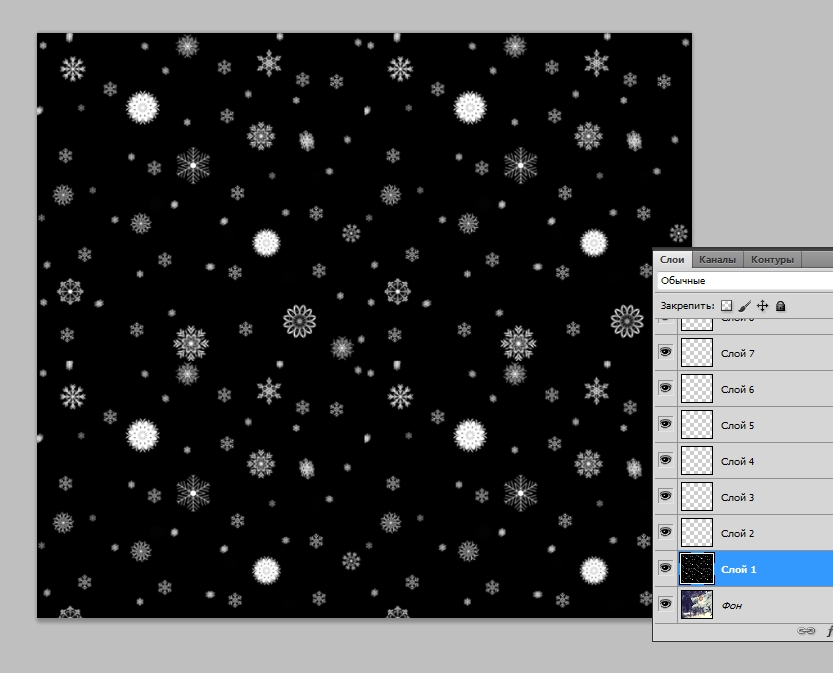
I have some beautiful snow glitters in my photo archives.
Choose on of them and open in Photoshop
(gif-files if you don't know opens in photo editor as a multy-layered file)
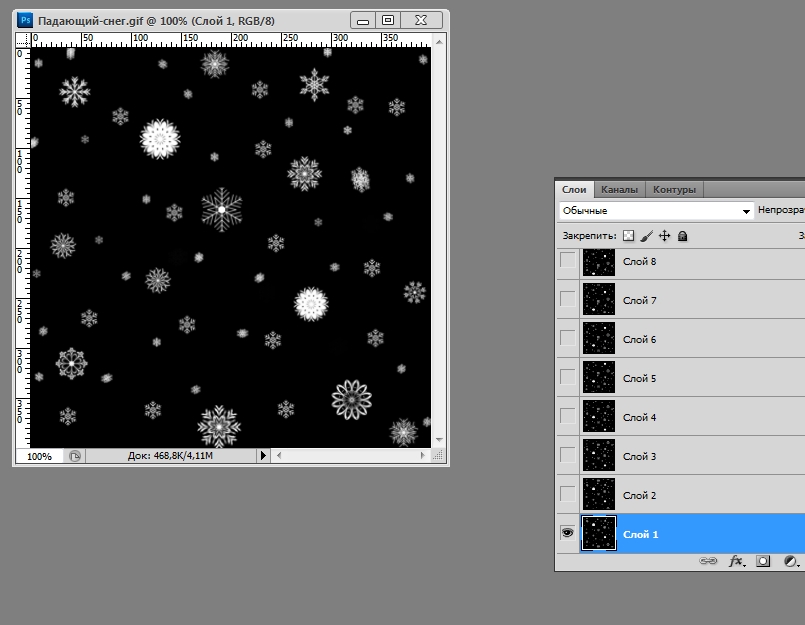
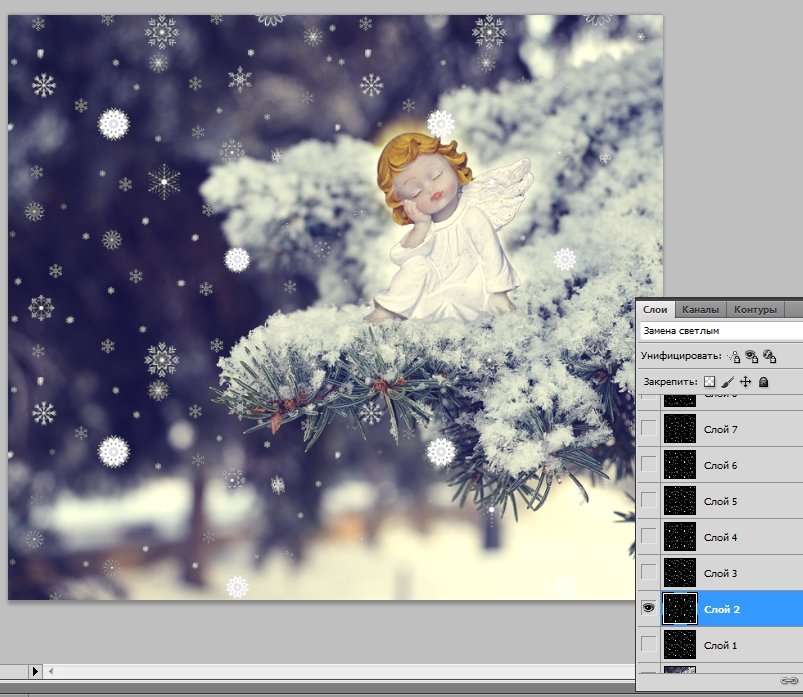
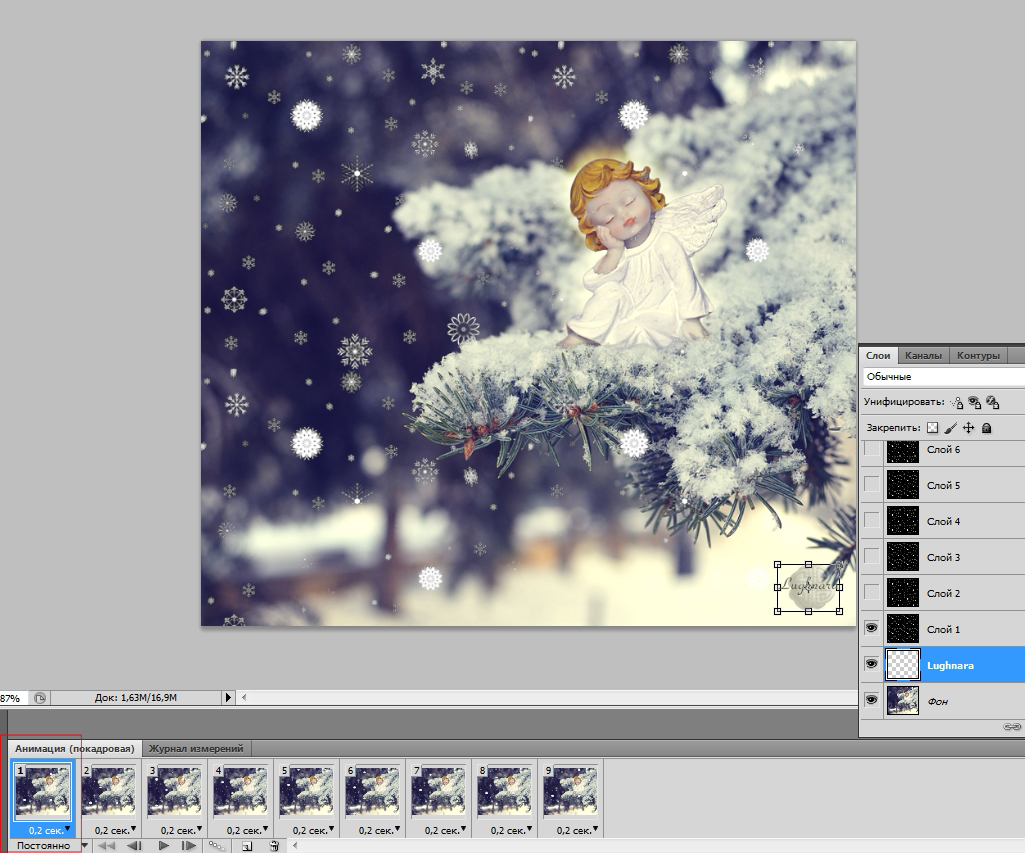
There are nine layers in this file.
I make each other layer like a pattern.
Choose first layer, selected all and then Edit - Define Pattern
In opened window named a new pattern & save in programm's pattern library.
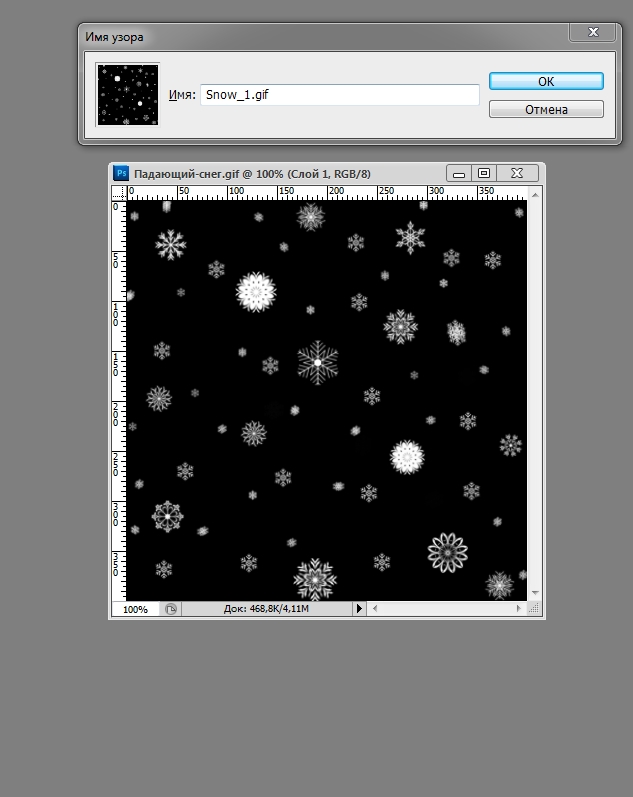
So I do it with all nine layers.
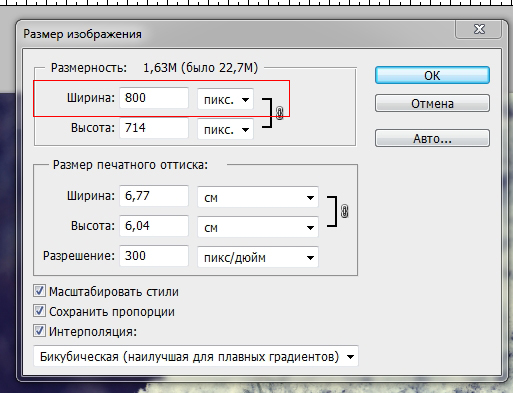
Then I need change size of angel's picture to reduce file's weigh for animation.
I do it 800 pxl by lenght
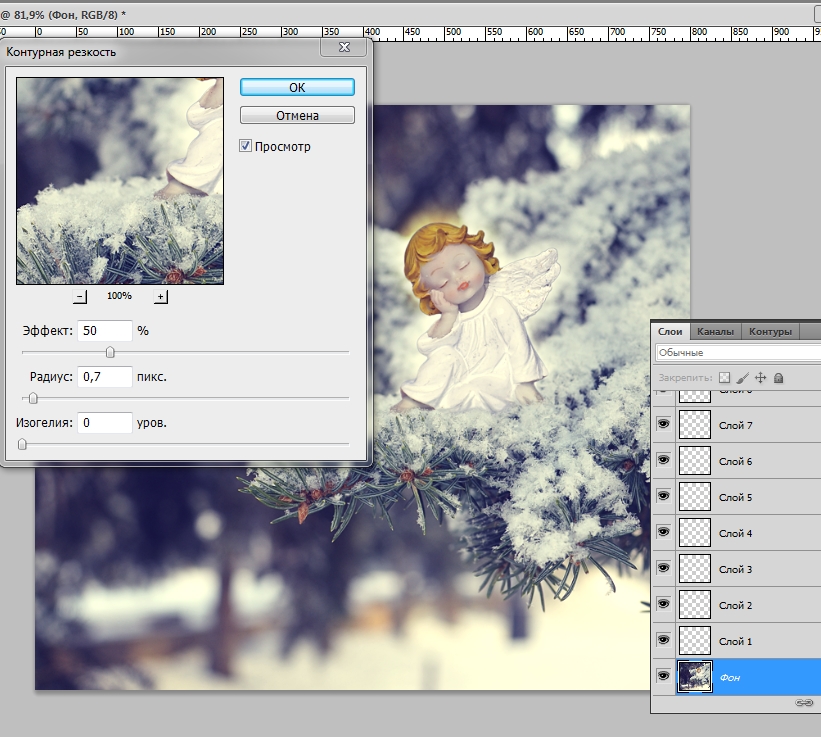
In this step can merge all layers - angel, adjustment & pine-tree's brunch - together.
And make Unsharp Mask with value: Amount - 50 %, Radius - 0,7 pxl
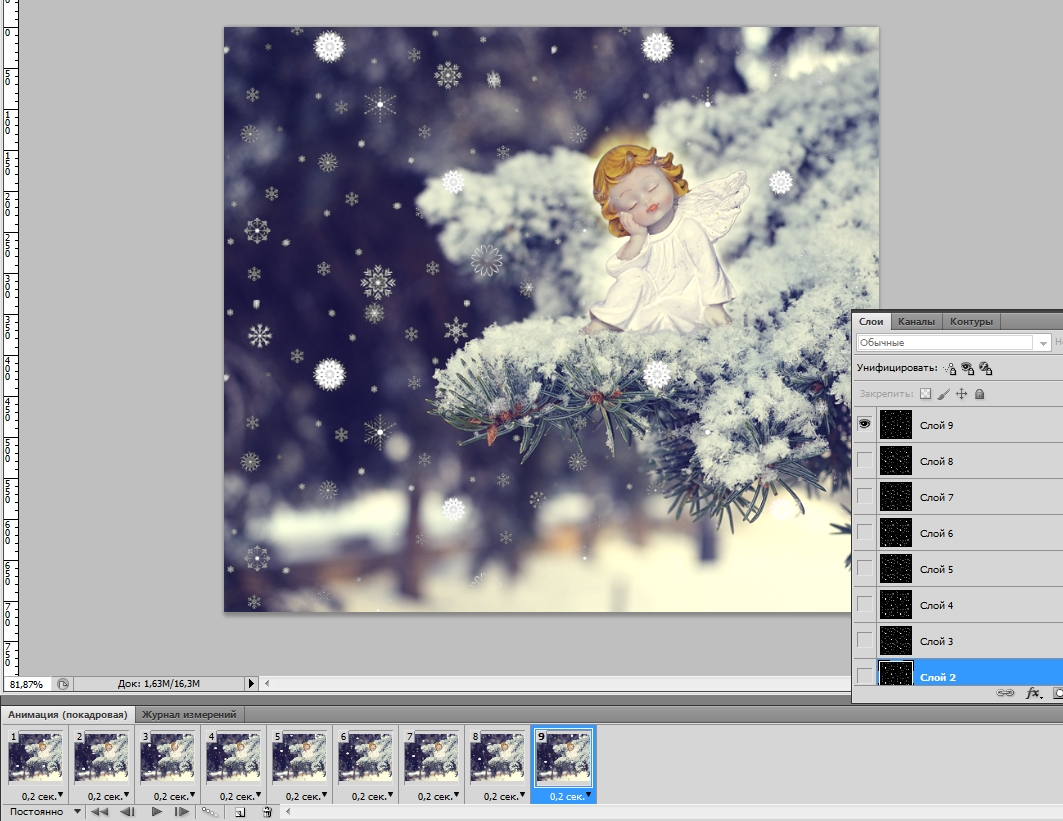
Then create nine new layers above merged.
Now each new layer needs to be filled with a snow pattern.
Edit - Fill - Pattern
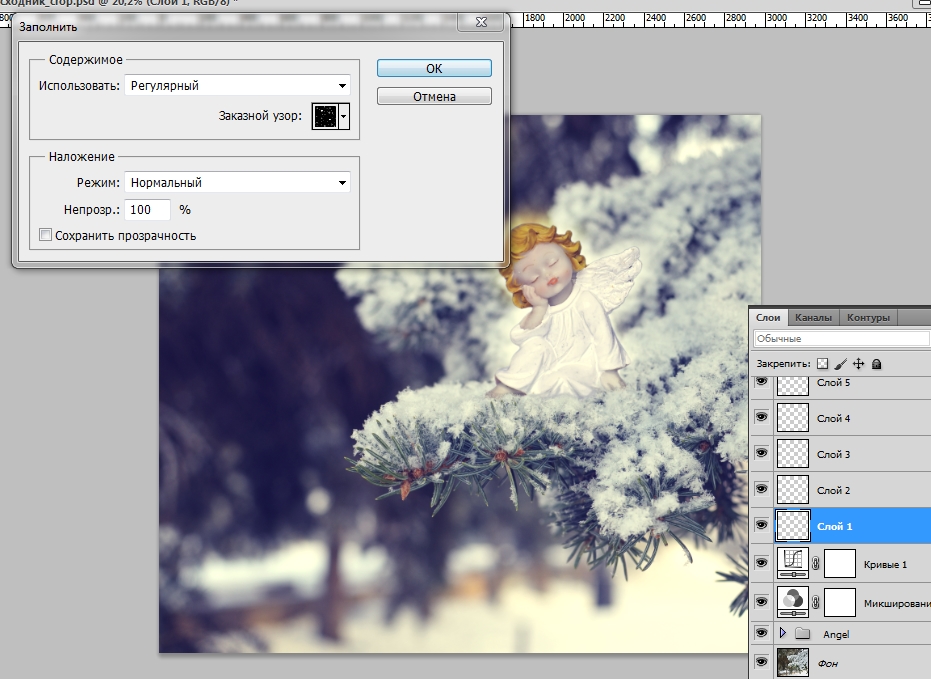
To black background disappeared change layer mode to Lighten
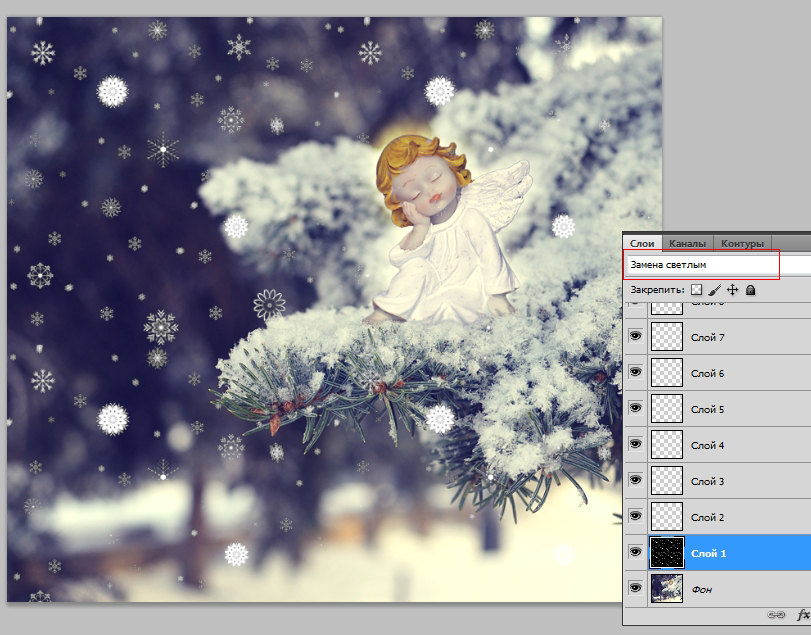
By this way filling all nine layers.
Then disable layers visibility except bottommost one
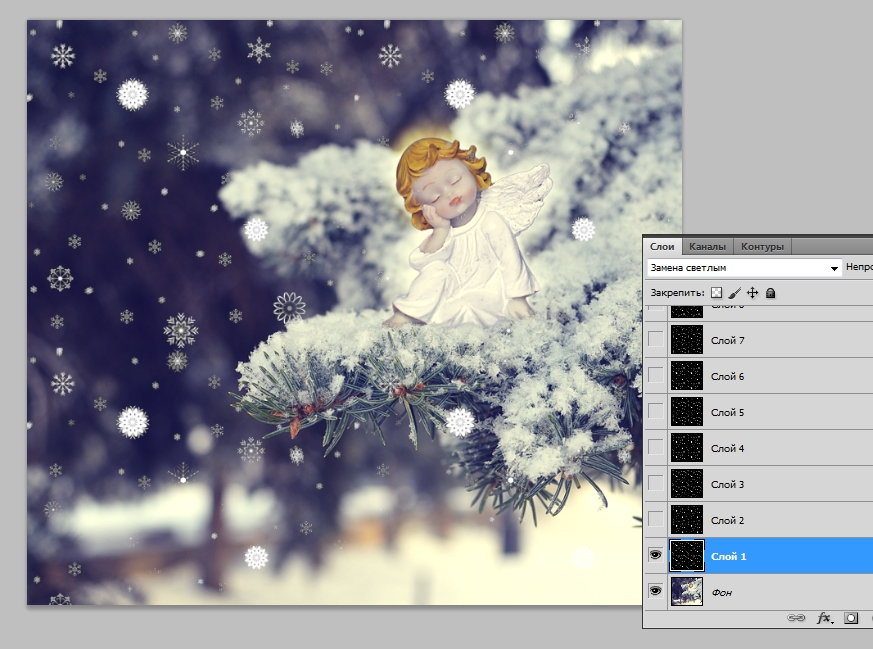
So open animation's panel (Window - Animation)
Make frame delay time 0,2 sec & looping option as Forever
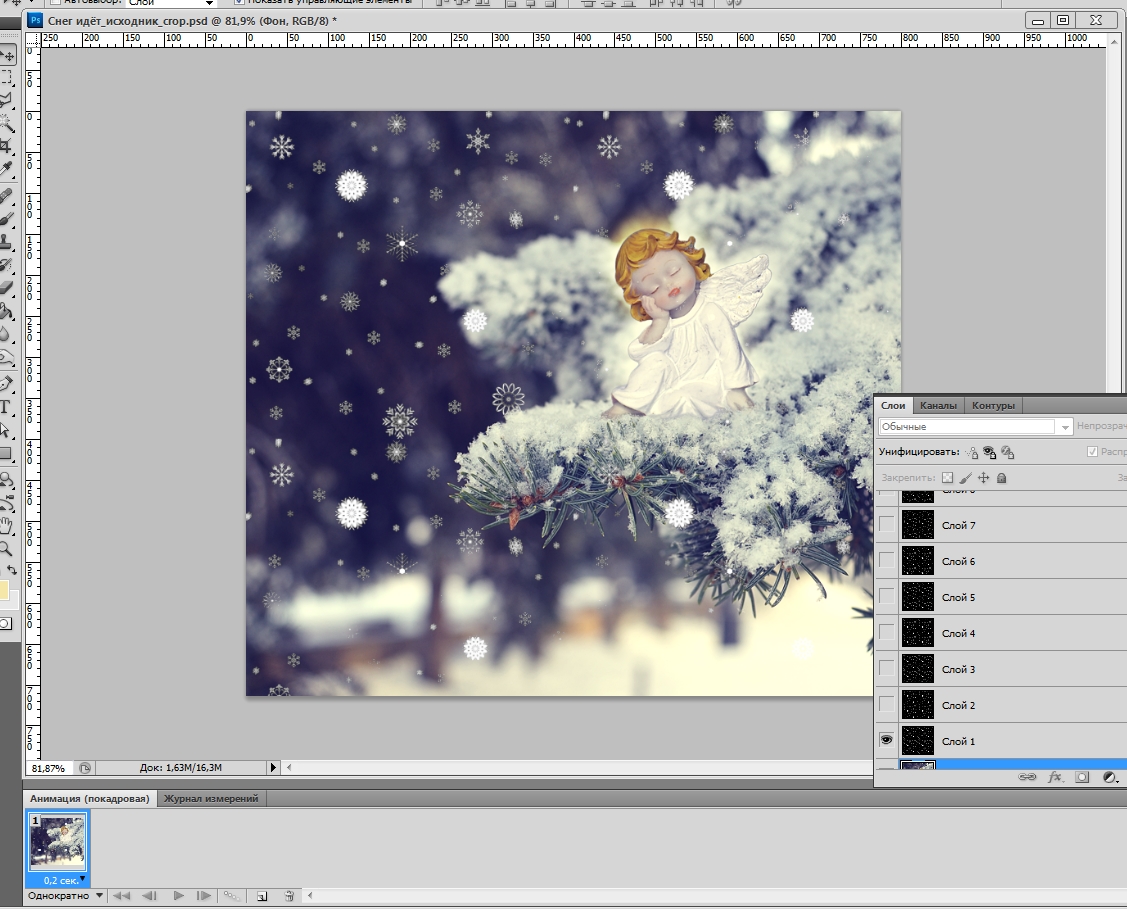
Create a new frame.

And then choose a new upper layer, at the same time disable visibility of first layer.
And do the same with all frames & layers.
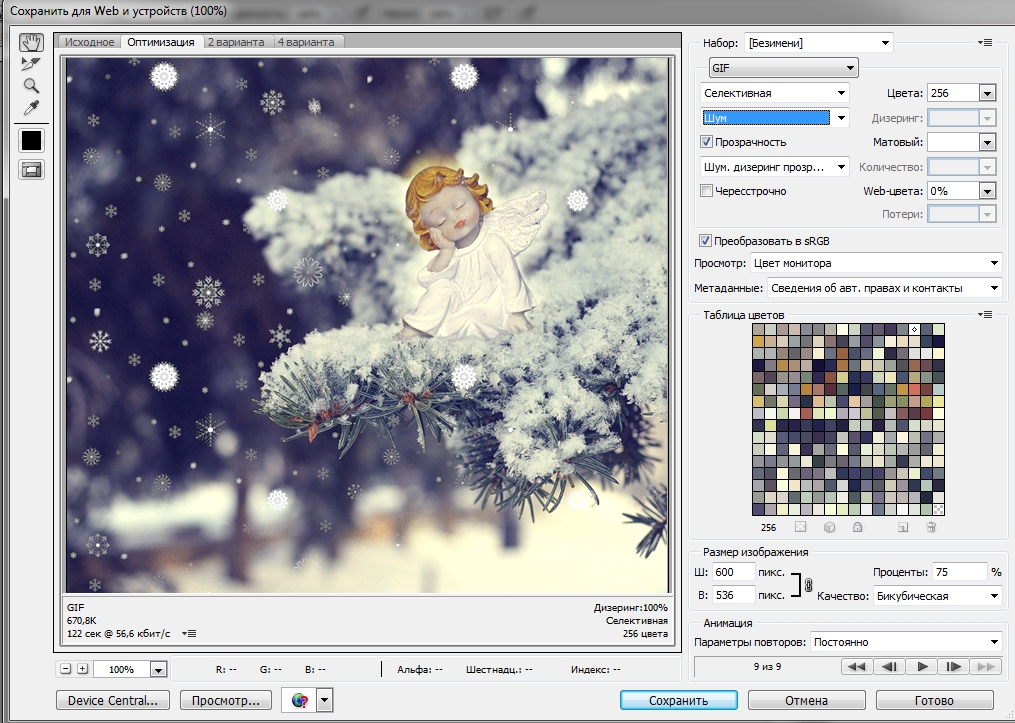
Finally I save my animation as a gif-file (File - Save for Web)
Optimized fike format - GIF
Color reduction algorithm - Selective
Dither algorithm - Noise
And Image Size - 600 pxl by width
Voila!
A... I forgot my watermark!
It's very easy!
Can add, move or delete layers in art picture reading to save as gif - if selecting first frame
Then the finished animation doesn't breaking.
Now it's ready!
Have a nice day!
Gera
bts: daring-celt
Your opinion is celebrated and welcomed, not banned or censored!