
Making A Fireplace Mantel, Part 1
"Creating things. I love the idea of creation and creativity. Whether it's a character, a short film, a piece of music, a painting, or a bookcase - to watch something go from an idea to a creation is pretty much where it's at for me."
- Eric Lange -
A cheerful, crackling fire,
shining out from under a beautifully finished mantel shelf mounted high above a rustic stone hearth.
Have you ever stopped to wonder how much blood, sweat, and tears might go into creating this heartwarming, homey scene?
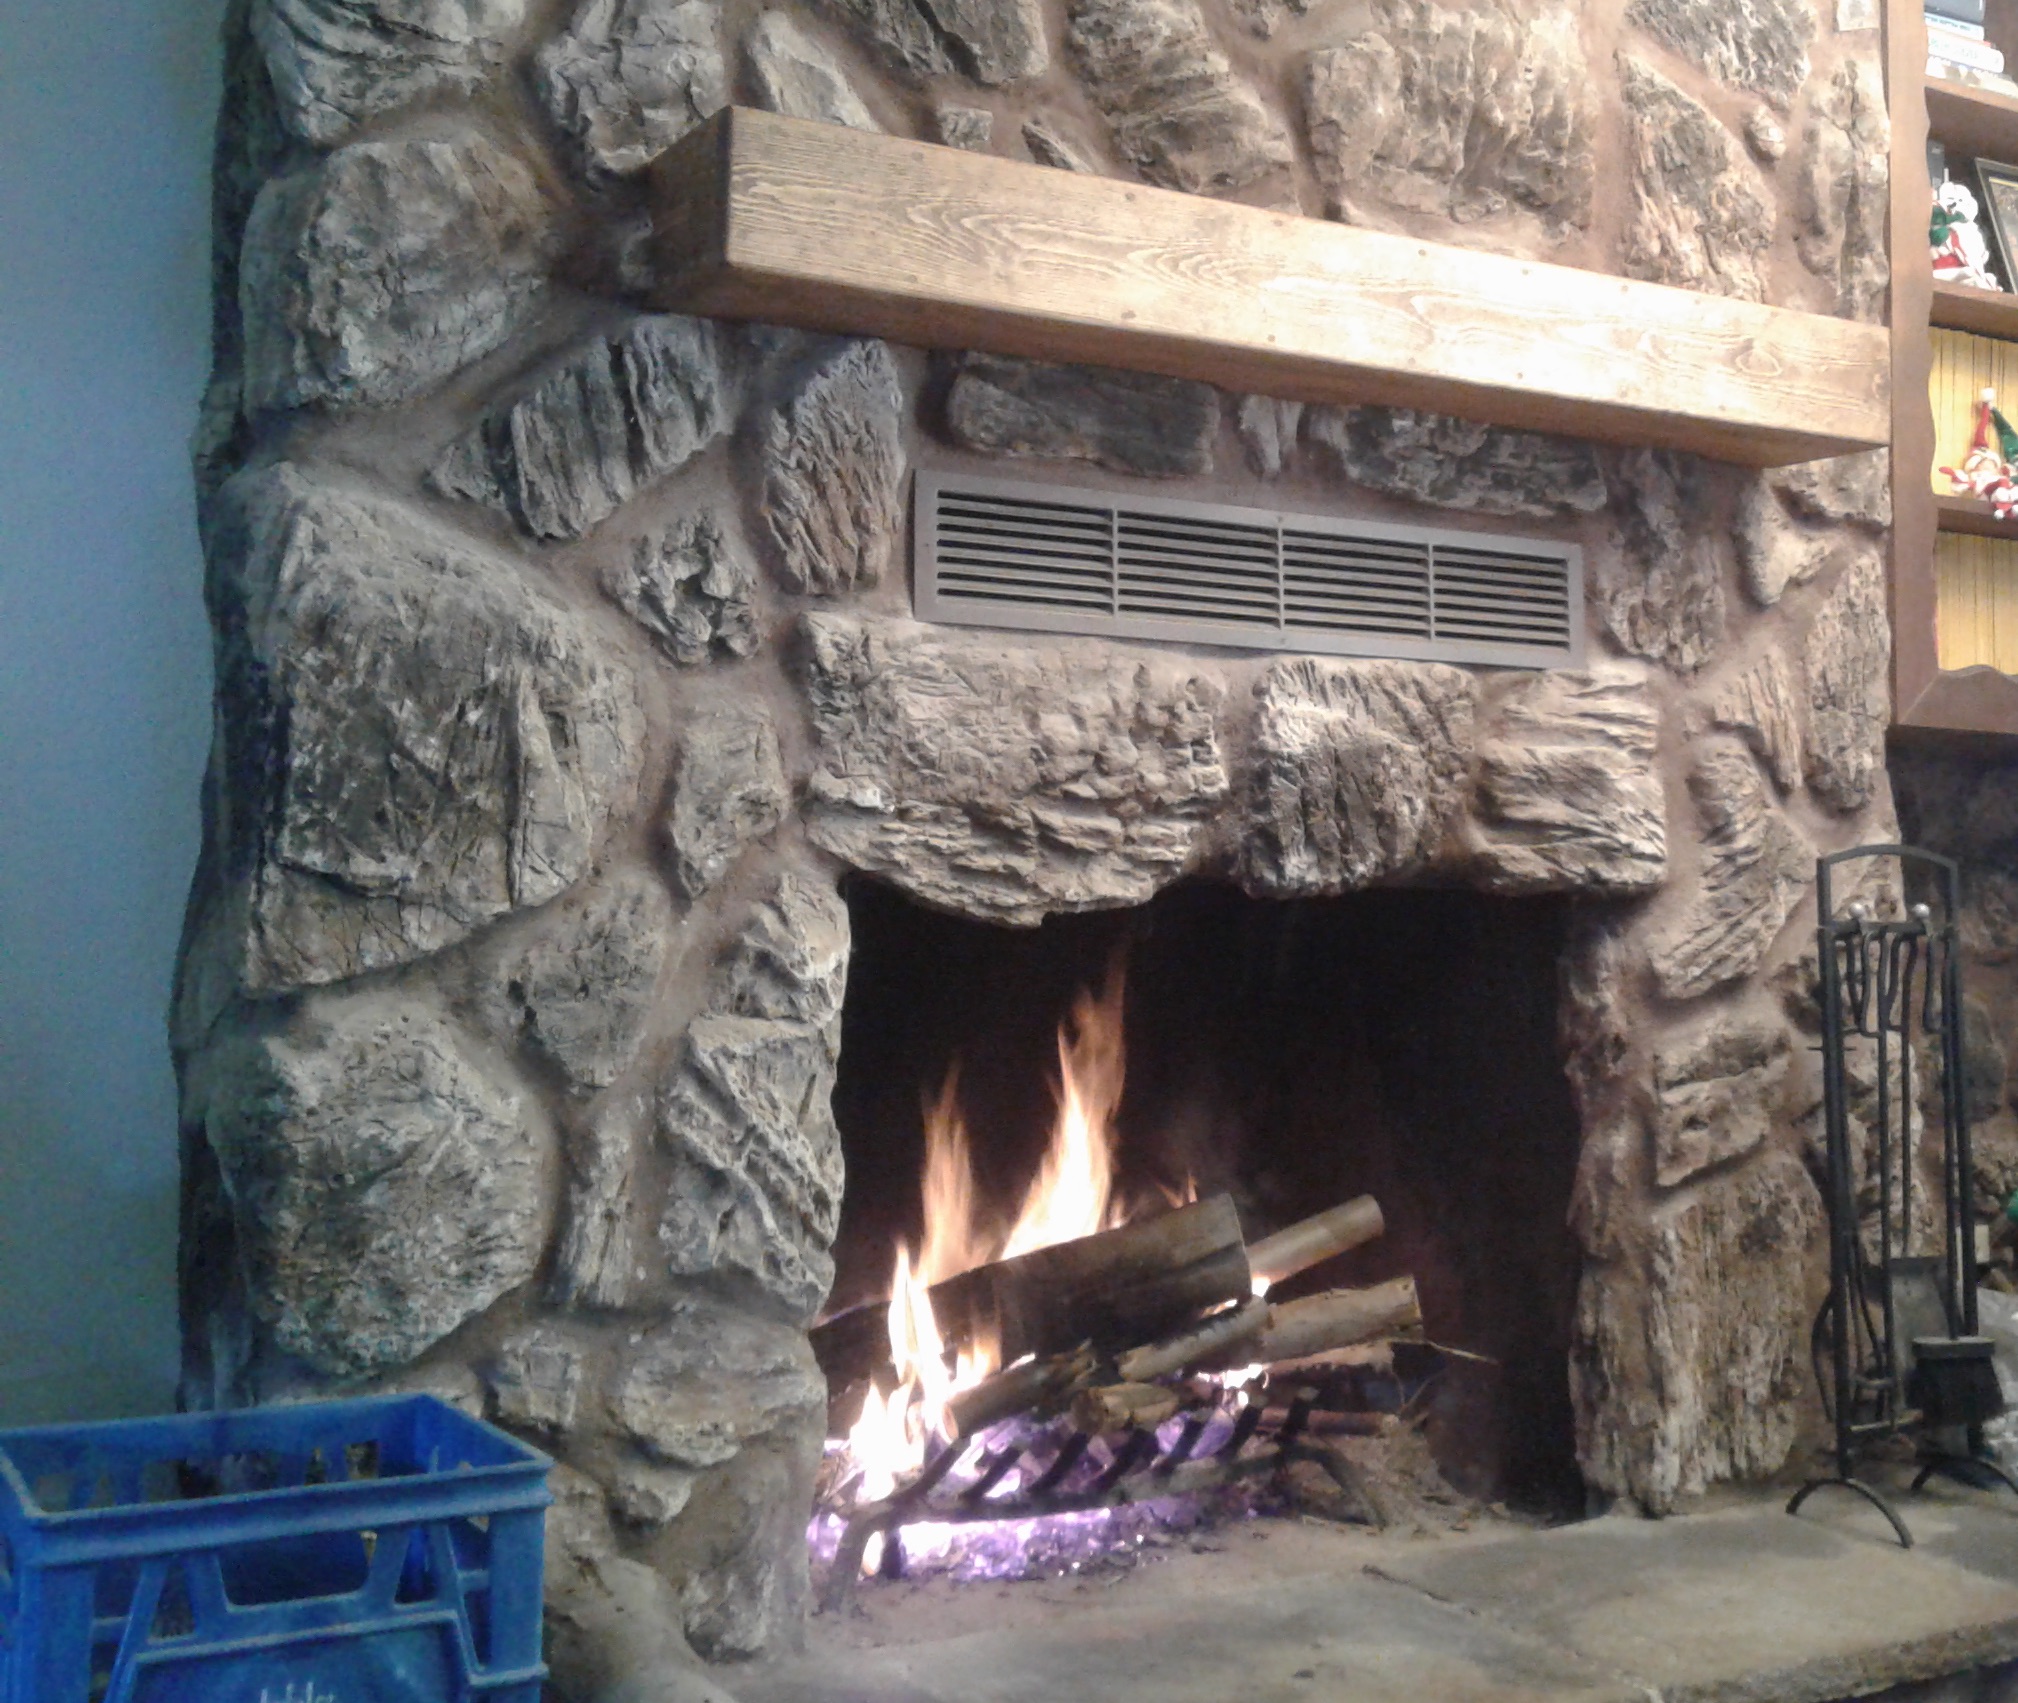
The Mantel In Action. ~ Original image by @creatr
It's a little embarrassing to admit this,
but my wife has wanted a mantel on our fireplace ever since we moved into our house thirty five years ago.
The good news is, she need not wait a day longer. For Christmas just past, I put my woodworking skills to work and made her a fireplace mantel that she loves.
If you have a look at our hearth,
perhaps you'll understand what put me off for so long. The fireplace is faced with large, irregular stonework. Apart from hiring a tradesman, I can only imagine two possible ways to add a mantel to that mess.
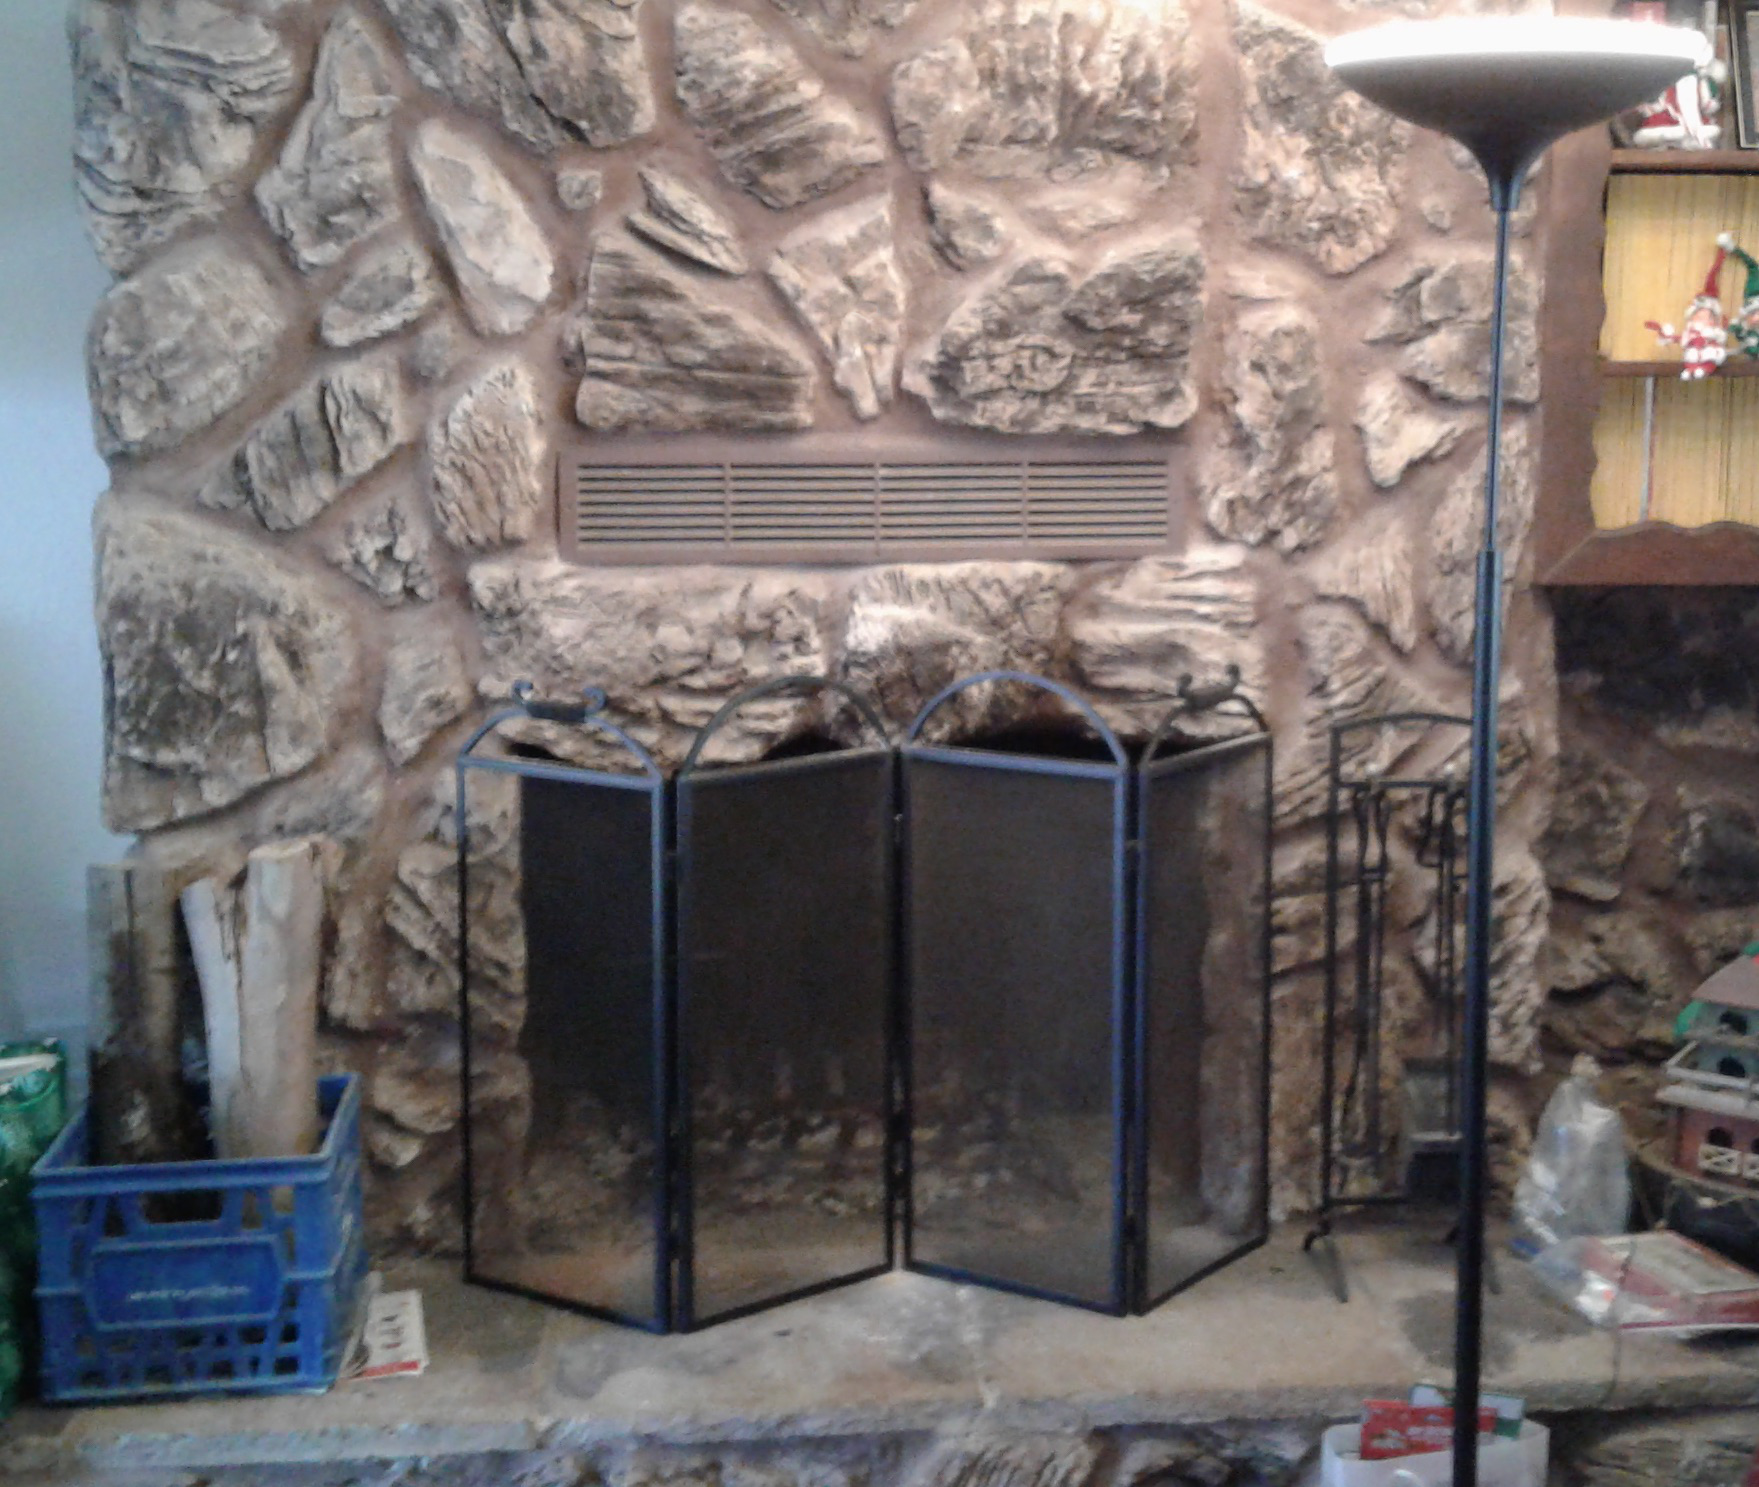
Our Stone Fireplace, Before Mantel. ~ Original image by @creatr
With such a rough face,
either a smooth slot would need to be cut into the stone to accommodate the entire width of the mantel, or the mantel would have to be shaped to fit all the irregularities of the stonework.
As the former would involve a lot of nasty, filthy masonry grinding and cutting, I chose the latter option.
Wifey didn't have a clue.
You see, she thought I could just order up a mantel on-line and put it in like magic. She had even shown me a handful of mantel options available from online retailers, all of them a lot like the classy mantel below.
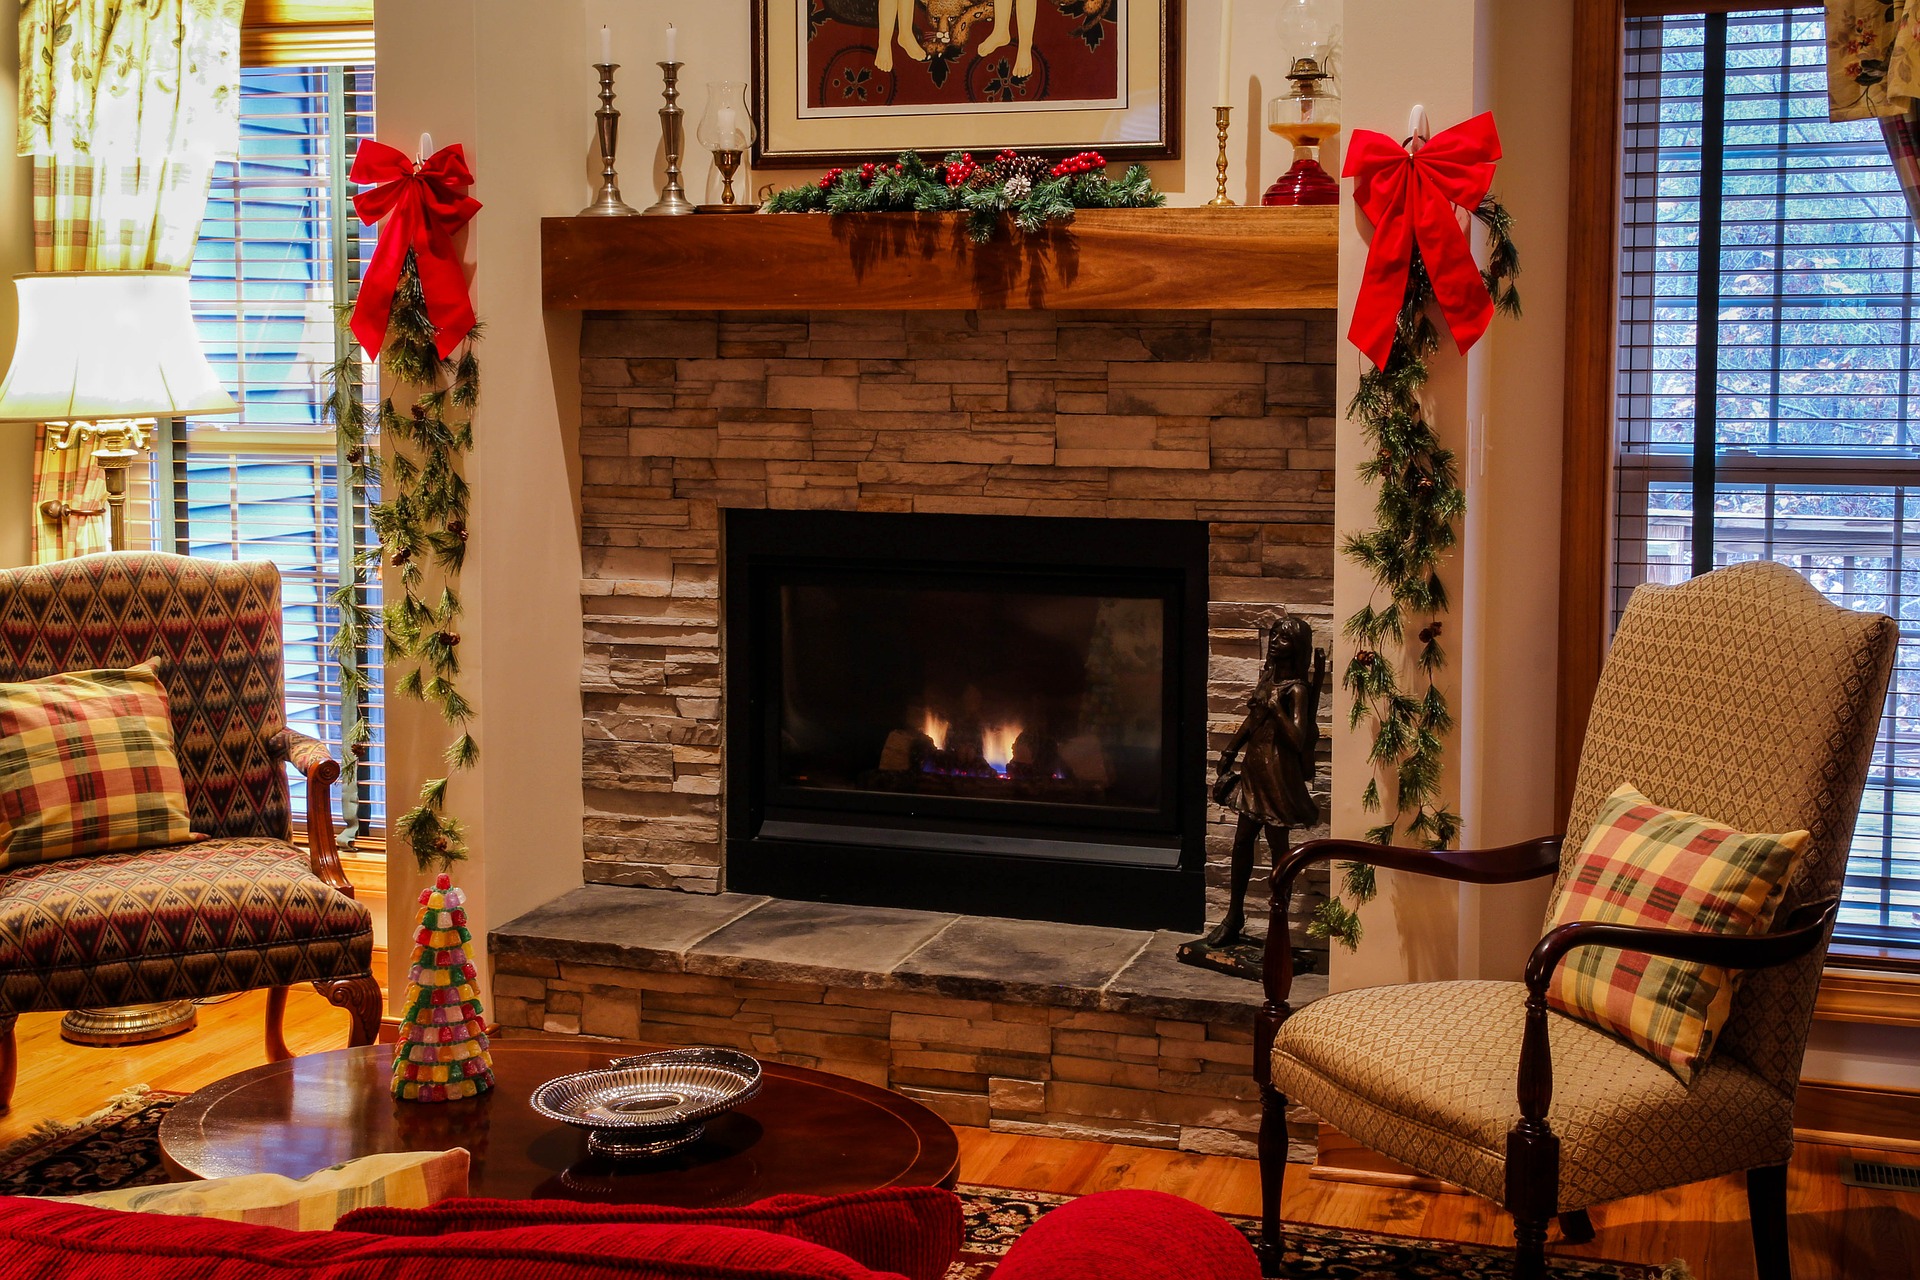
Mantel on a smooth fireplace. ~ Image courtesy of JamesDeMers
From the standpoint of helping me understand the vision she had, this was a good thing. However, would you like to hear something scary?
When I informed her that I was not going to buy one from online—that rather, I was going to make her one from scratch—she actually became quite irate.
Huh?
Angry that I would work hard to make a mantel for her?
The reason for her anger was quickly revealed.
"You don't have a very good track record with me when it comes to do-it-yourself projects around here!"
Oh. Right. Let's see, the hallway renovation, begun a couple of years ago, is still maybe only 80% complete... Touche!
Well, after the steam stopped pouring out of her ears, I had a little explaining to do to make my wife understand that there was really no way to adapt one of those standard mantels to our extremely irregular fireplace.
Furthermore, we are blessed to have a fireplace with a built-in heatilator. The heatilator is a metal chamber that surrounds the firebox with a large airspace, capturing a lot of heat from the fire that otherwise would be lost up the chimney. Another concern that had discouraged me from installing a mantel was that heat from the heatilator vent might overheat and damage a wooden mantel.
But I was left with no options.
I had to promise to deliver a fully finished fireplace mantel by Christmas, no ifs, ands, or buts about it. It was time to get to work. After all, I had something to prove.
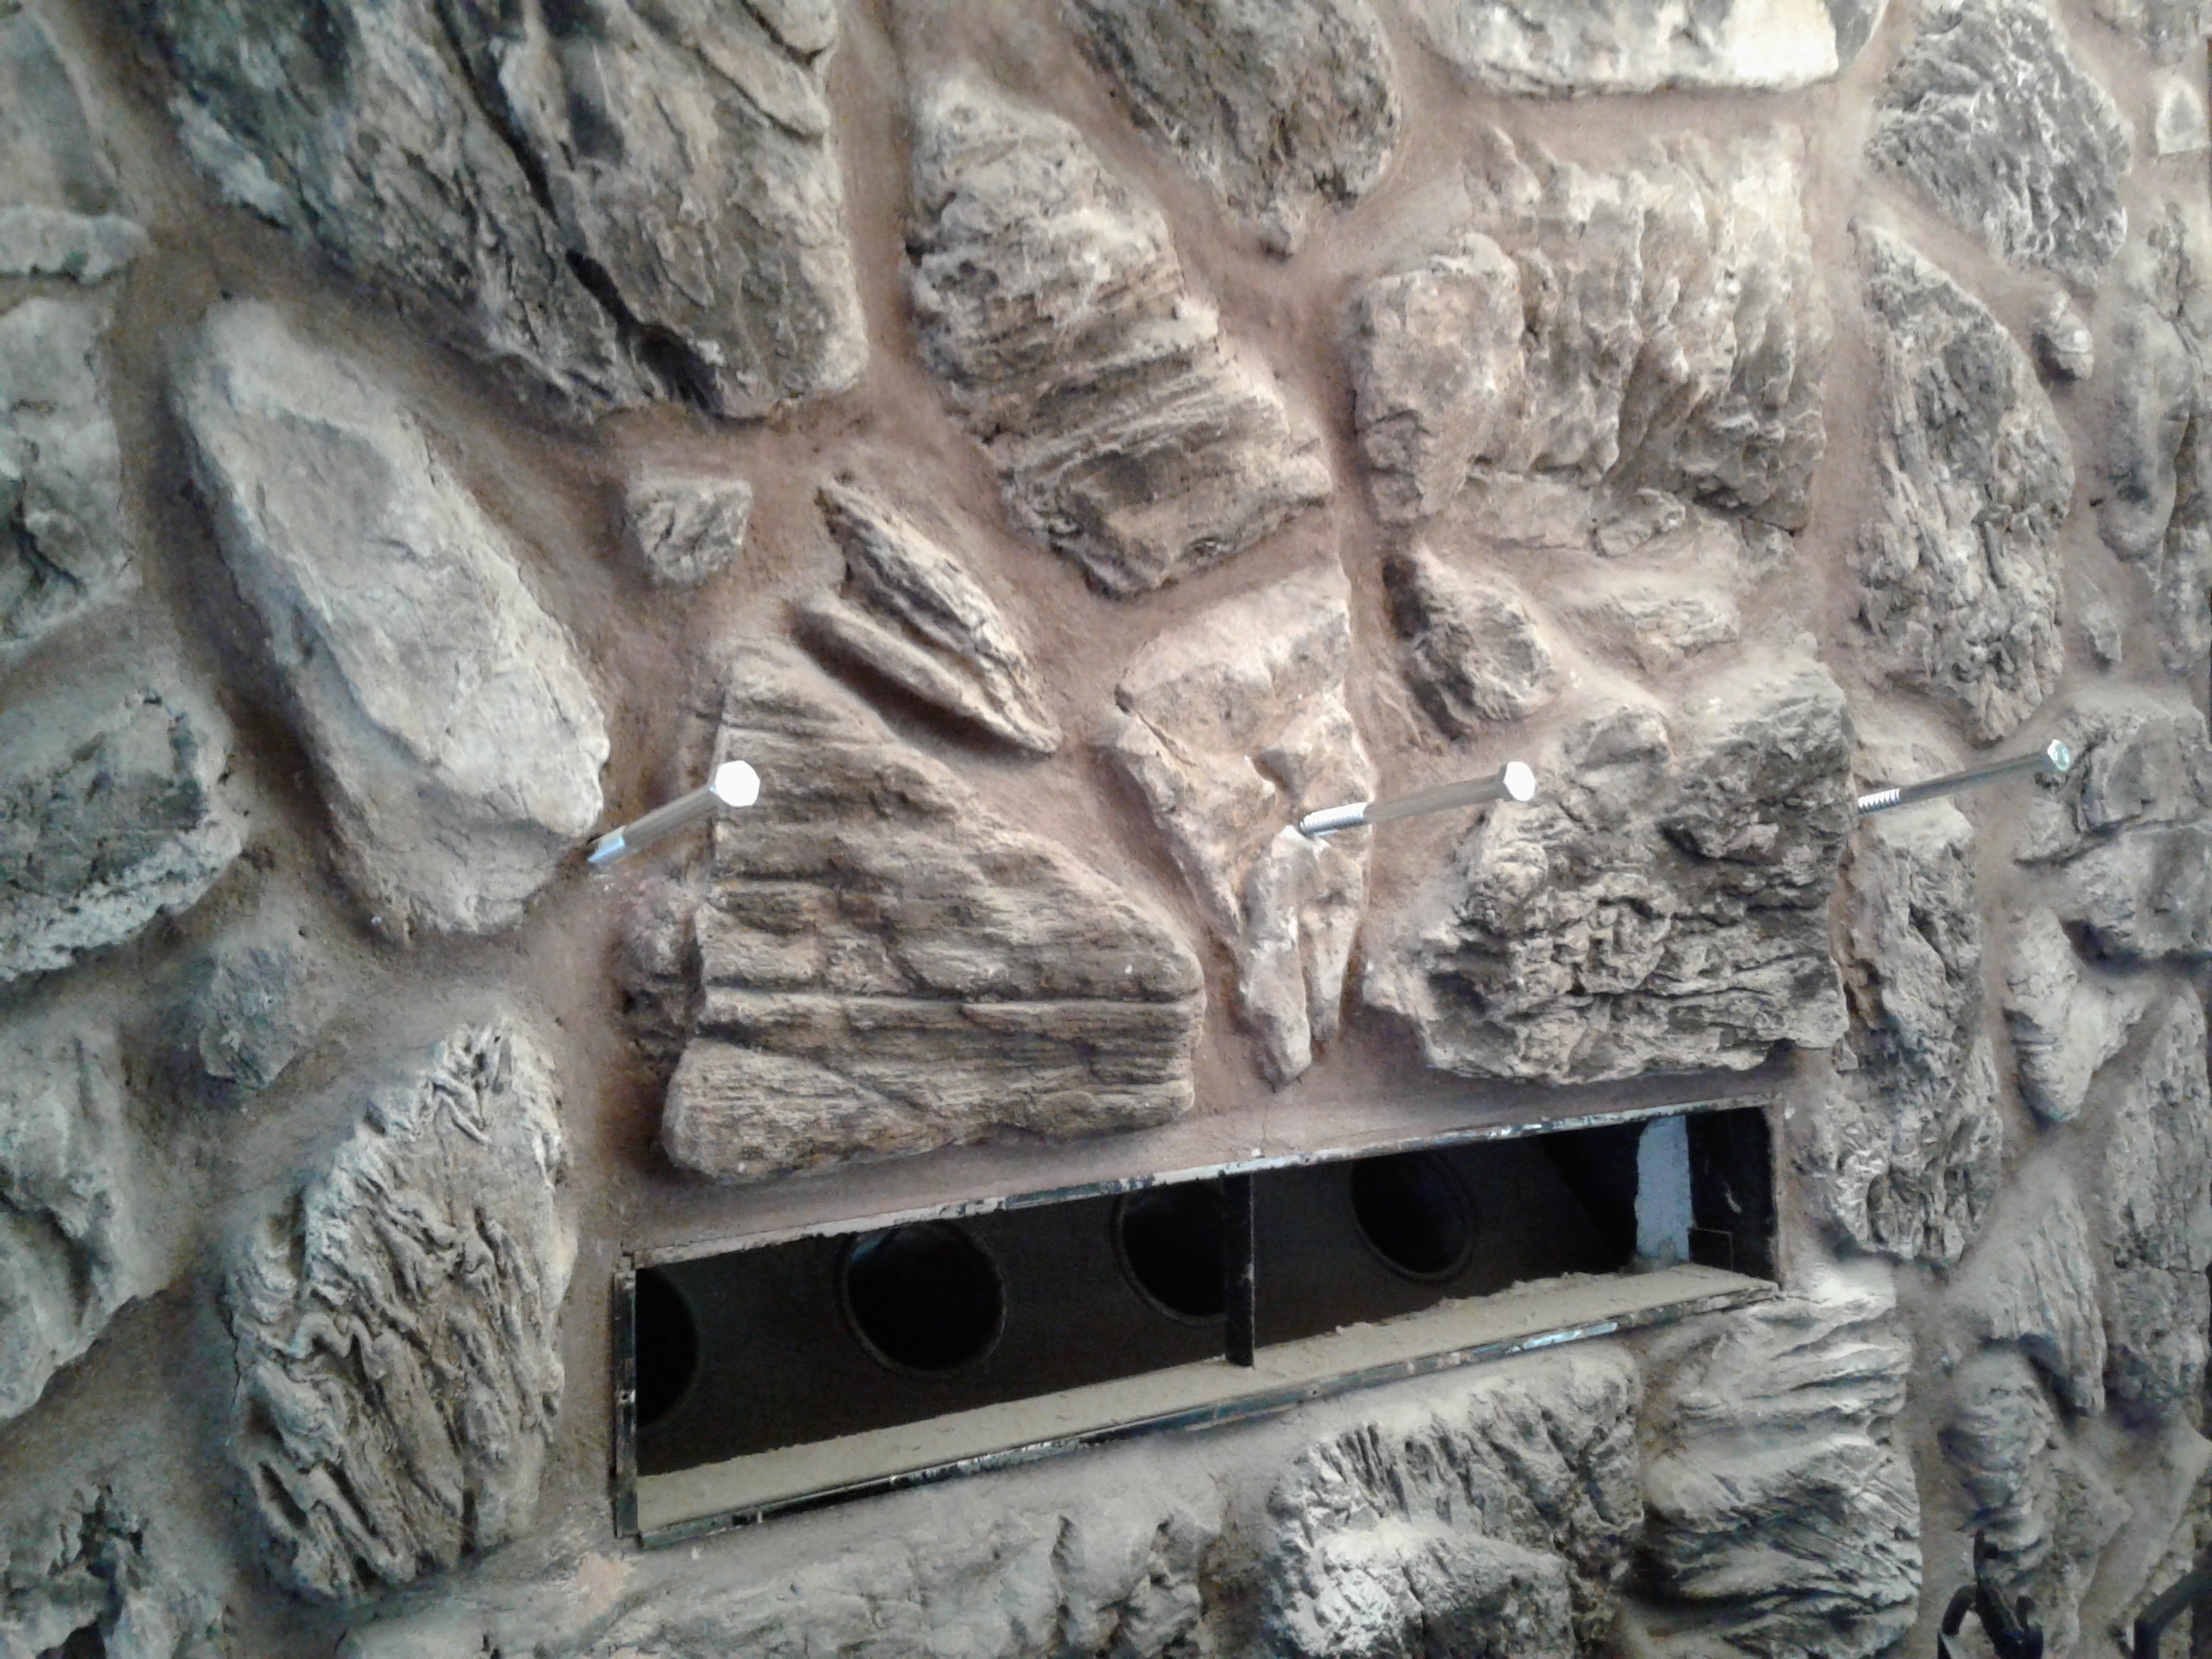
Lag Bolts Installed. ~ Original image by @creatr
After a trip to Lowes,
I had almost everything I needed in hand. With an electric drill and a masonry bit, I installed three ten-inch by half inch lag bolts at a slight upward angle, with about half their length embedded in the masonry.
In the image above, with the front grill off you can see some of the tubular inner workings of the fireplace heatilator below the bolts. In the next image, the heatilator grill is back in place.
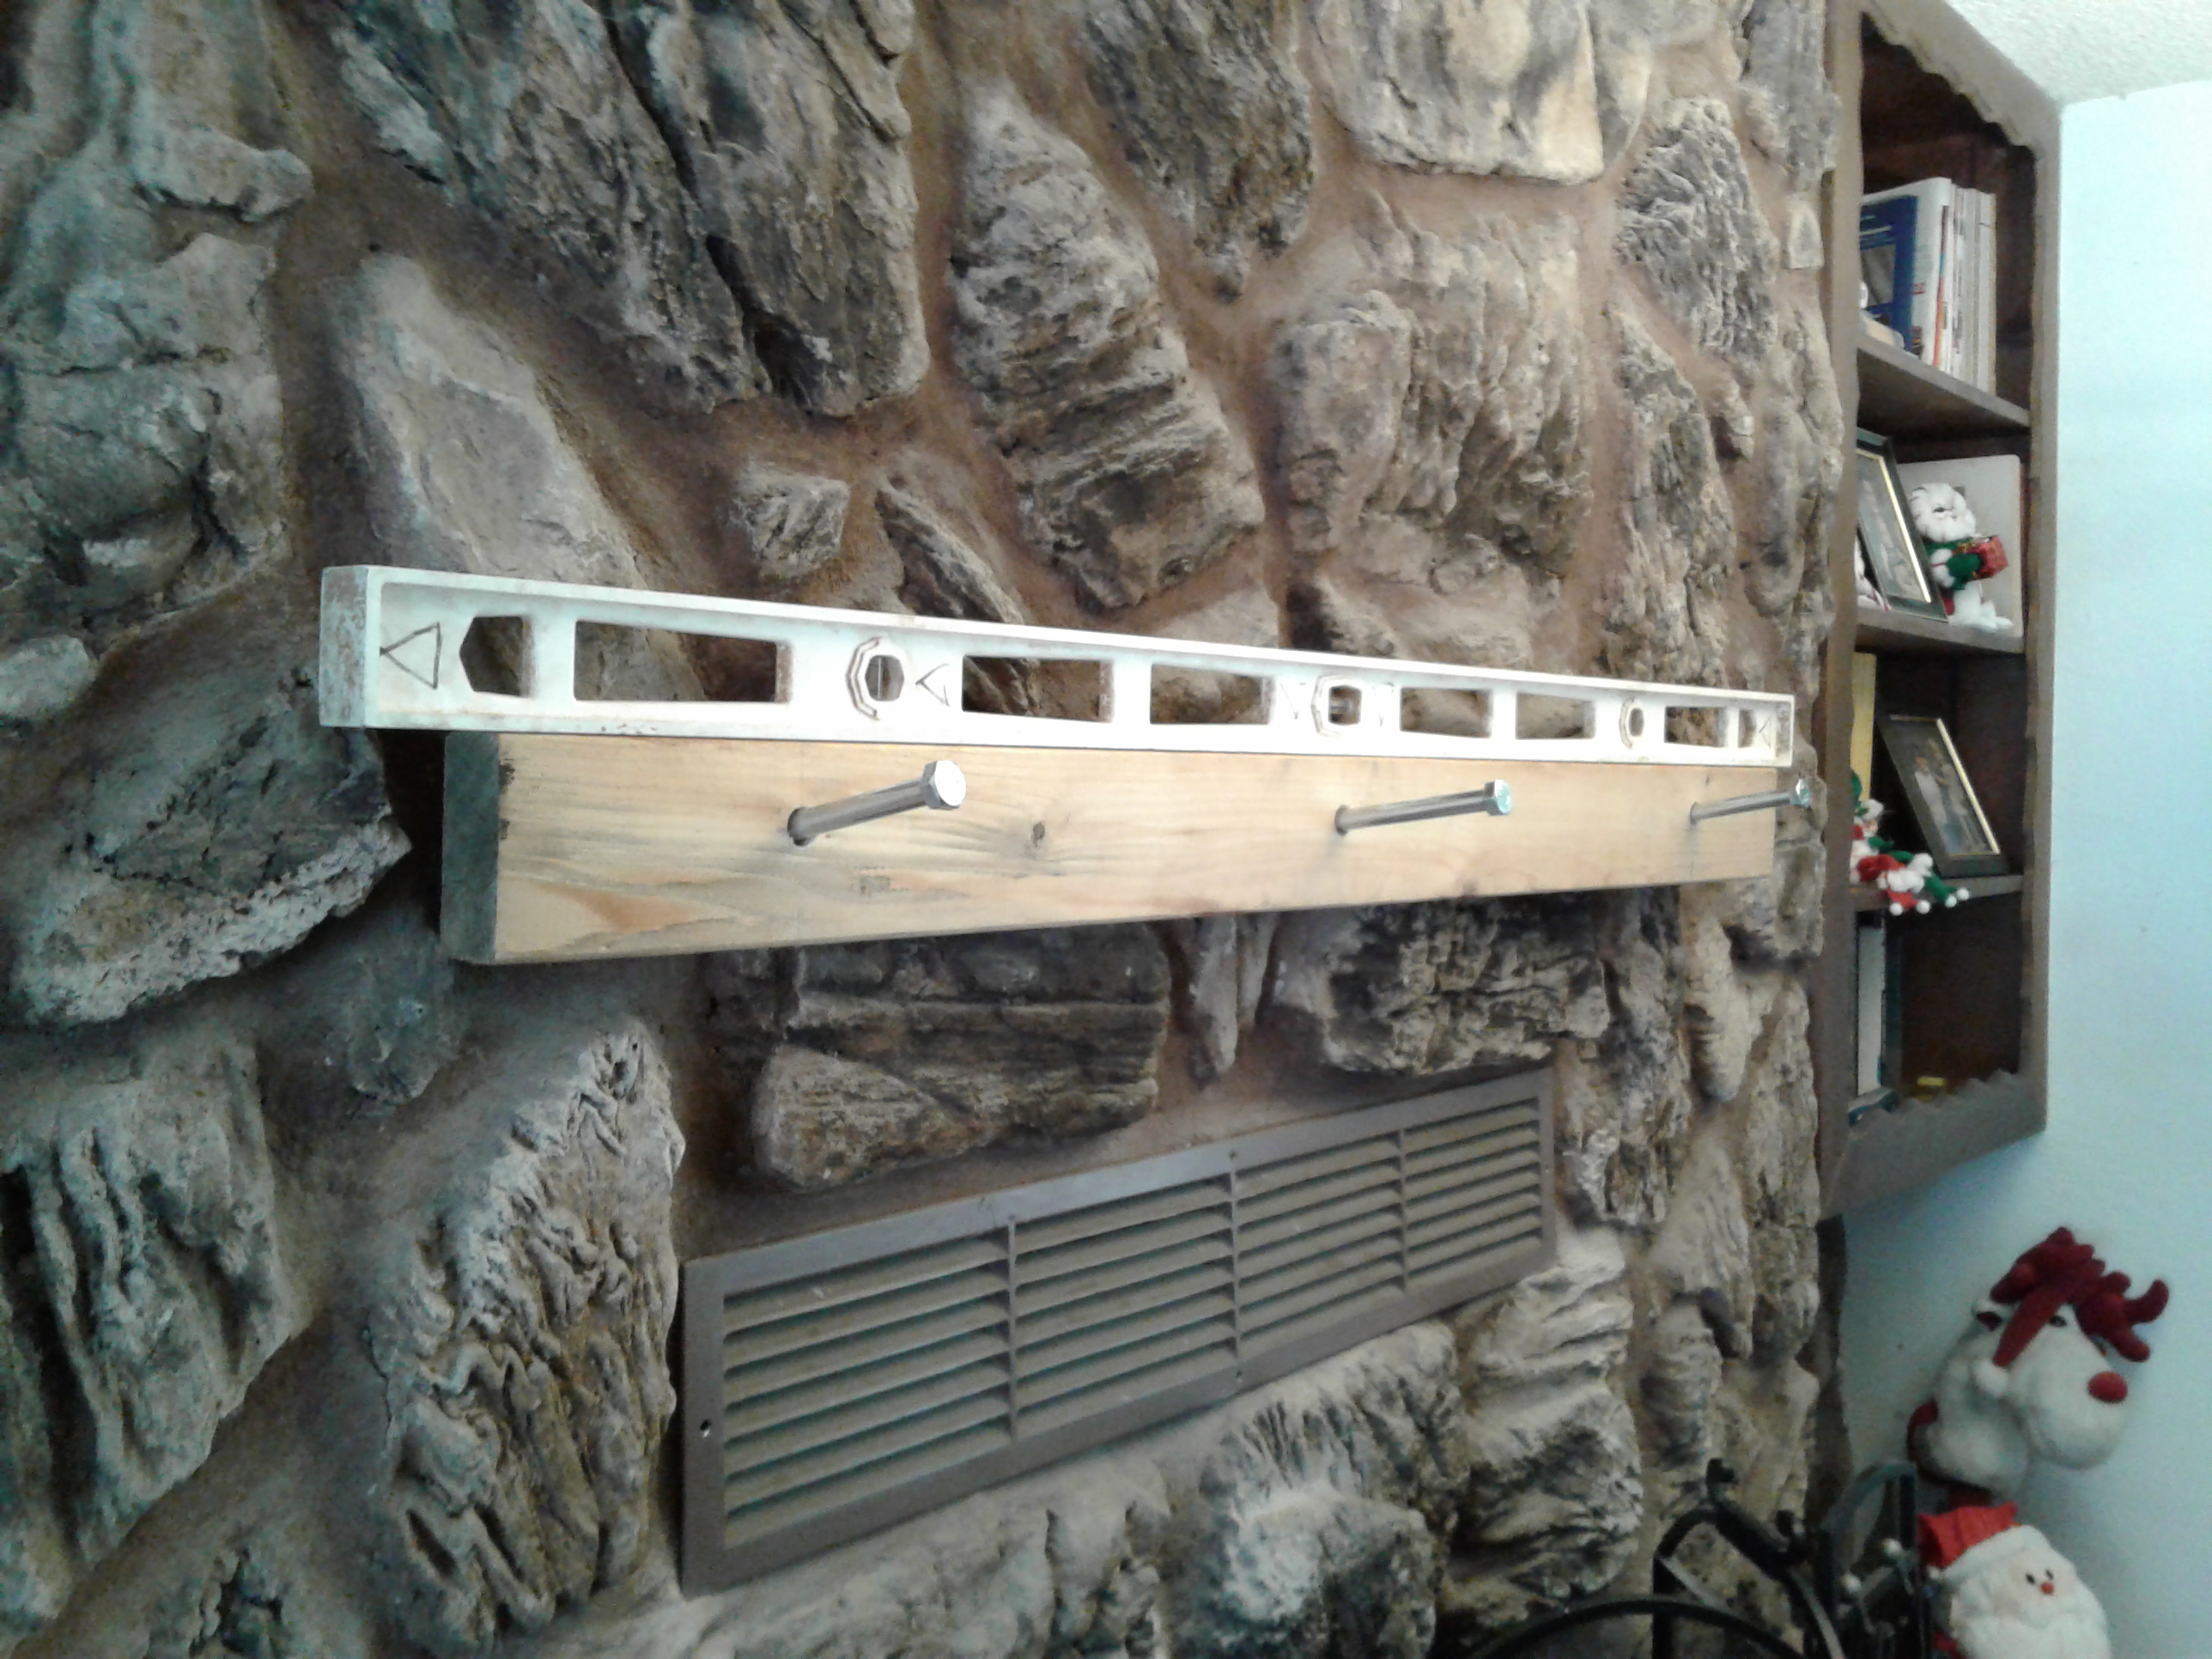
2 x 4 Mantel Mount. ~ Original image by @creatr
Having never built a mantel before,
I was definitely playing things by ear.
My nefarious plan was to create a solidly anchored level shelf up against the stonework on which I could mount and attach the mantel. But as you can see in the image above, the 2 x 4 is not thick enough for the bolts to hold it firmly in place.
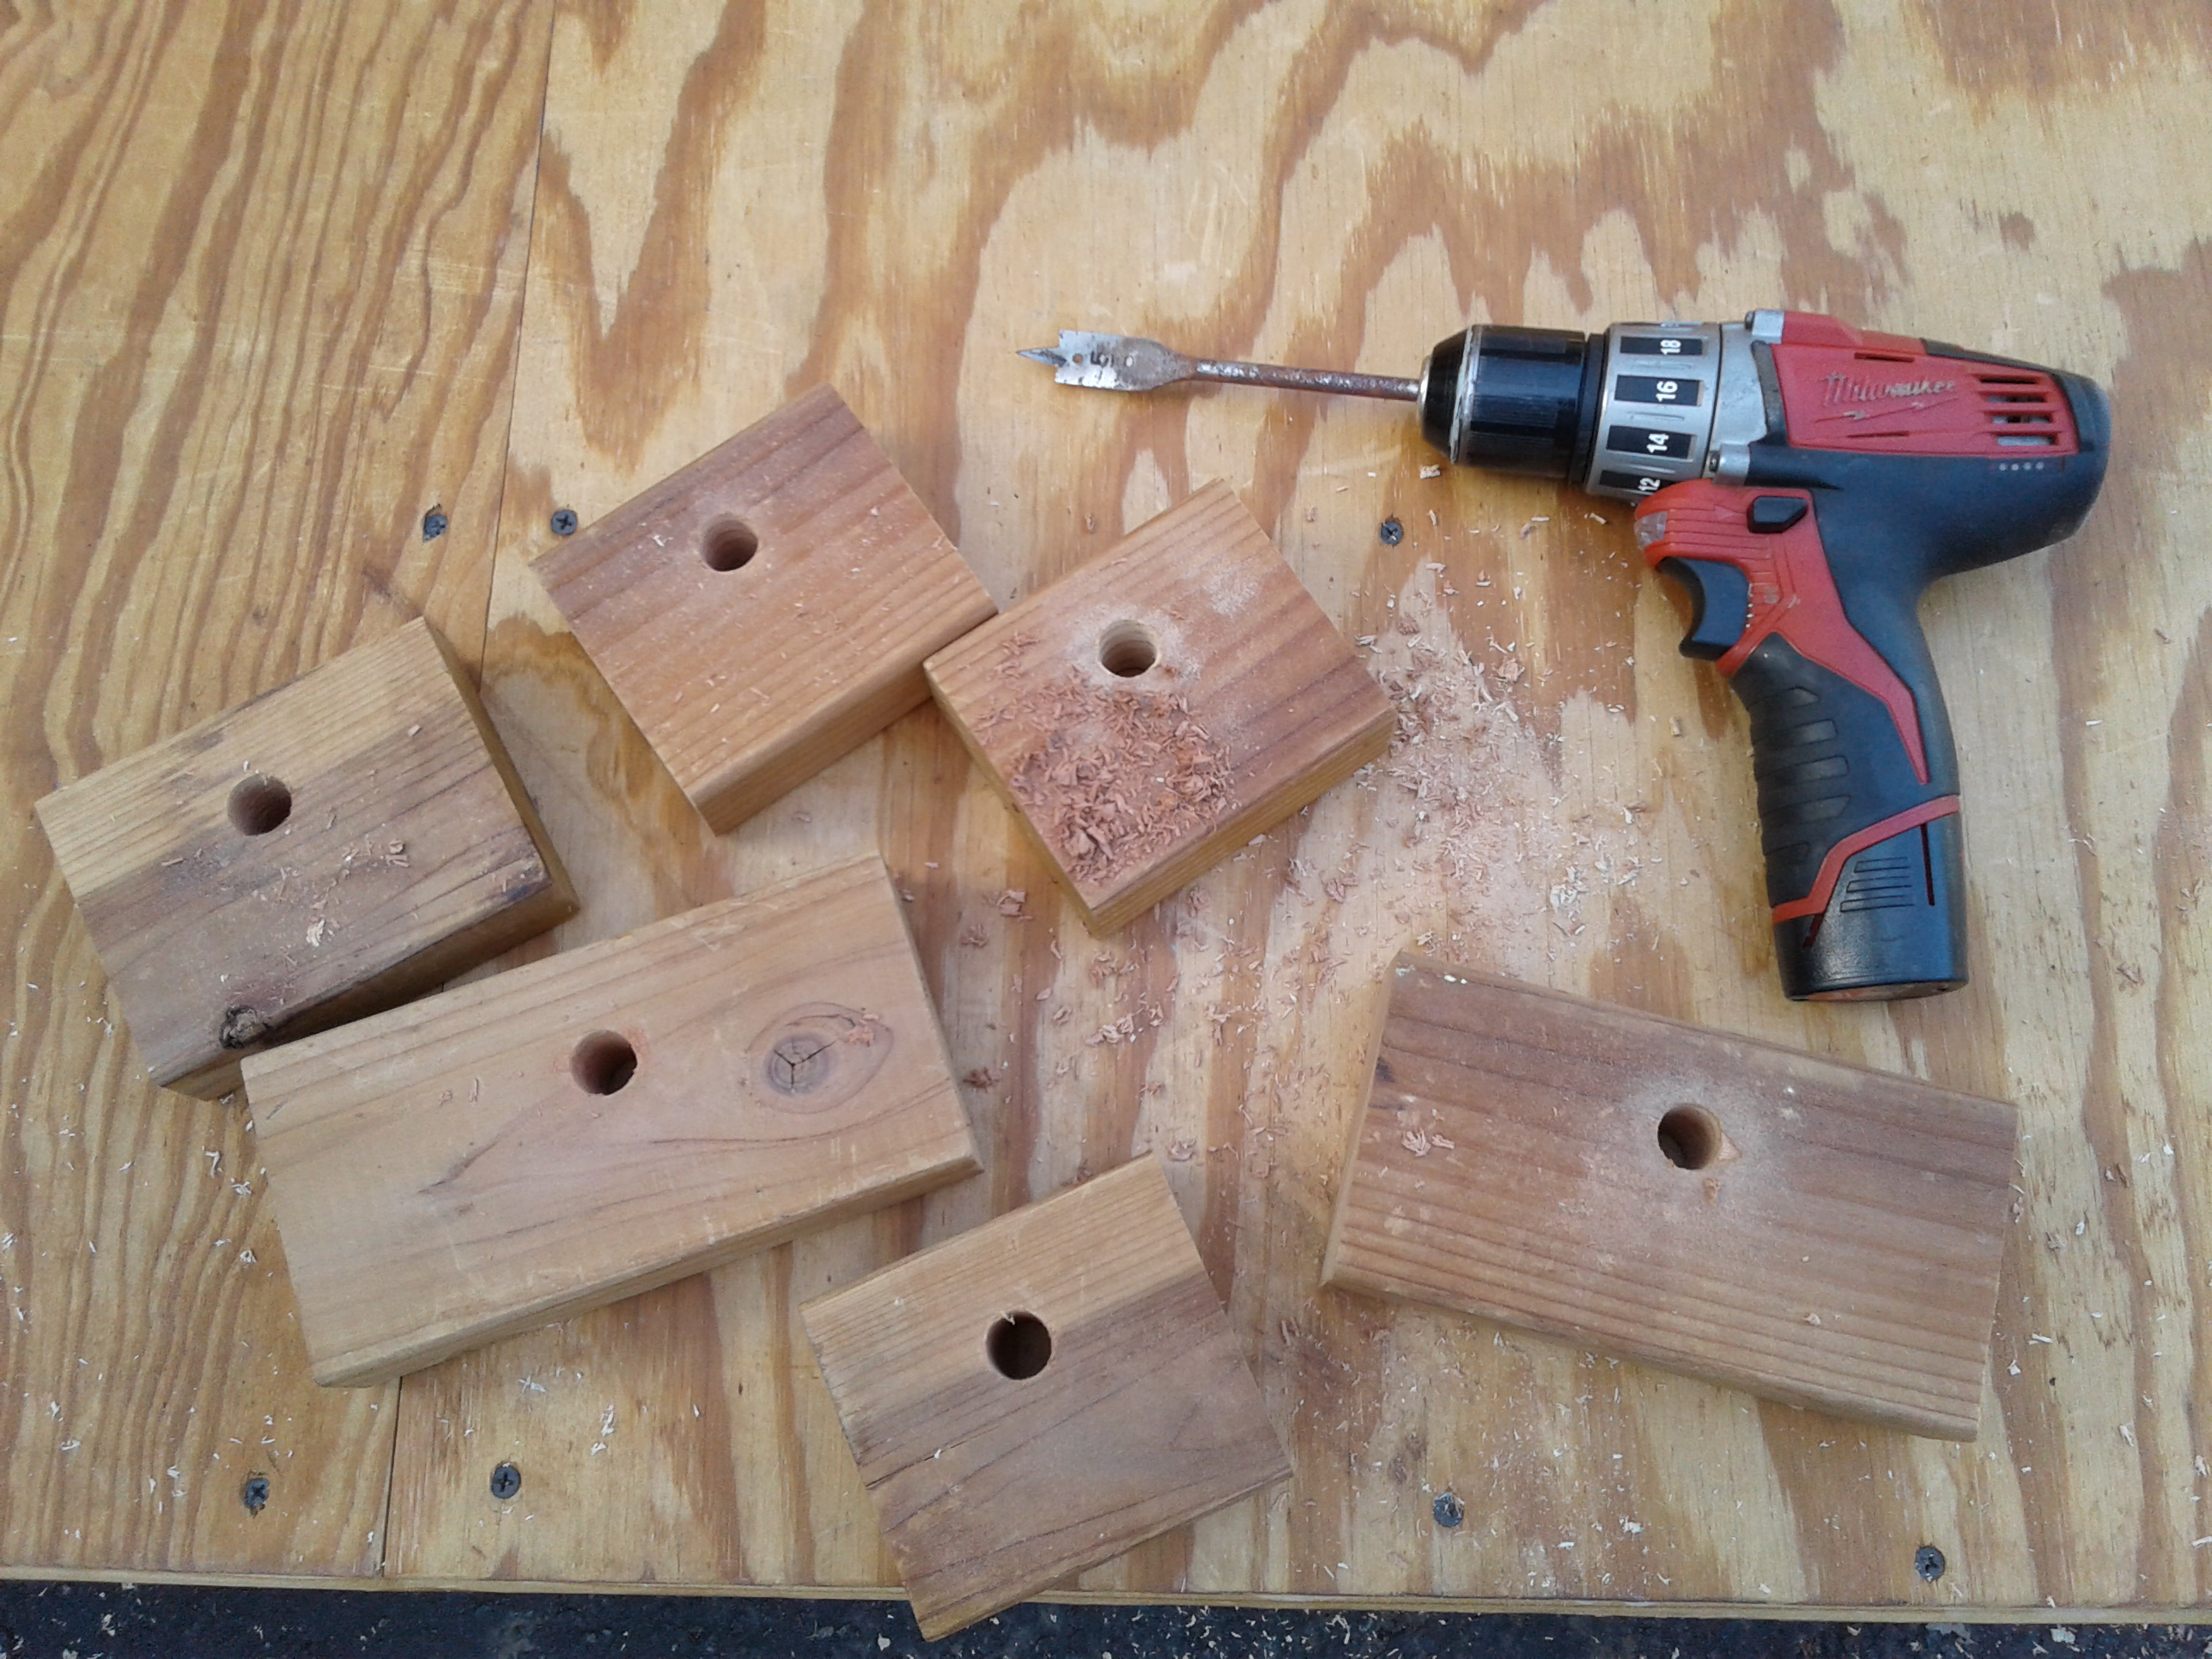
2 x 4 Block Spacers. ~ Original image by @creatr
I grabbed a half dozen chunks of 2 x 4.
These I drilled to act as spacers. I knew that I would need at least two thicknesses of 2 x 4 in order to fill the gap between the heads of the bolts and the long 2 x 4 mount point.
Oops, there was one more problem... Due to the angle of the lag bolts, I needed something to solidly fill the gap, jamming the 2 x 4 mount solidly against the masonry.
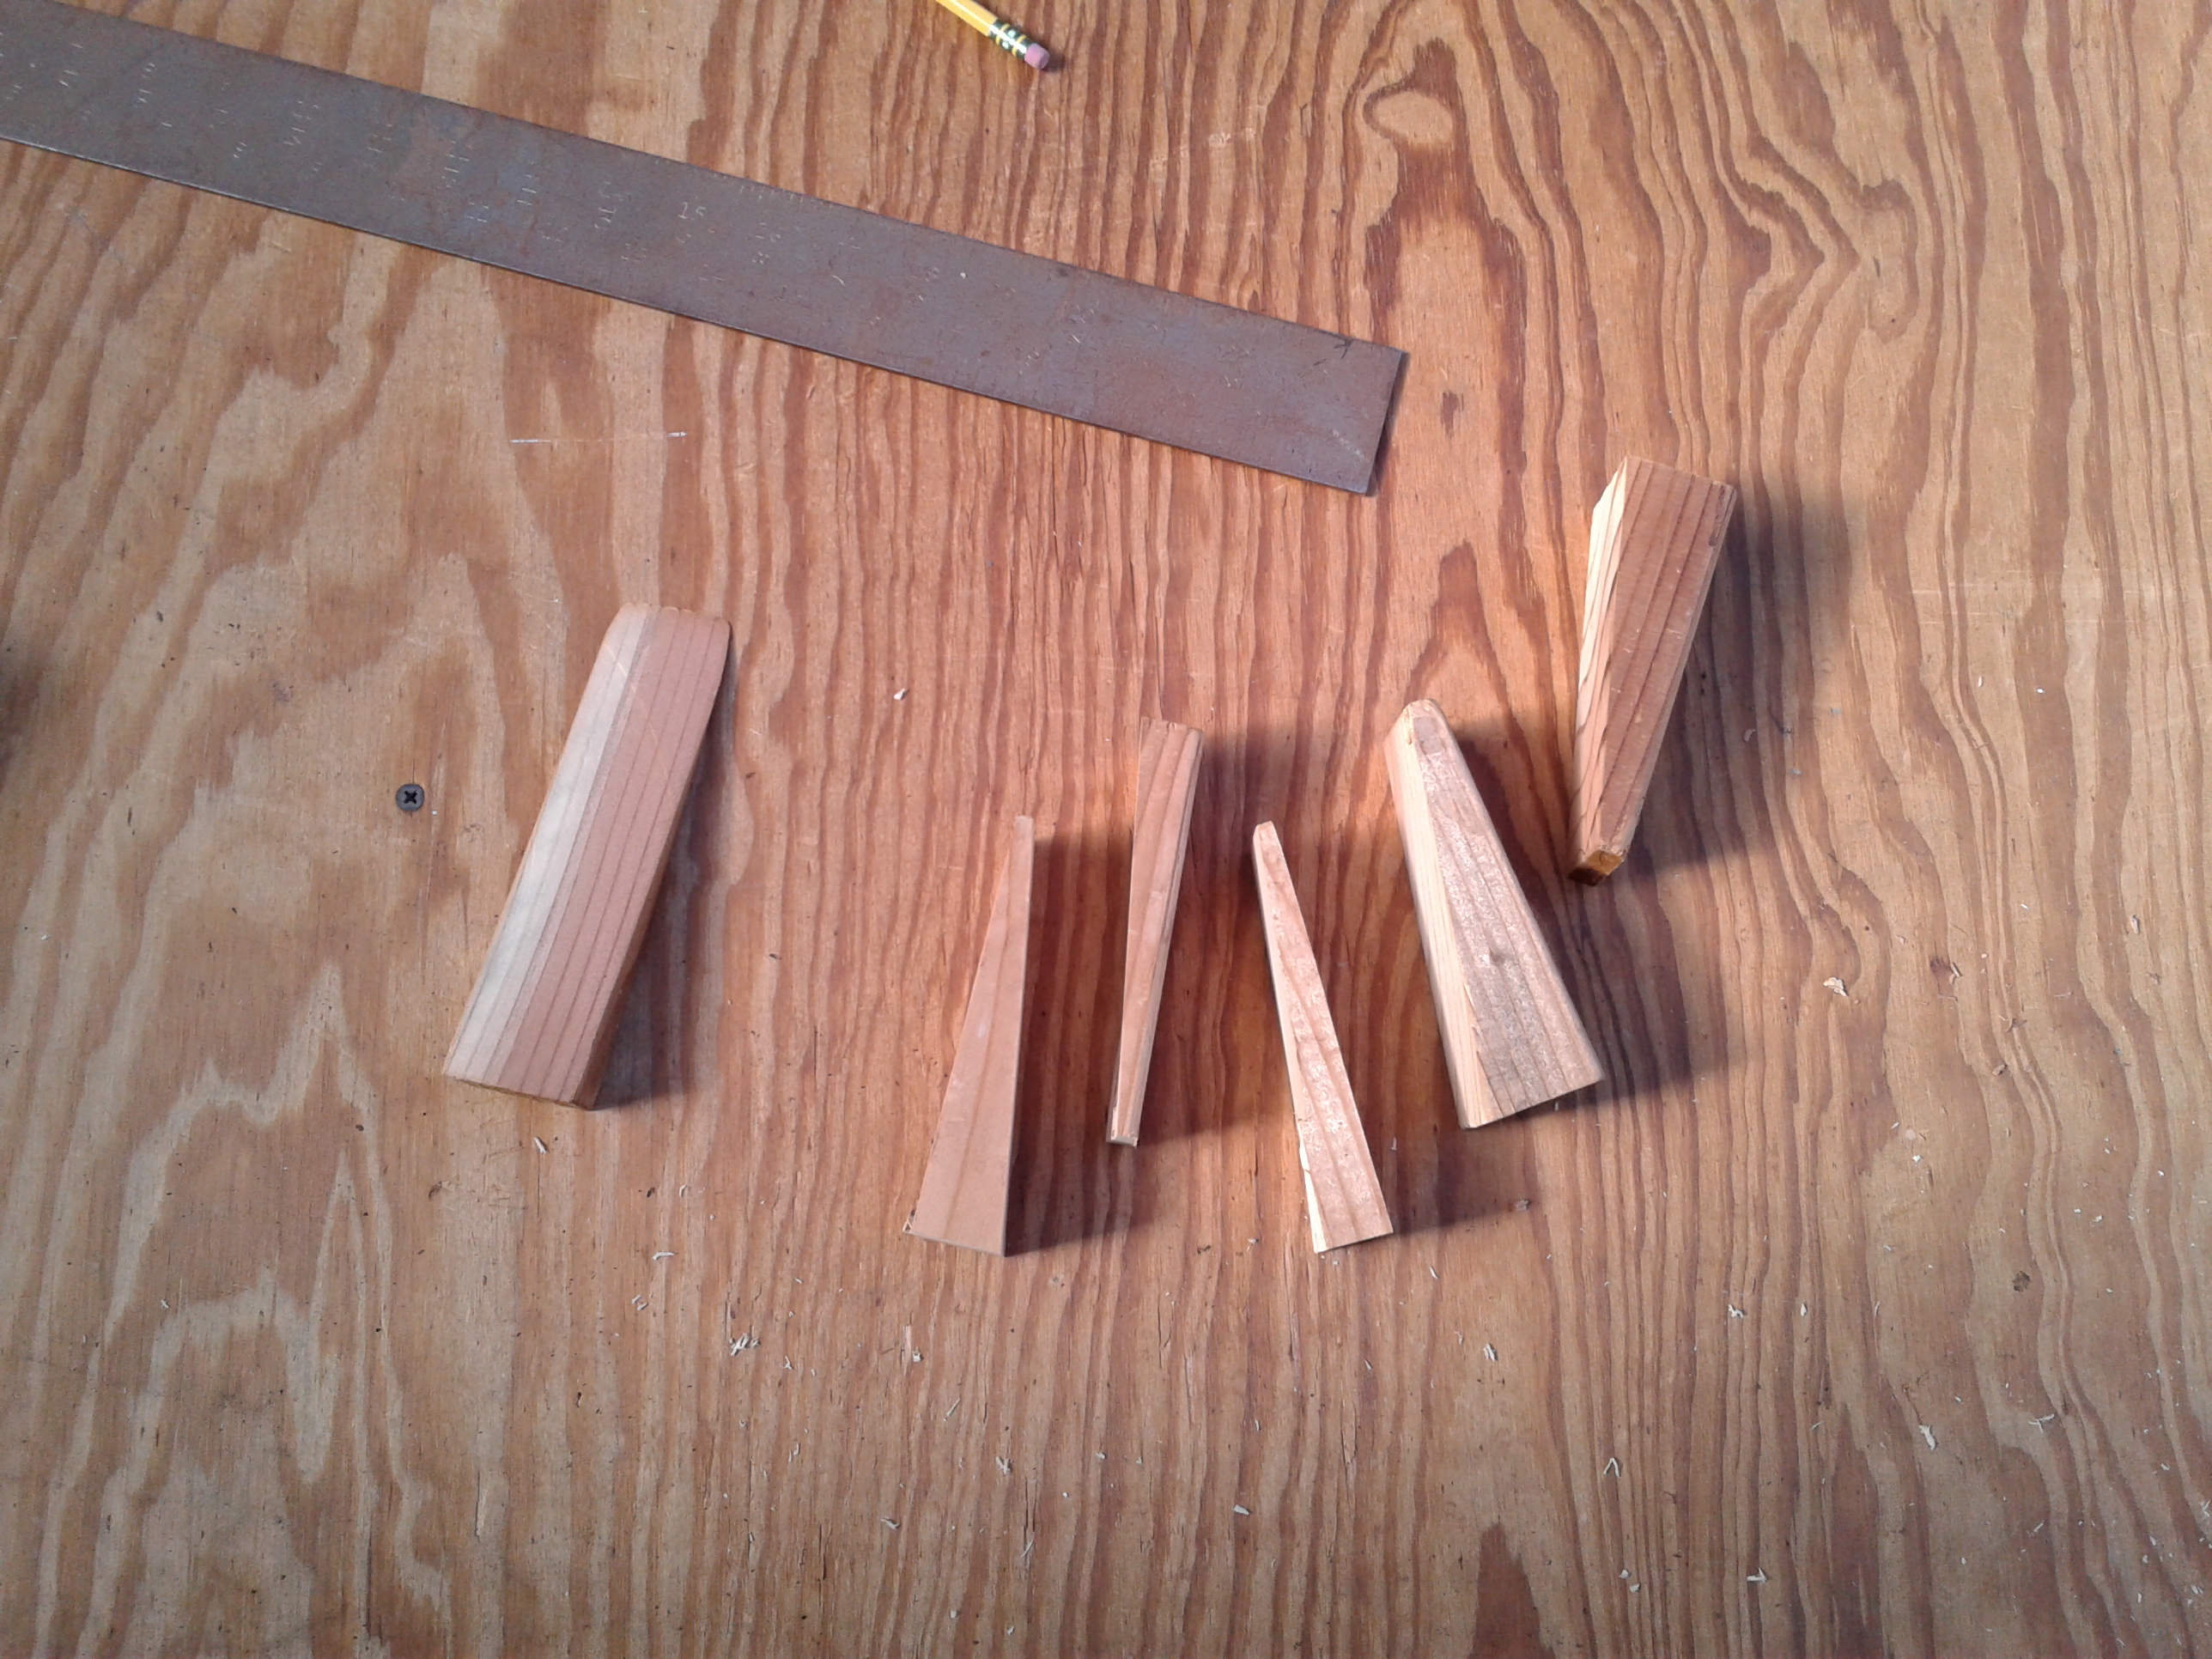
Wooden Wedges. ~ Original image by @creatr
The answer was wedges.
In the image above, you can see the half dozen wedges that I cut from another piece of 2 x 4. These would need to be driven between the spacer blocks to fill the gap at a matching angle.
I drove the wedges between the blocks from below, one on either side of each of the lag bolts.
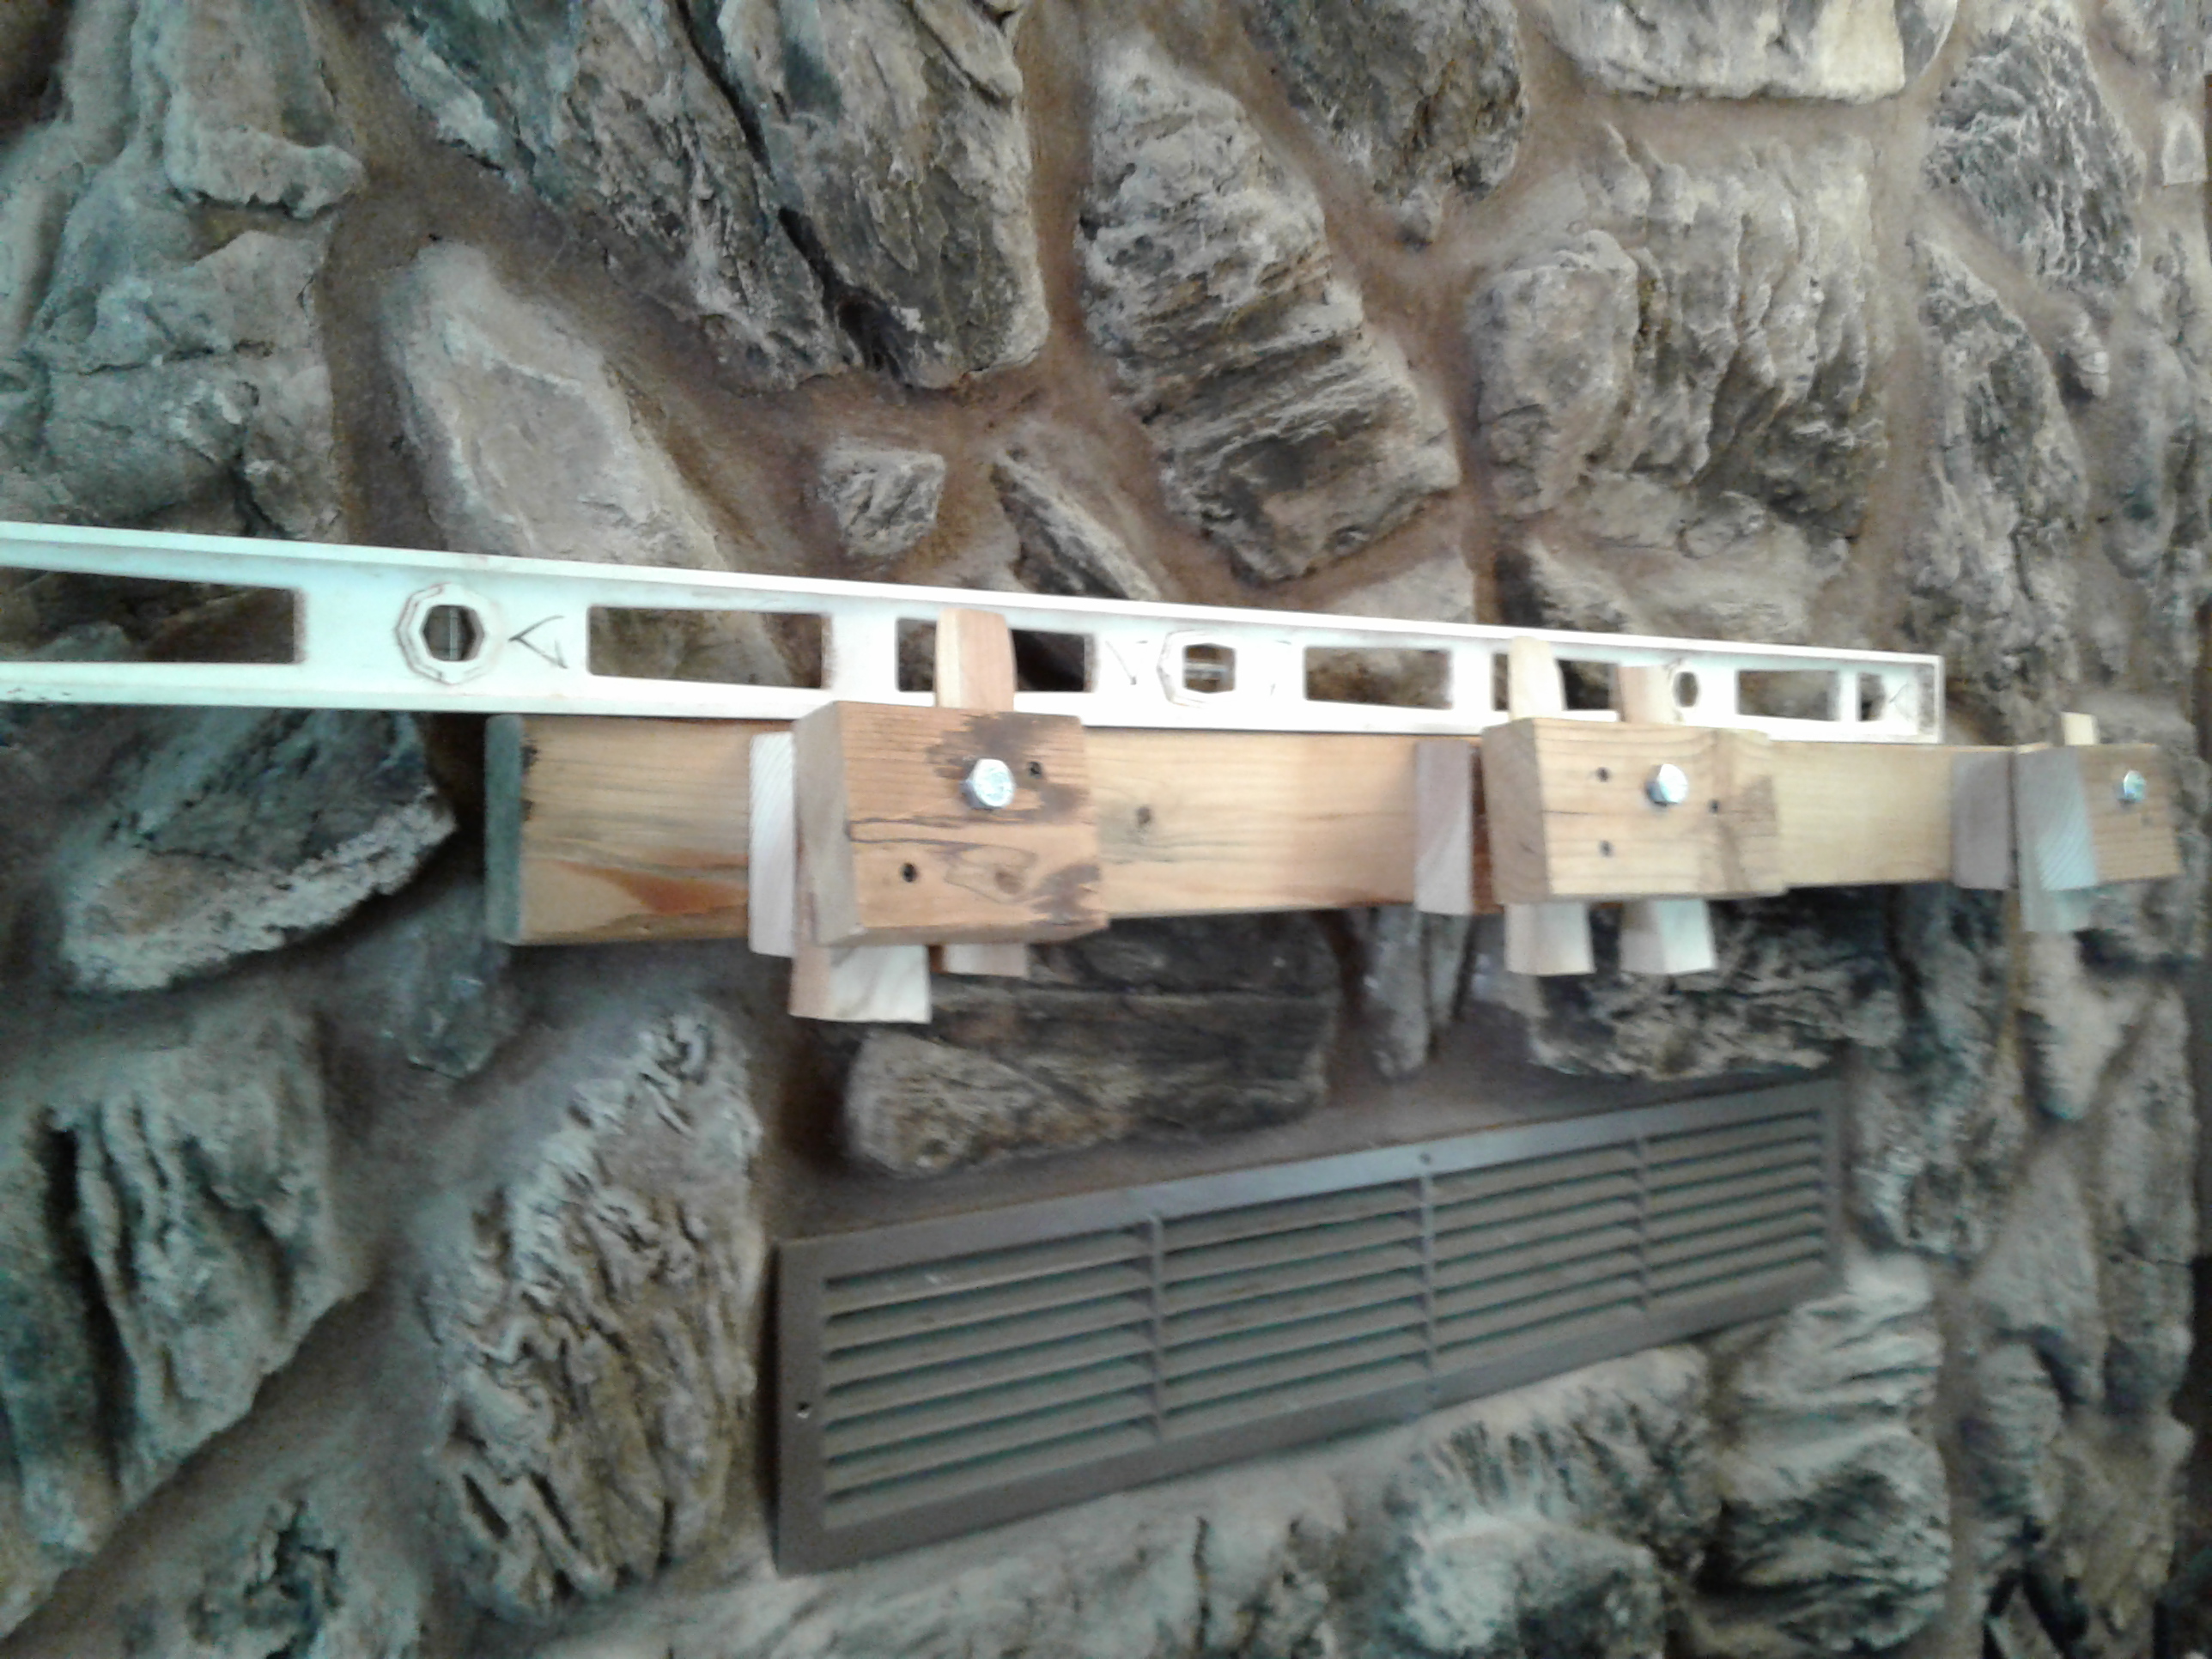
Wedges screwed in place. ~ Original image by @creatr
But friction alone would not make it stable enough.
Temperature changes, vibration, and time would work those wedges out of position.
The solution was to use some drywall screws to solidly anchor the wedges in place.
As you can see in the image above, this left parts of the spacer blocks and excess wedge material projecting both above and below where the mantel was intended to go.
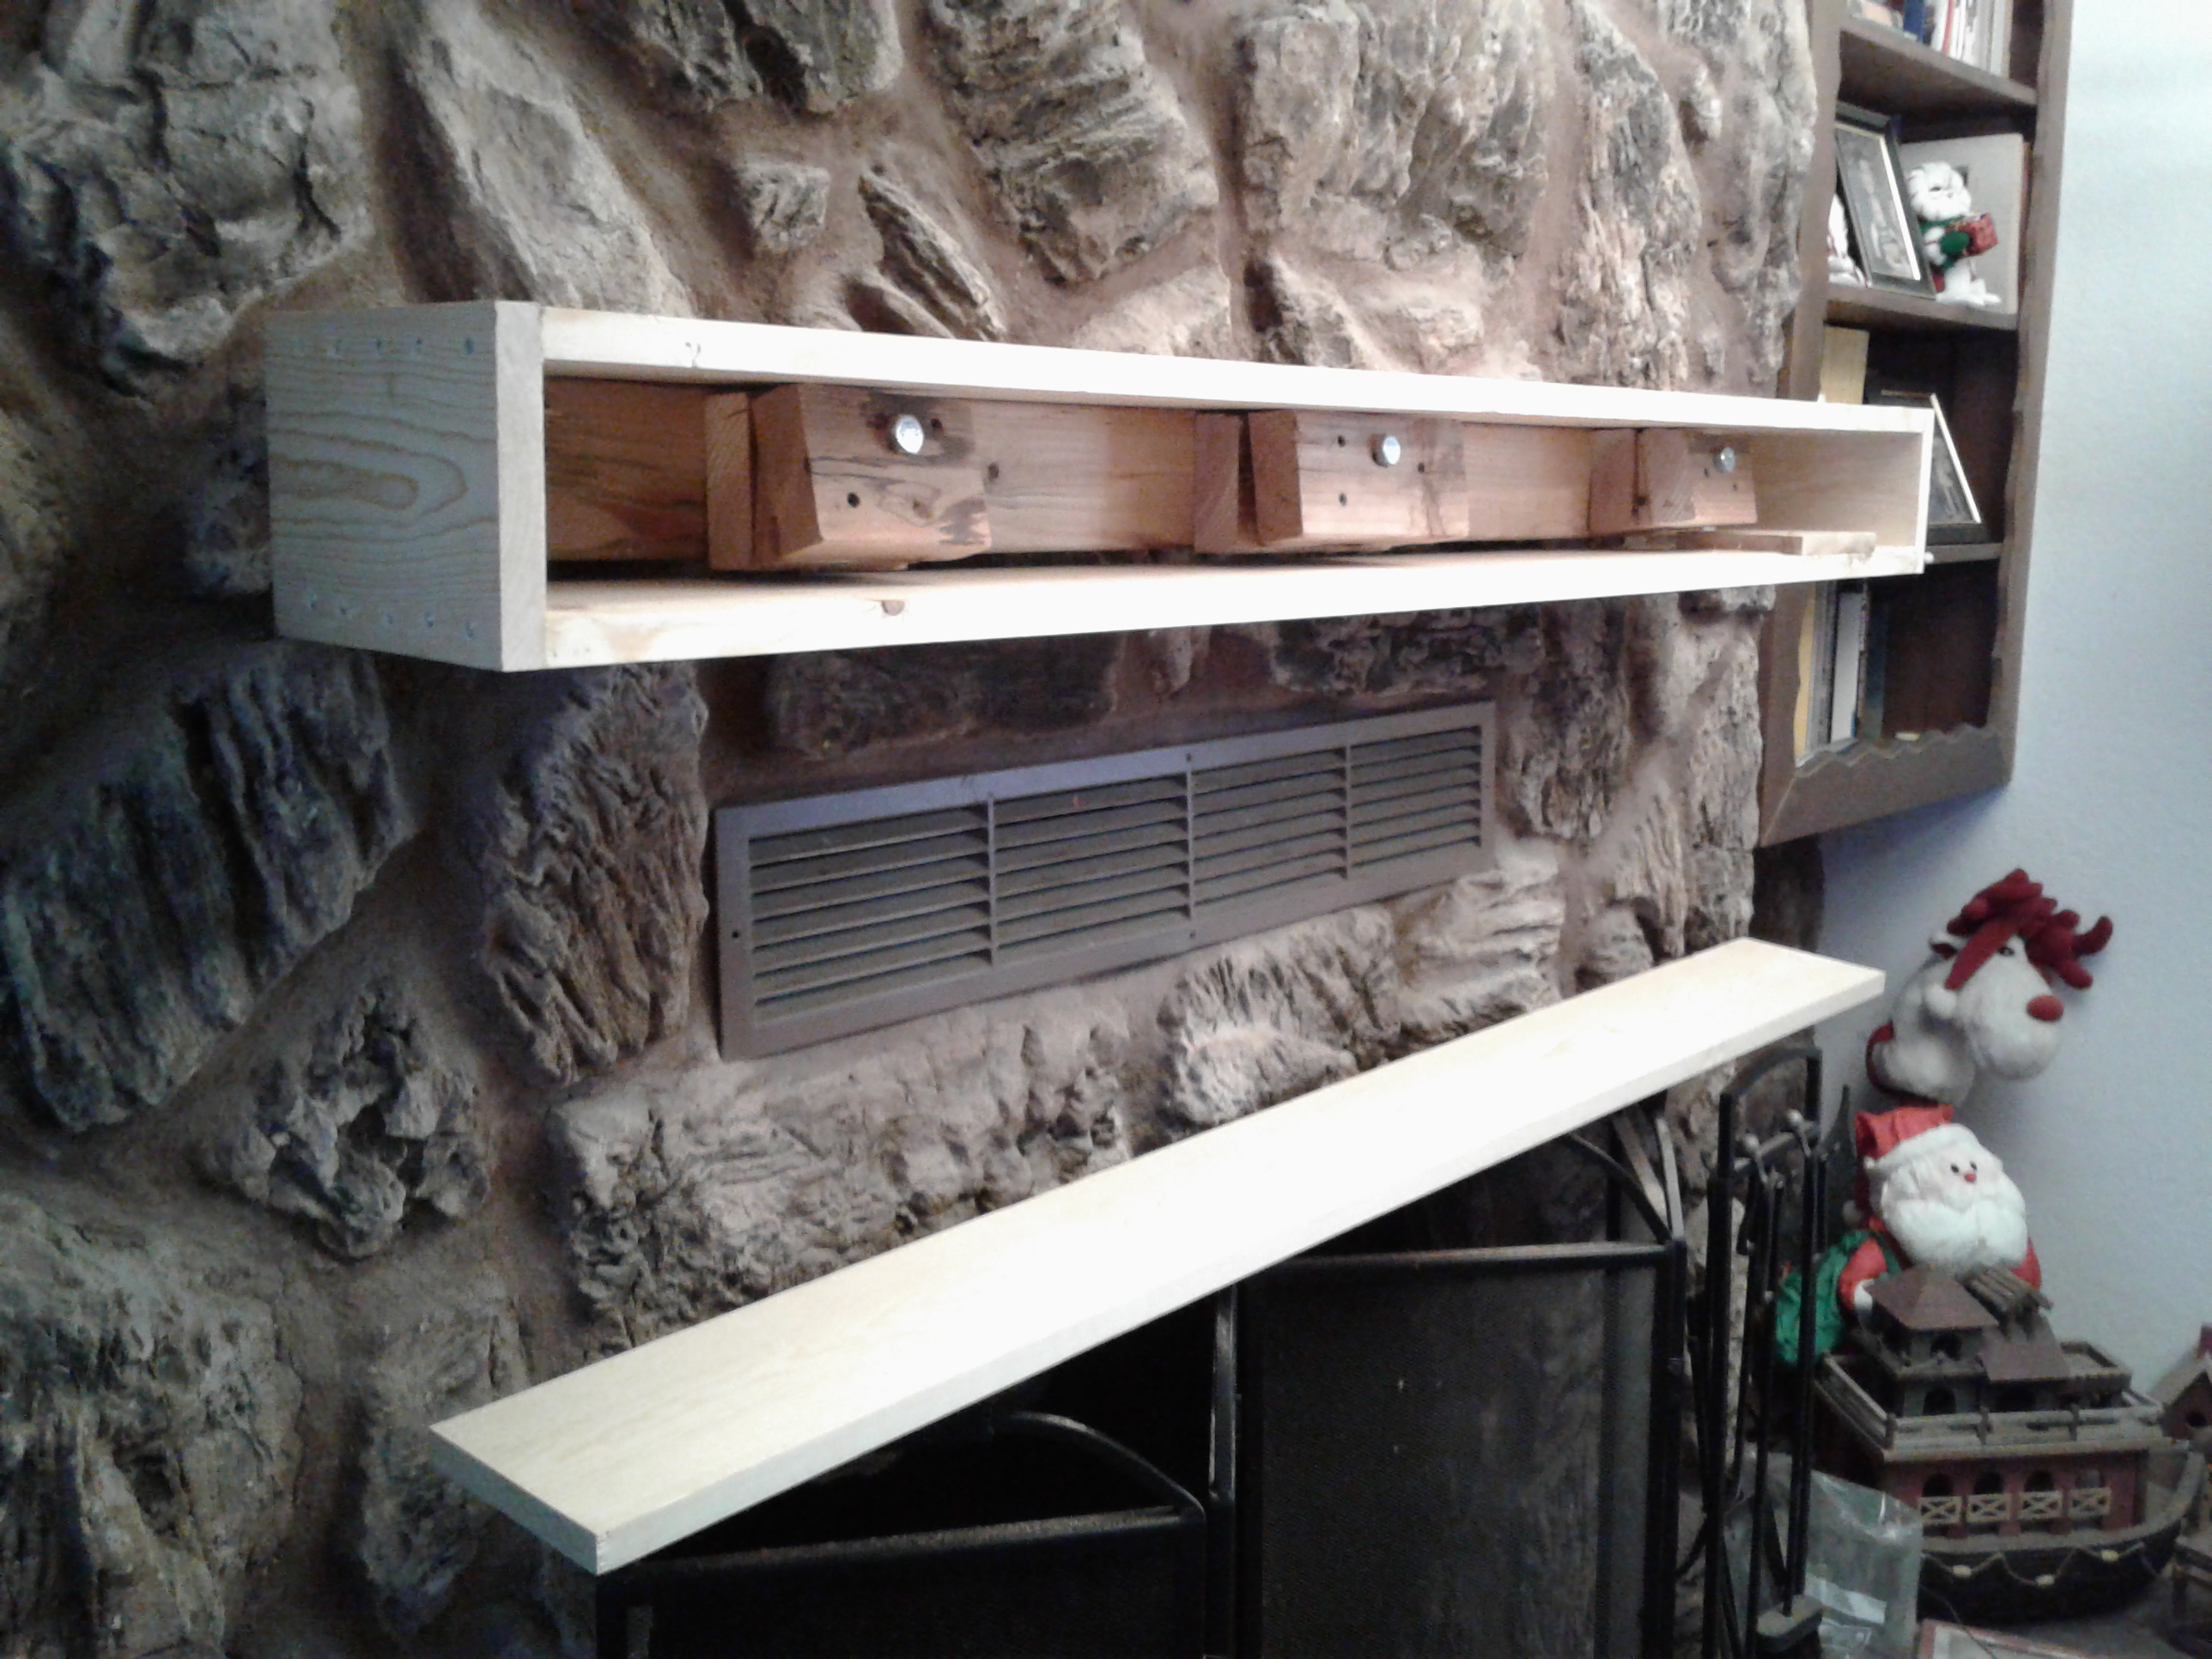
Wedge Excess trimmed. ~ Original image by @creatr
The setup needed trimming.
In the image above, you can see that I've cut off the top and bottom projections of the spacer blocks and wedges. The shell of the mantel now fit over the supporting shelf.
So far, so good.
I had a solid support shelf, bolted solidly to the face of the fireplace. I had the shell of the mantel shelf completed. But I still had a long ways to go in order to fit it to the irregular stone face.
In the next installment,
I'll describe how I managed to fit the mantel to the extremely rough stone face.
~FIN~
The Mantel In Action. ~ Original image by @creatr
Articles In This Series
- Making A Fireplace Mantel ~ Part 1
- My Wife's Christmas Present: Fireplace Mantel, Part 2
- Making The Fireplace Mantel Fit, Conclusion
Thanks for visiting our (usually) Maker-themed blog.
Important Note: My articles often contain hot links to supplemental information. While they aren't essential, you may find added value by following them. Most images also link to useful or related information or articles.
As a member of the Whaleshares community, I promise to take your comments, both positive and corrective, very seriously.
I'm especially interested in meeting makers. If you make stuff, I would love to read about it and encourage you in any way that I can... Just say "Hi" in a comment, and show me what you're working on; I welcome your links!

Thanks to @beherenow for this lovely #thebeast banner!
Your opinion is celebrated and welcomed, not banned or censored!