Saludos, comunidad de Whaleshares, la presente entrada fue originalmente publicado en la comunidad de Steemit, sin embargo, y debido a la recepción que tuvo en ella, hemos decidido publicarla además en esta plataforma.
Greetings, community of Whaleshares, the present entry was originally published in the Steemit community, however, and due to the reception it had in it, we have decided to publish it on this platform as well.

1.
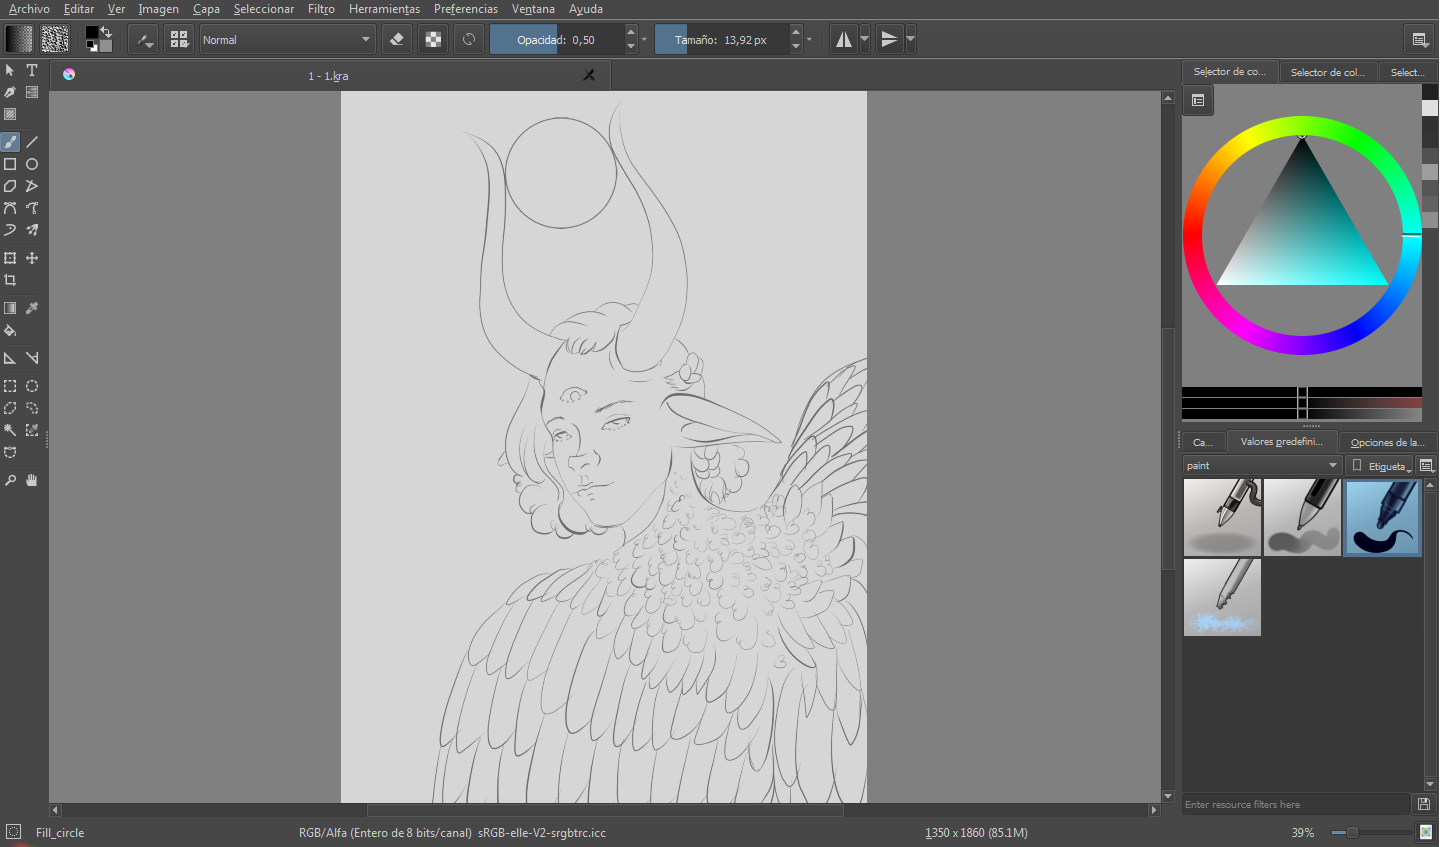
Como es lógico, lo primero que he hecho es un boceto del personaje, para ello utilicé el pincel fill circle (disponible en el menú desplegable de pinceles, en la categoría paint), con opacidad a 0,50.
As is logical, the first thing I did is a sketch of the character, for this I used the fill circle brush (available in the drop-down menu of brushes, in the paint category), with opacity at 0.50.
2.
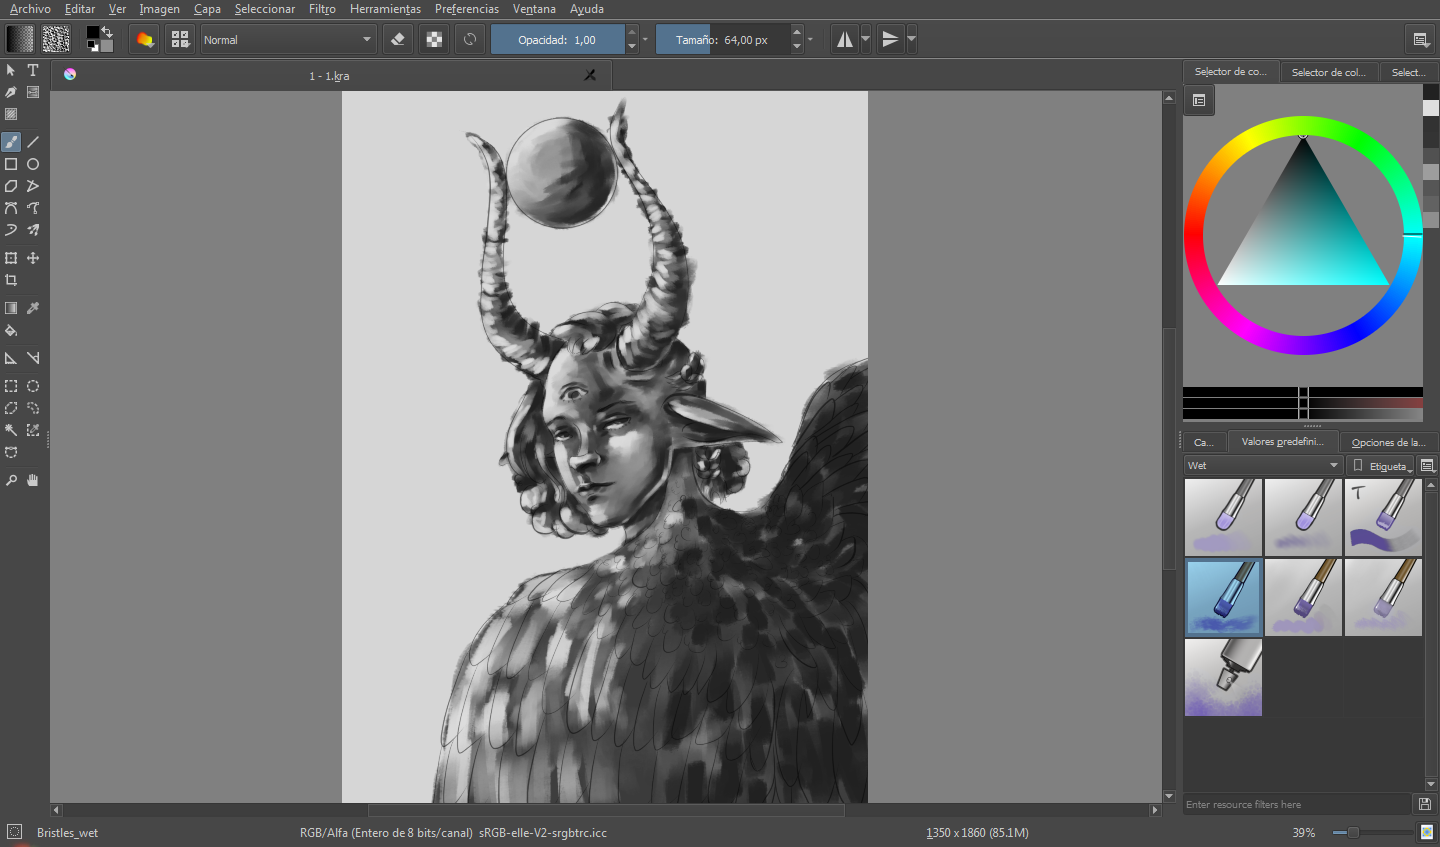
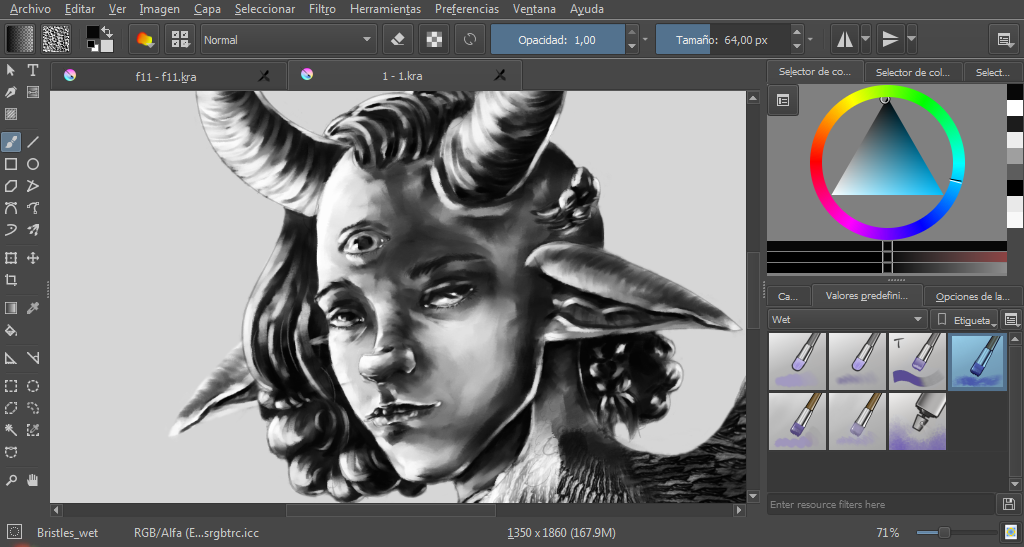
En una capa nueva, puesta por debajo de la anterior, comencé a manchar en escala de grises, con el pincel bristles wet (disponible en el menú desplegable de pinceles, en la categoría wet).
In a new layer, placed below the previous one, I began to stain in gray scale, with the bristles wet brush (available in the drop-down menu of brushes, in the wet category).
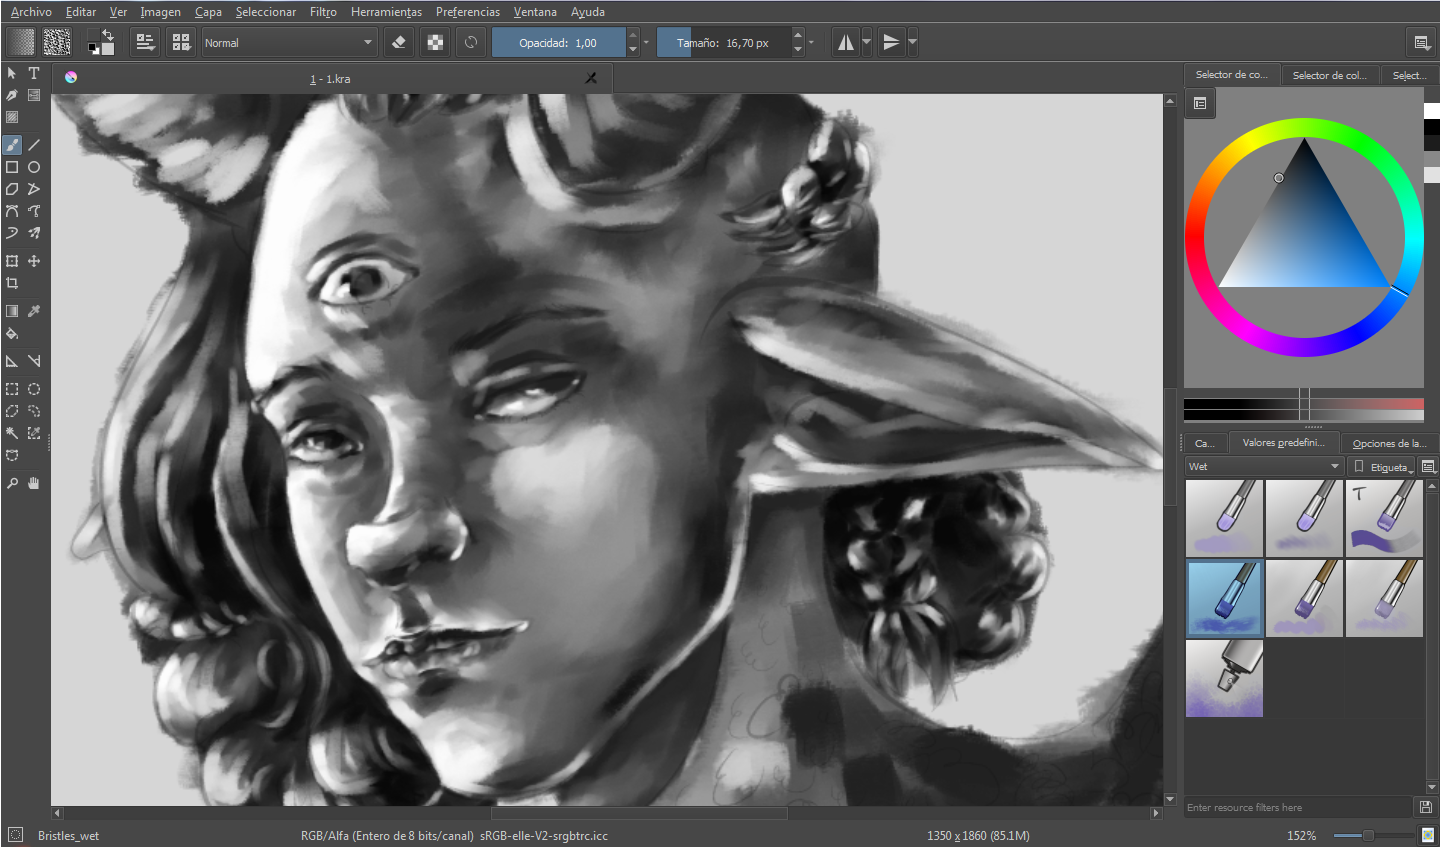
3.
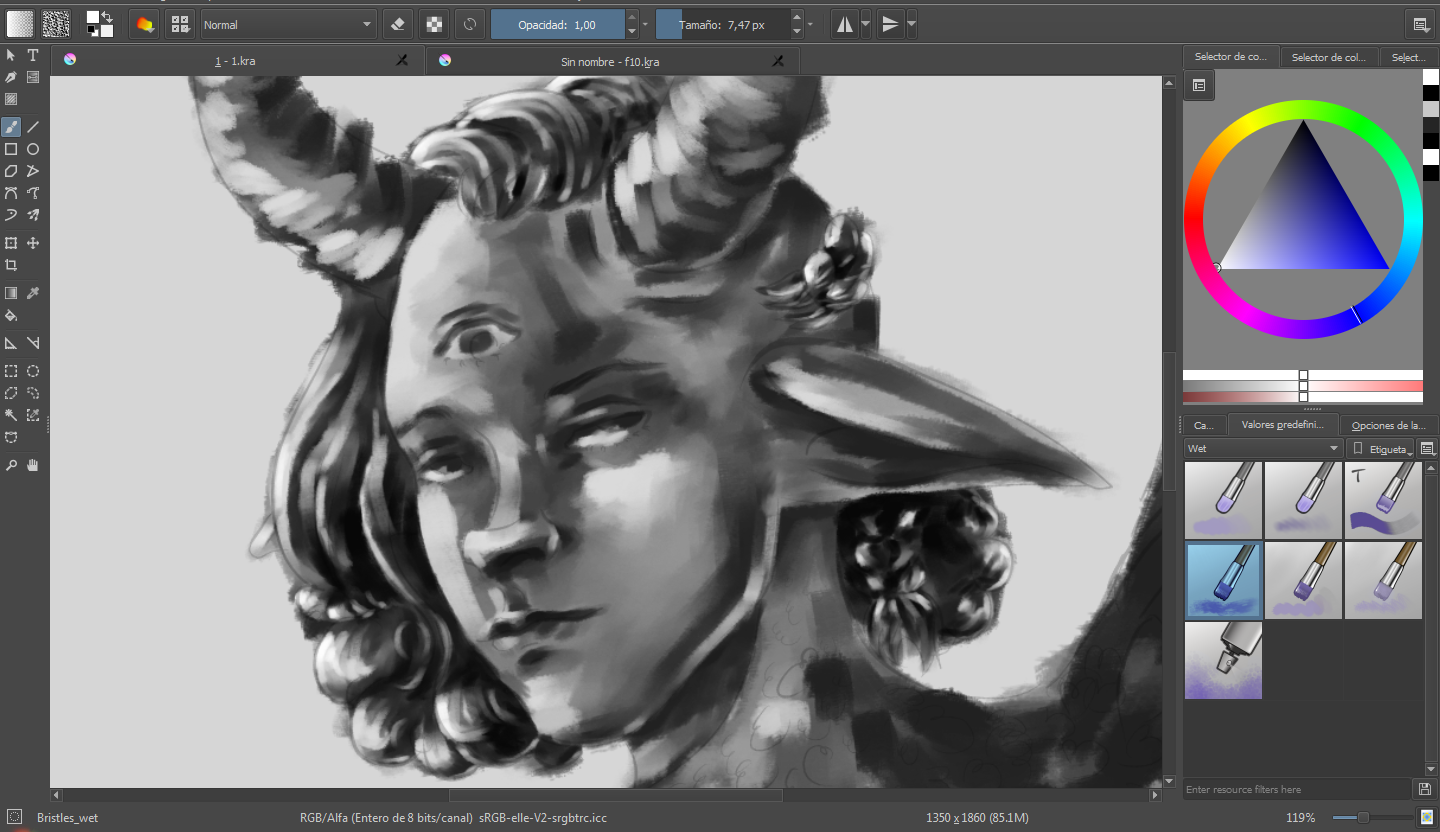
Seguidamente, aún con bristles wet, comencé a detallar el cabello, valiéndome de pinceladas en un sentido curvo/vertical, adaptándola a la forma del mismo.
Then, still with bristles wet, I began to detail the hair, using brush strokes in a curved / vertical direction, adapting it to the shape of the hair.
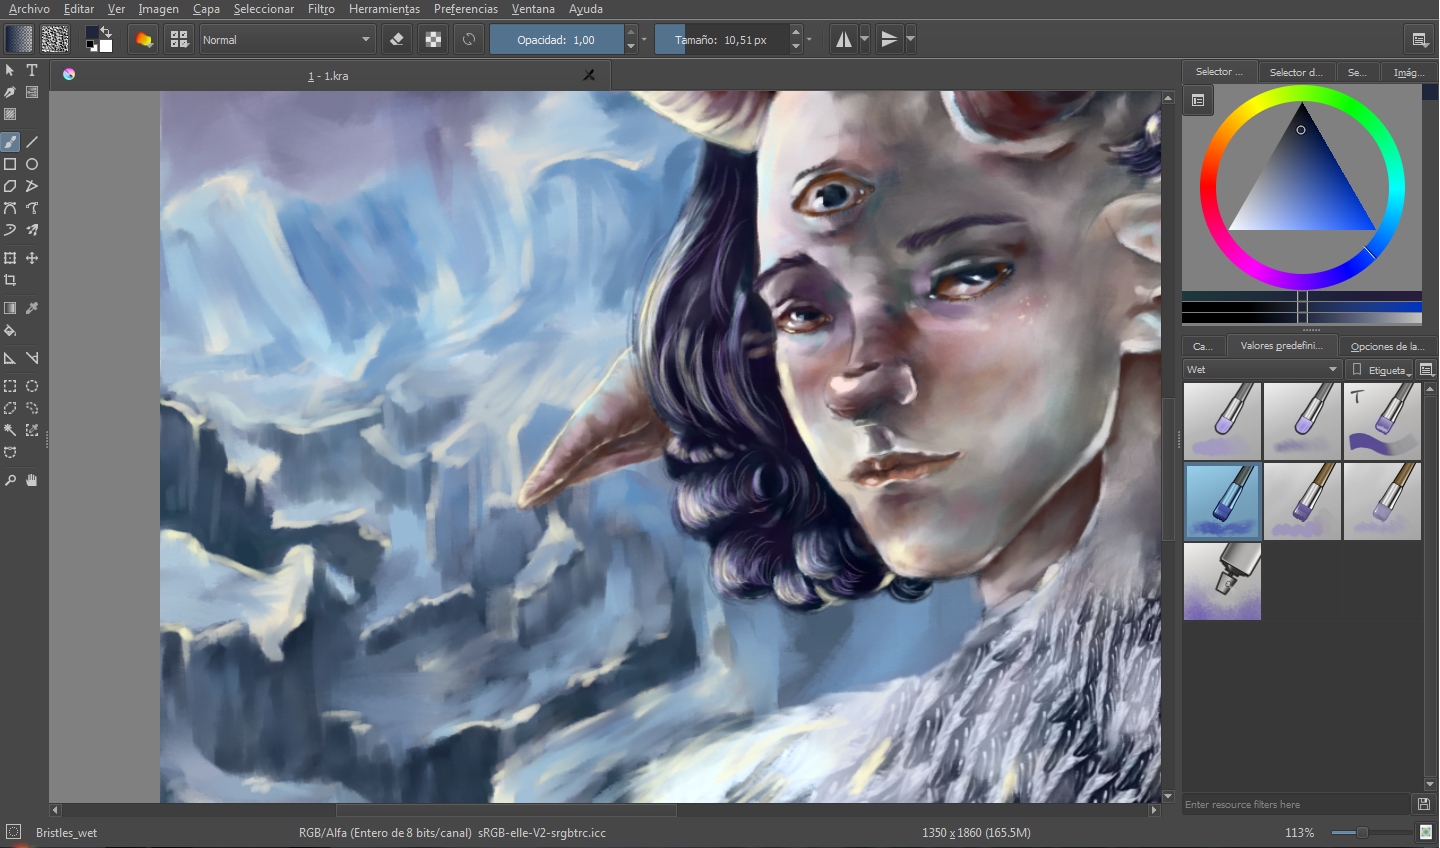
4.
Hice lo mismo con la piel, los labios y los ojos.
I did the same with the skin, lips and eyes.
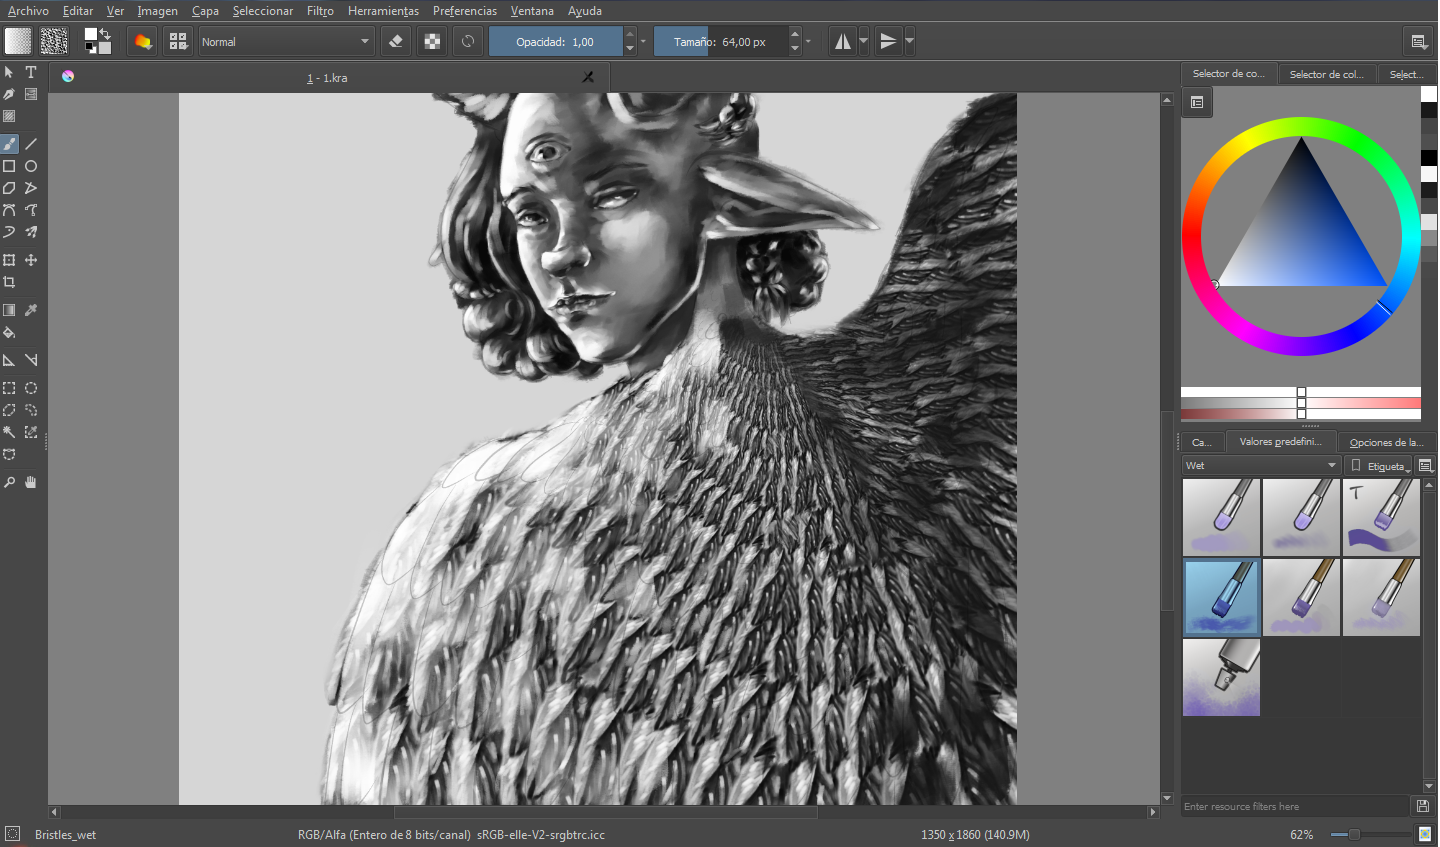
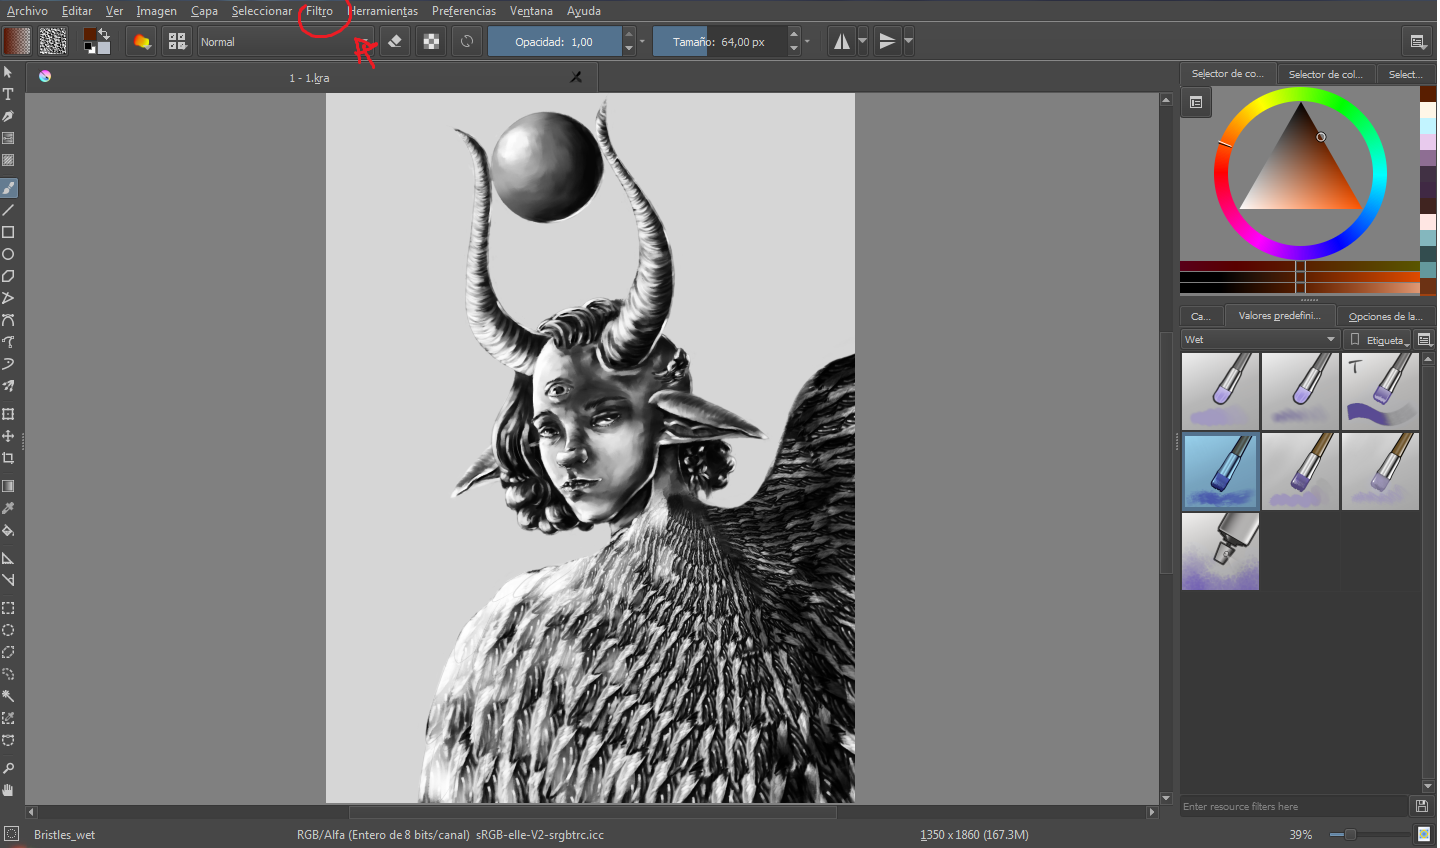
5.
Seguidamente me ocupé de las alas, precisando cada pluma de modo individual.
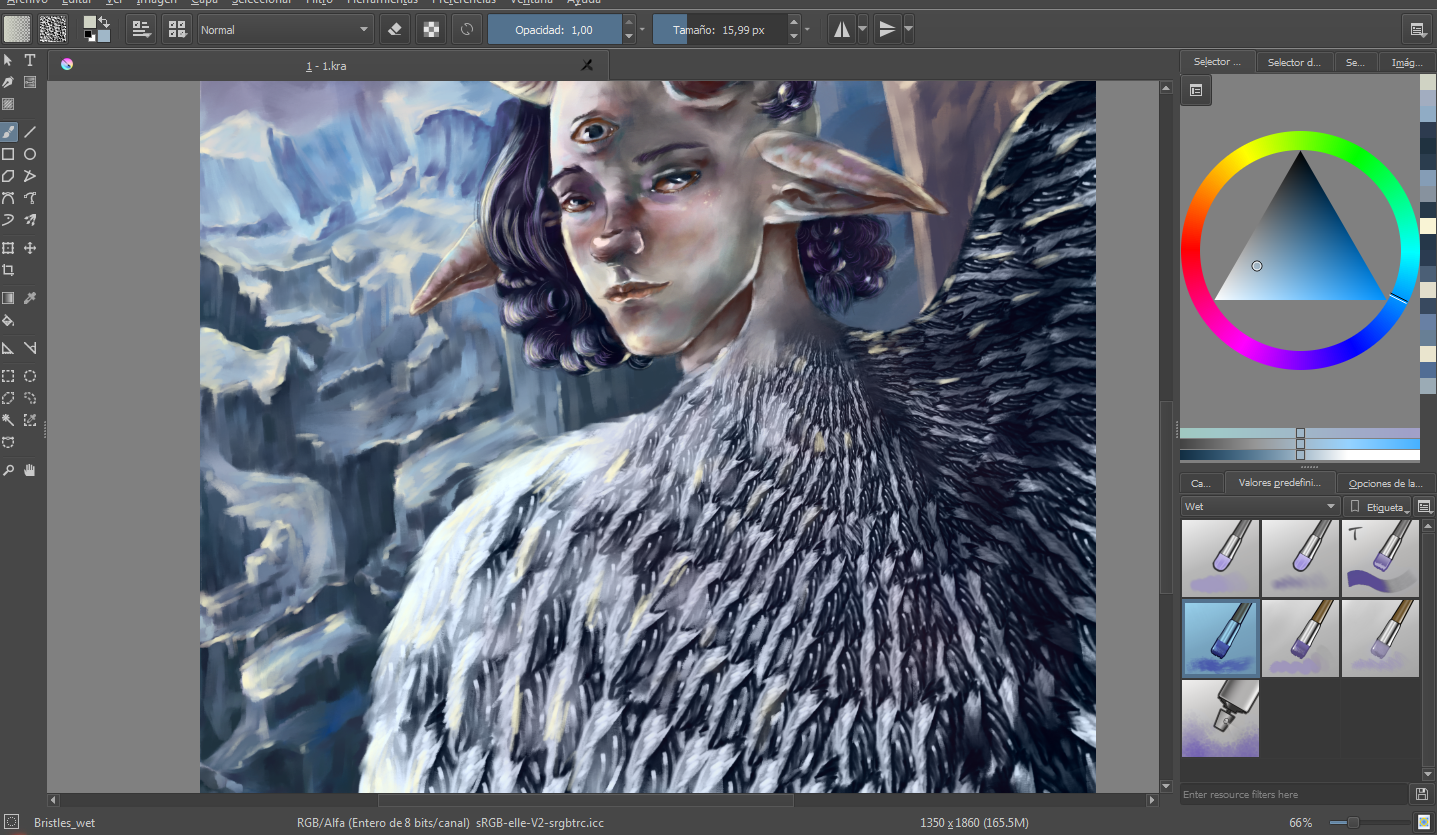
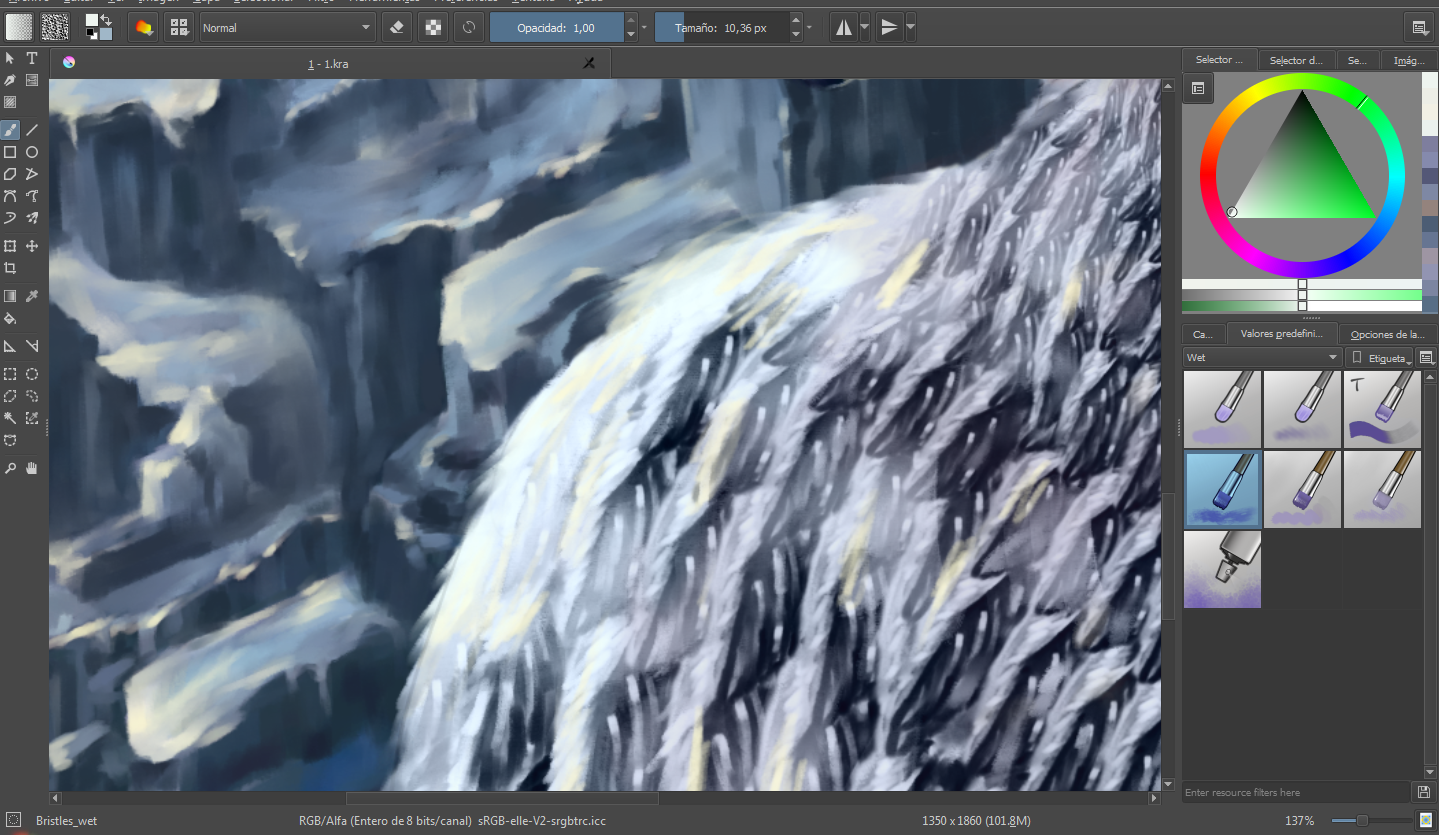
Then I took care of the wings, specifying each pen individually.
6.
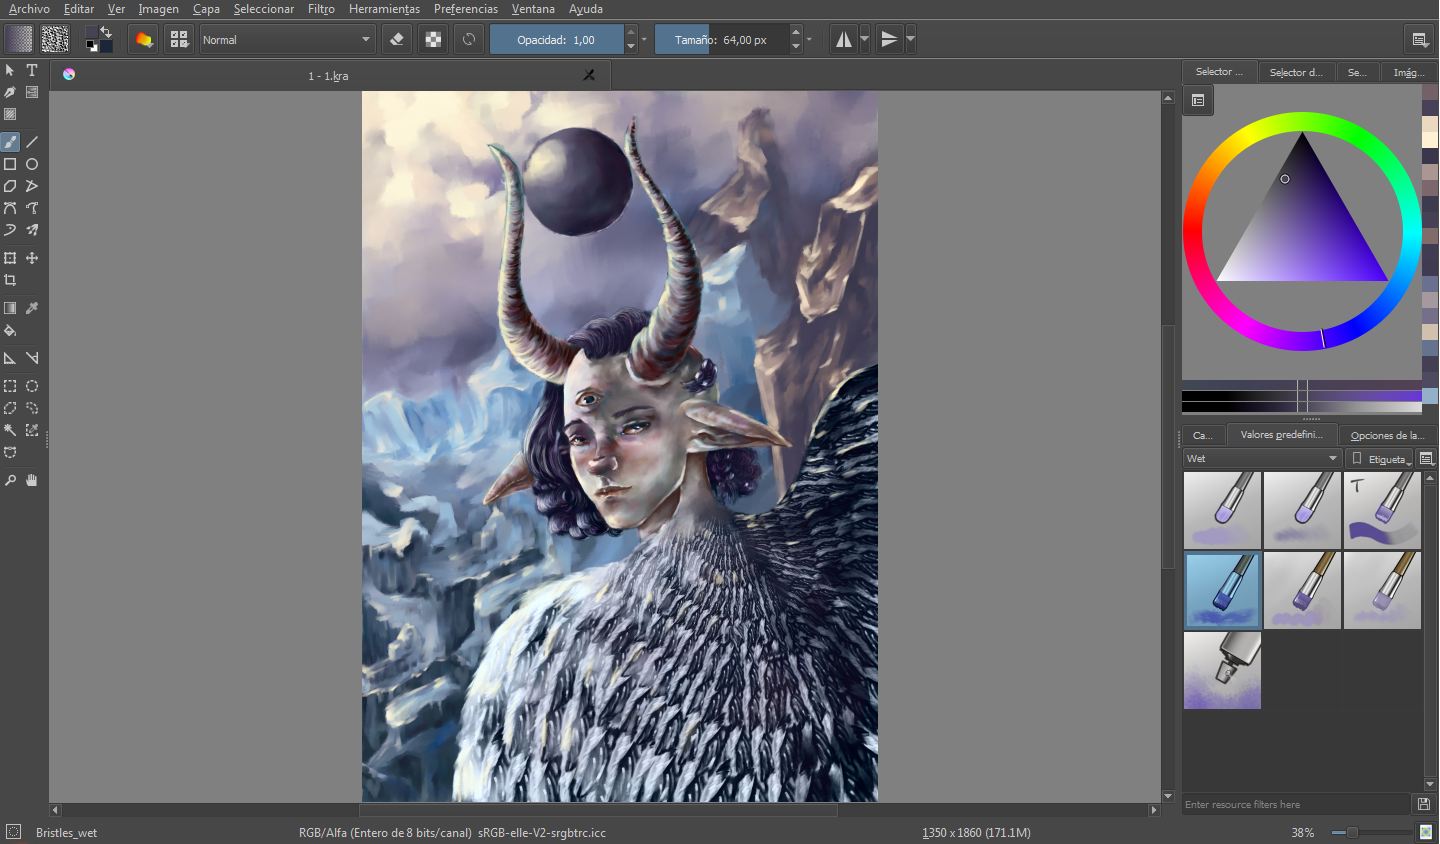
Para los cuernos también hice uso de una pincelada curva, en un sentido envolvente, con el fin de generar una apariencia convexa.
For the horns I also made use of a curved brush stroke, in an enveloping sense, in order to generate a convex appearance.
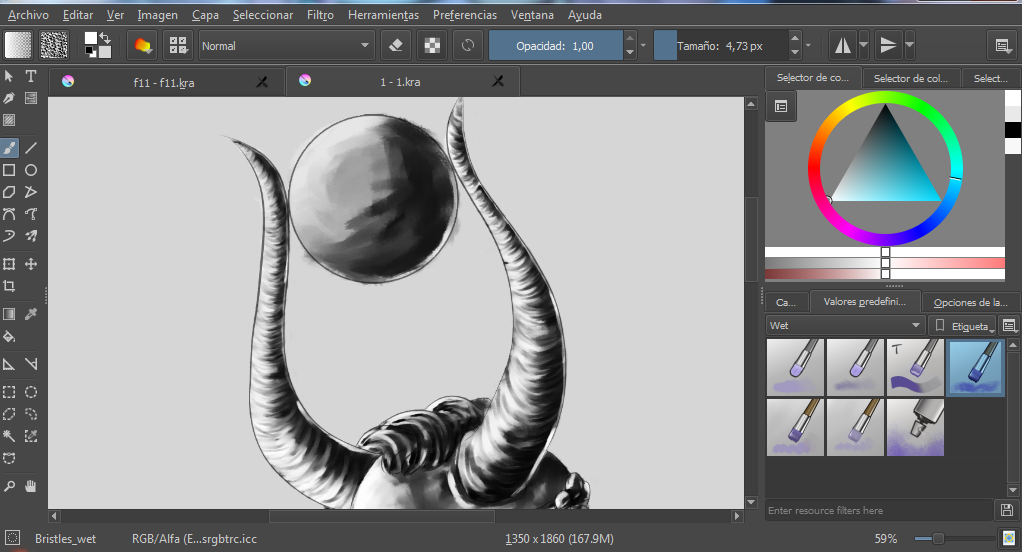
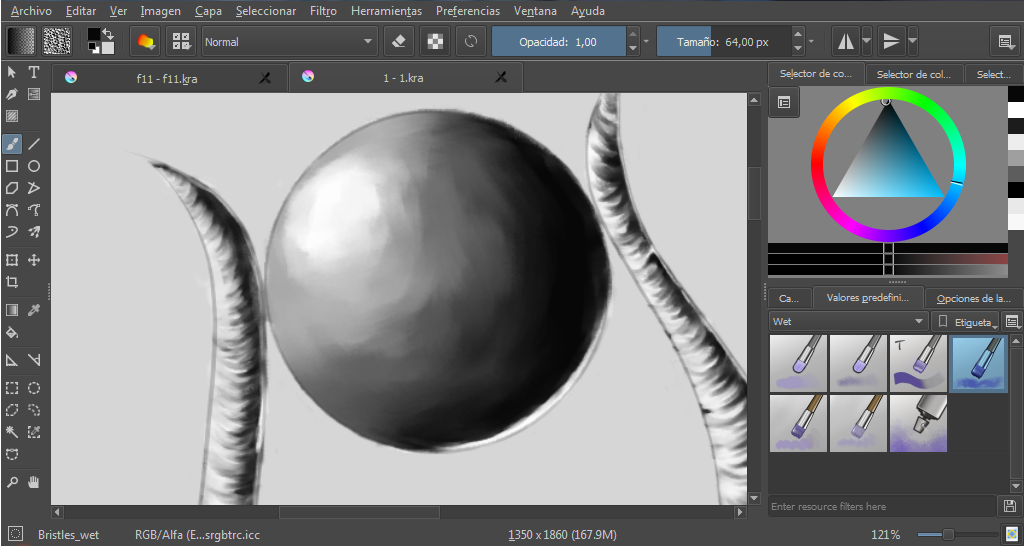
7.
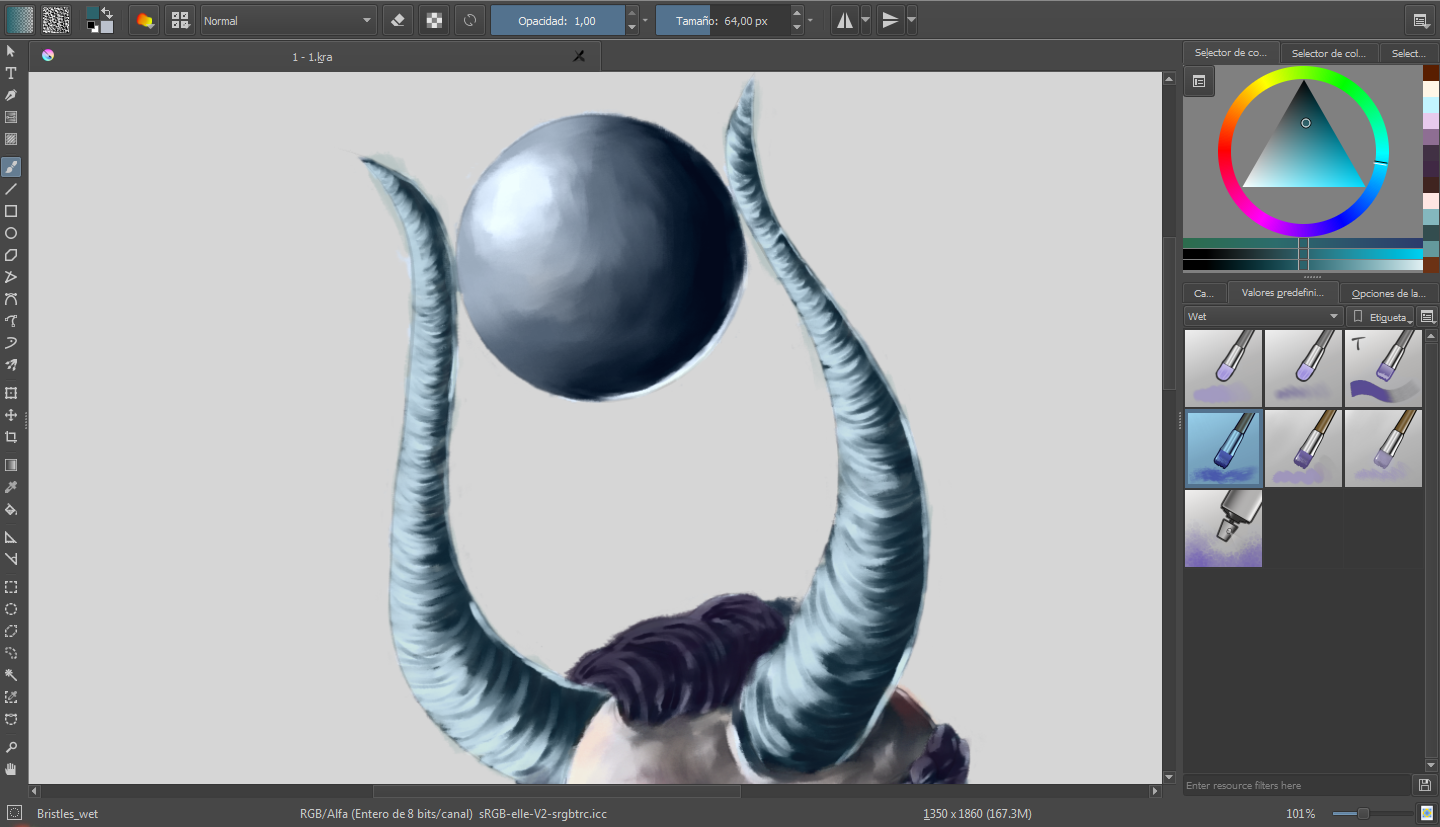
Asimismo, continué con la esfera entre sus cuernos.
Also, I continued with the sphere between its horns.
8.
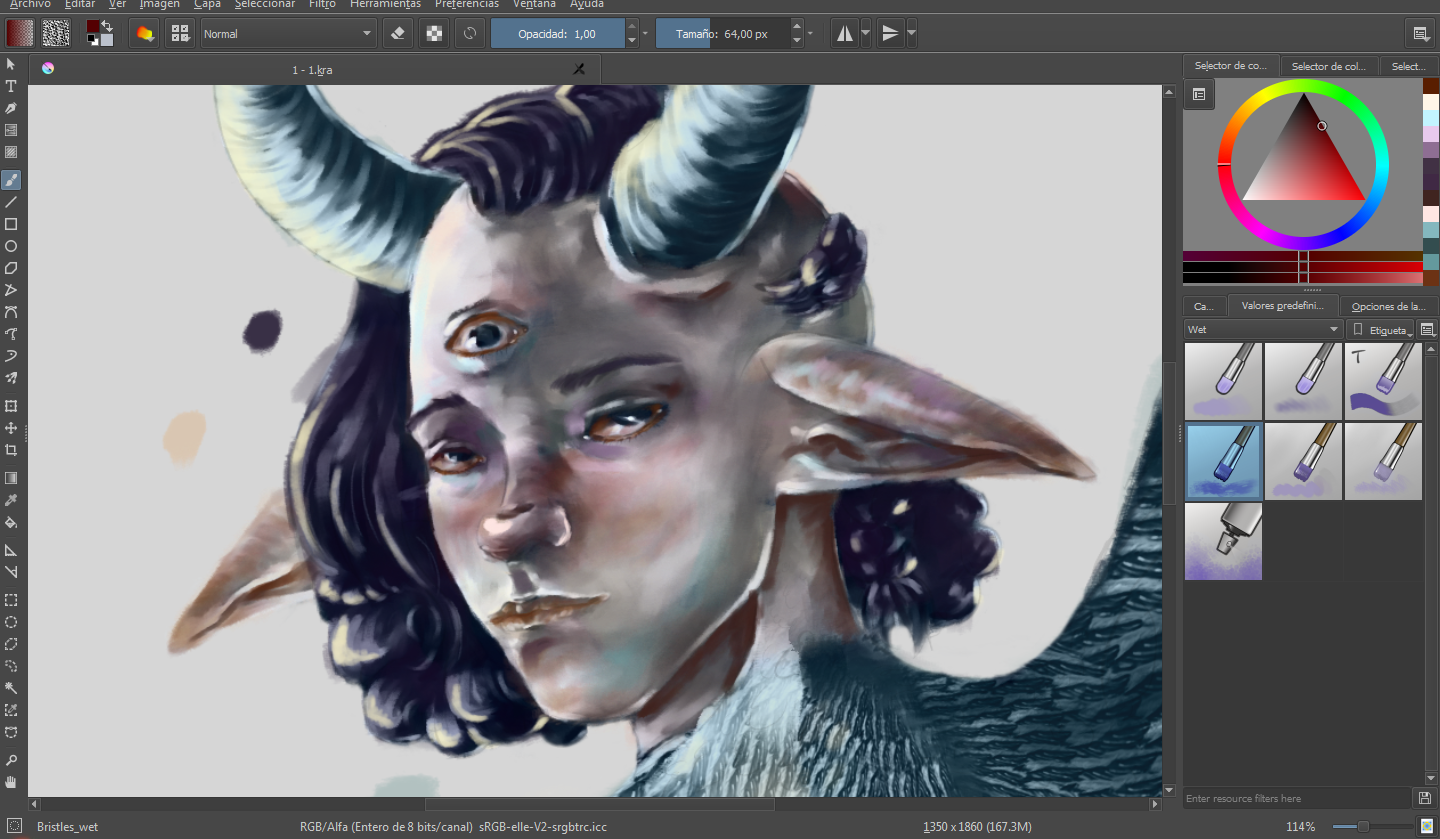
Por último, decidí añadir más detalles al rostro, como también las orejas del personaje.
Finally, I decided to add more details to the face, as well as the character's ears.
9.
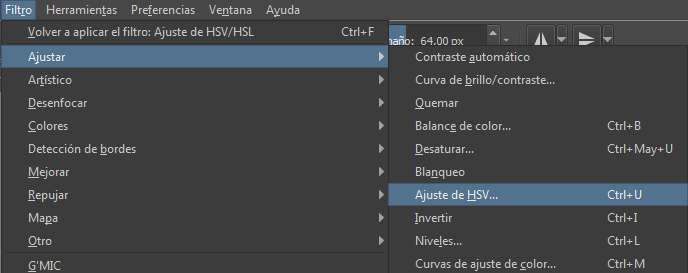
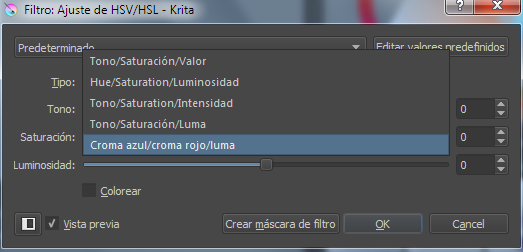
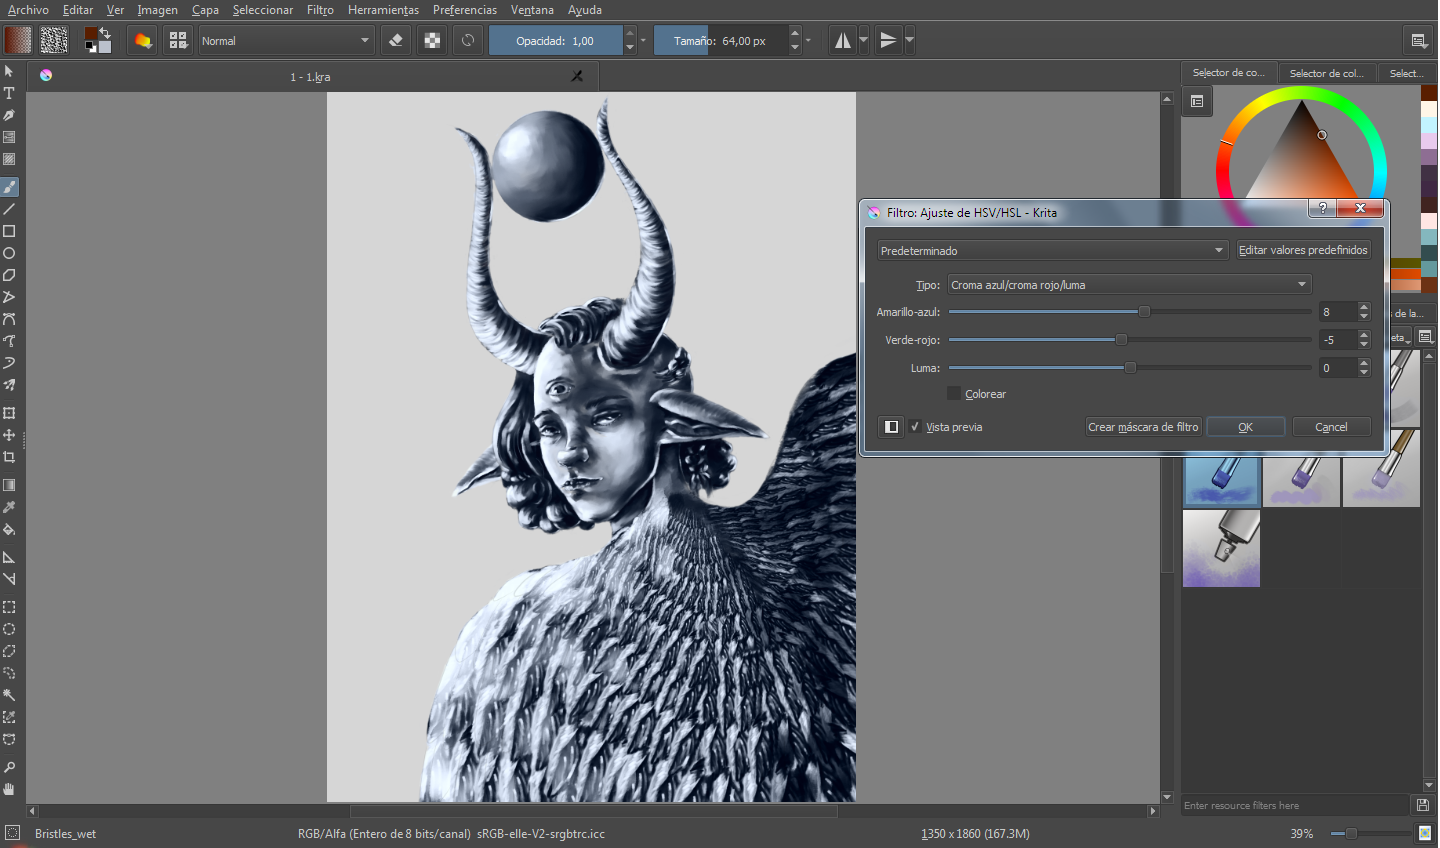
Ya habiendo hecho esto, procedí a añadir un filtro azul sobre la capa de escala de grises, pues más tarde me ayudaría a matizar la escena, así como el personaje. Para ello abrí el pánel de filtro, ubicado en las opciones del área superior del software > ajustar > ajuste HSV > tipo > croma azul/croma rojo/luma. Ajusté las opciones mostradas de modo manual, y di click en ok.
Having already done this, I proceeded to add a blue filter on the gray scale layer, as it would later help me to qualify the scene, as well as the character. For this I opened the filter panel, located in the options in the upper area of the software> adjust> HSV setting> type> blue chroma / red / luma chroma. I adjusted the options shown manually, and click ok.
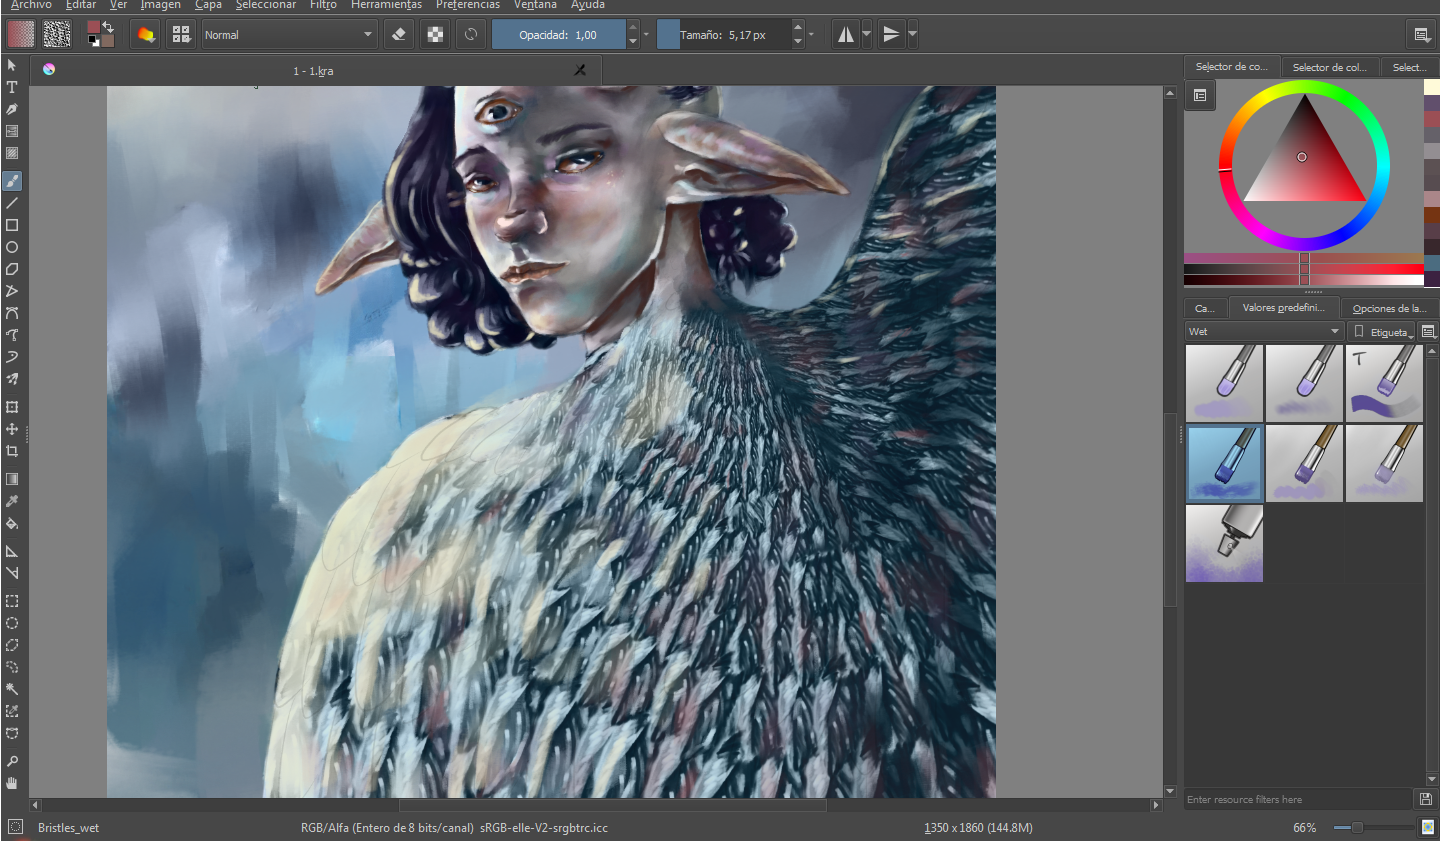
10.
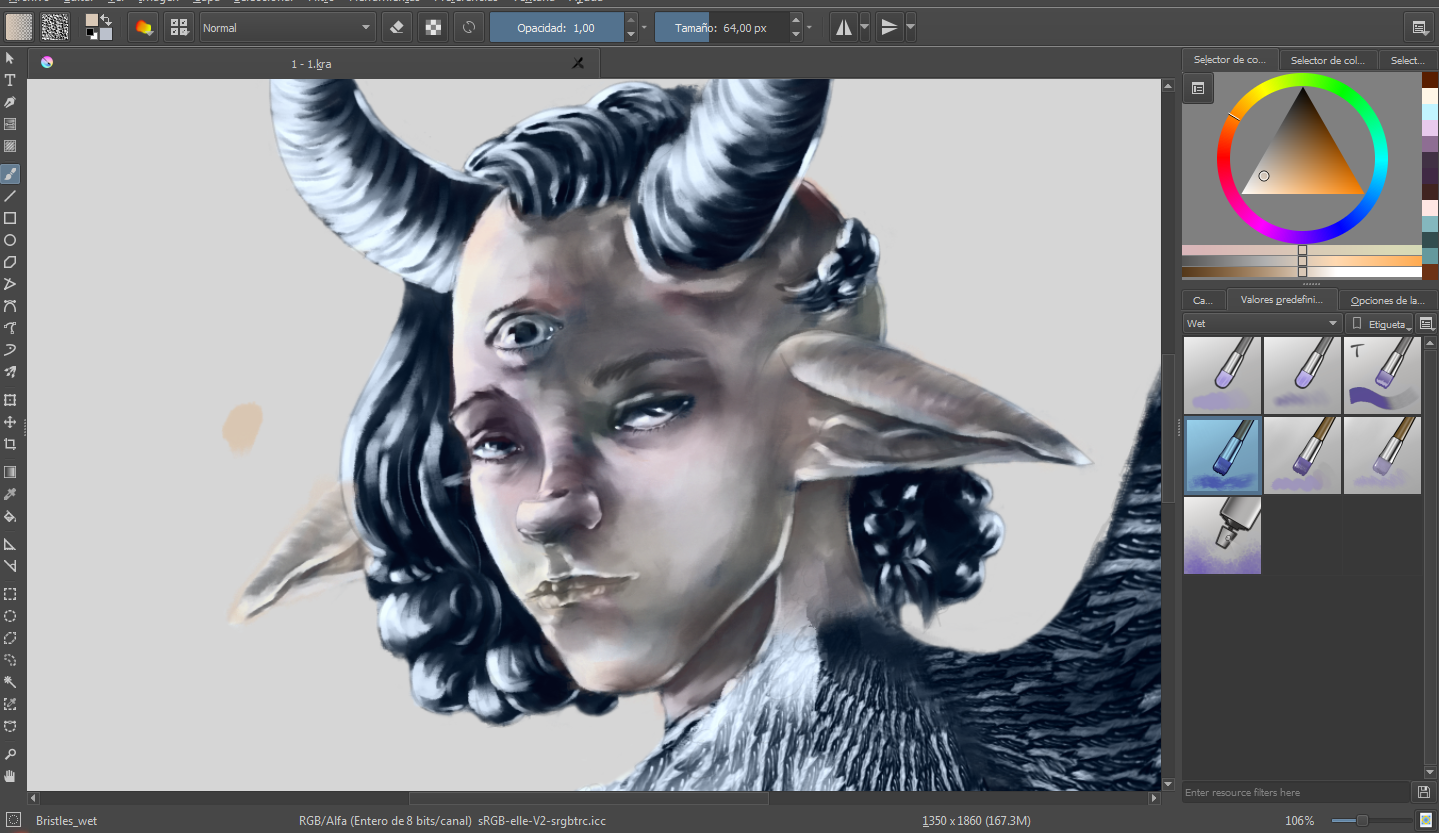
Después de ajustar el filtro de color, comencé, en una capa nueva, puesta por encima de esta, a pintar la piel del personaje.
After adjusting the color filter, I began, in a new layer, placed above it, to paint the character's skin.
11.
De igual forma, procedí a ubicar los distintos colores del resto de los elementos, en una capa nueva para cada uno. Es importante separar los colores por capas, pues cada color tiene su propia luminocidad, y en caso de que se necesite reducir o aumentar la opacidad de un color, esto no afectará al resto.
In the same way, I proceeded to locate the different colors of the rest of the elements, in a new layer for each one. It is important to separate the colors by layers, since each color has its own luminocity, and in case it is necessary to reduce or increase the opacity of a color, this will not affect the rest.
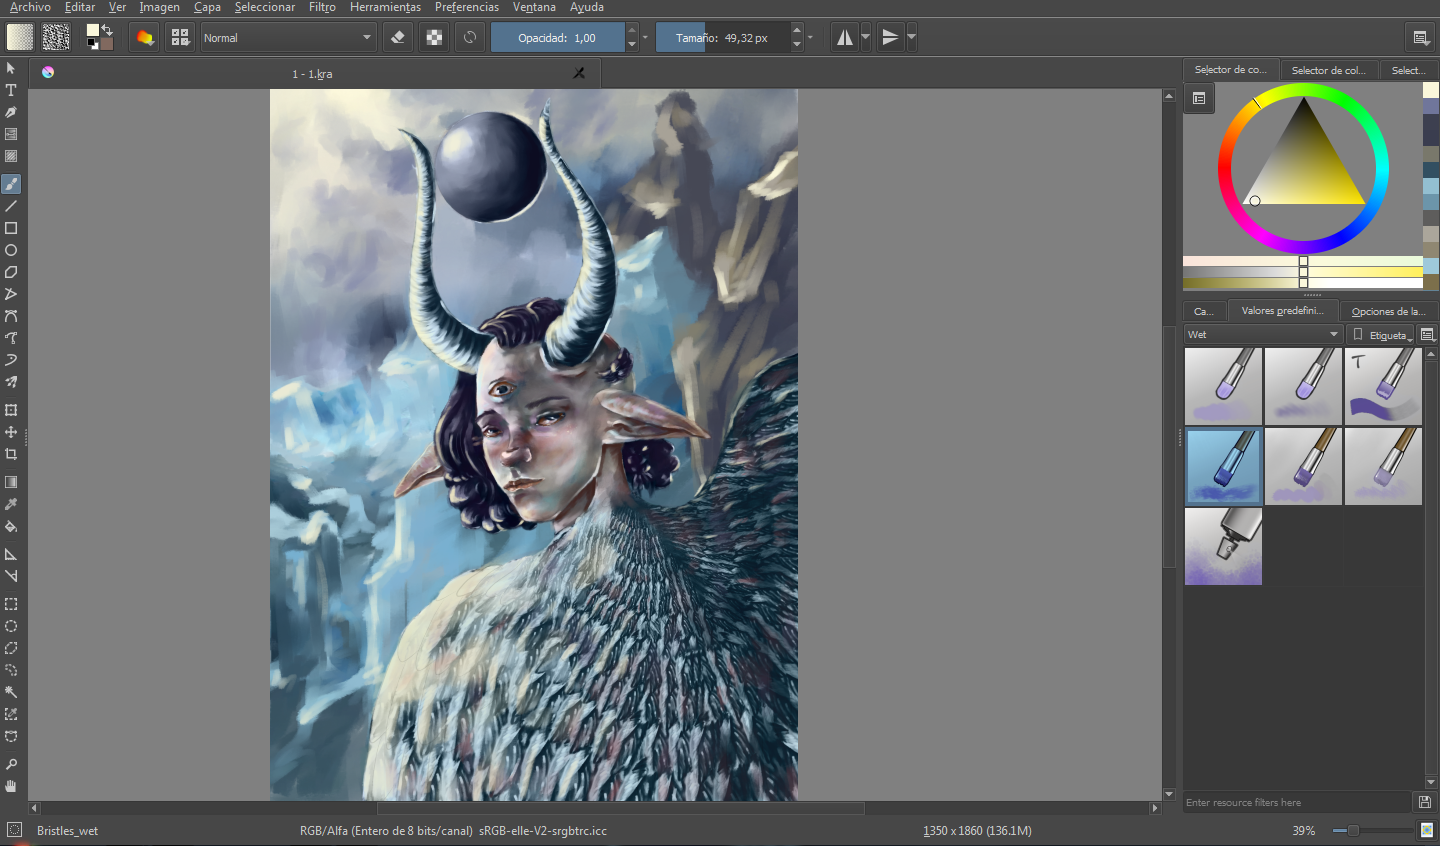
12.
Continué añadiendo una luz amarillenta, pues mi personaje se ubicará en un paisaje ártico diurno.
I continued adding a yellowish light, because my character will be located in a daytime Arctic landscape.

13.
Seguidamente comencé a manchar los colores que se ubicarían en el fondo.
I continued adding a yellowish light, because my character will be located in a daytime Arctic landscape.
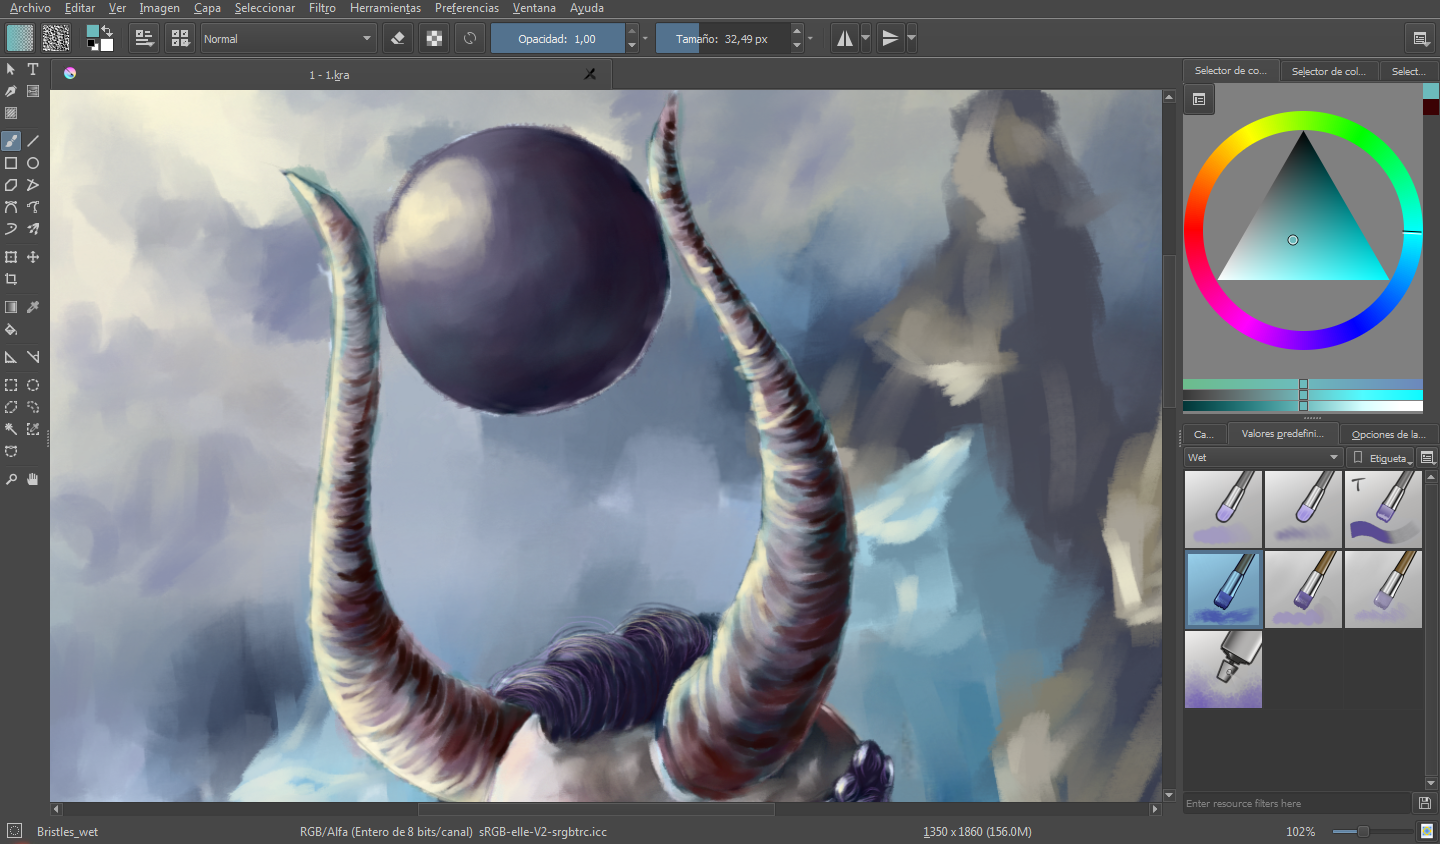
14.
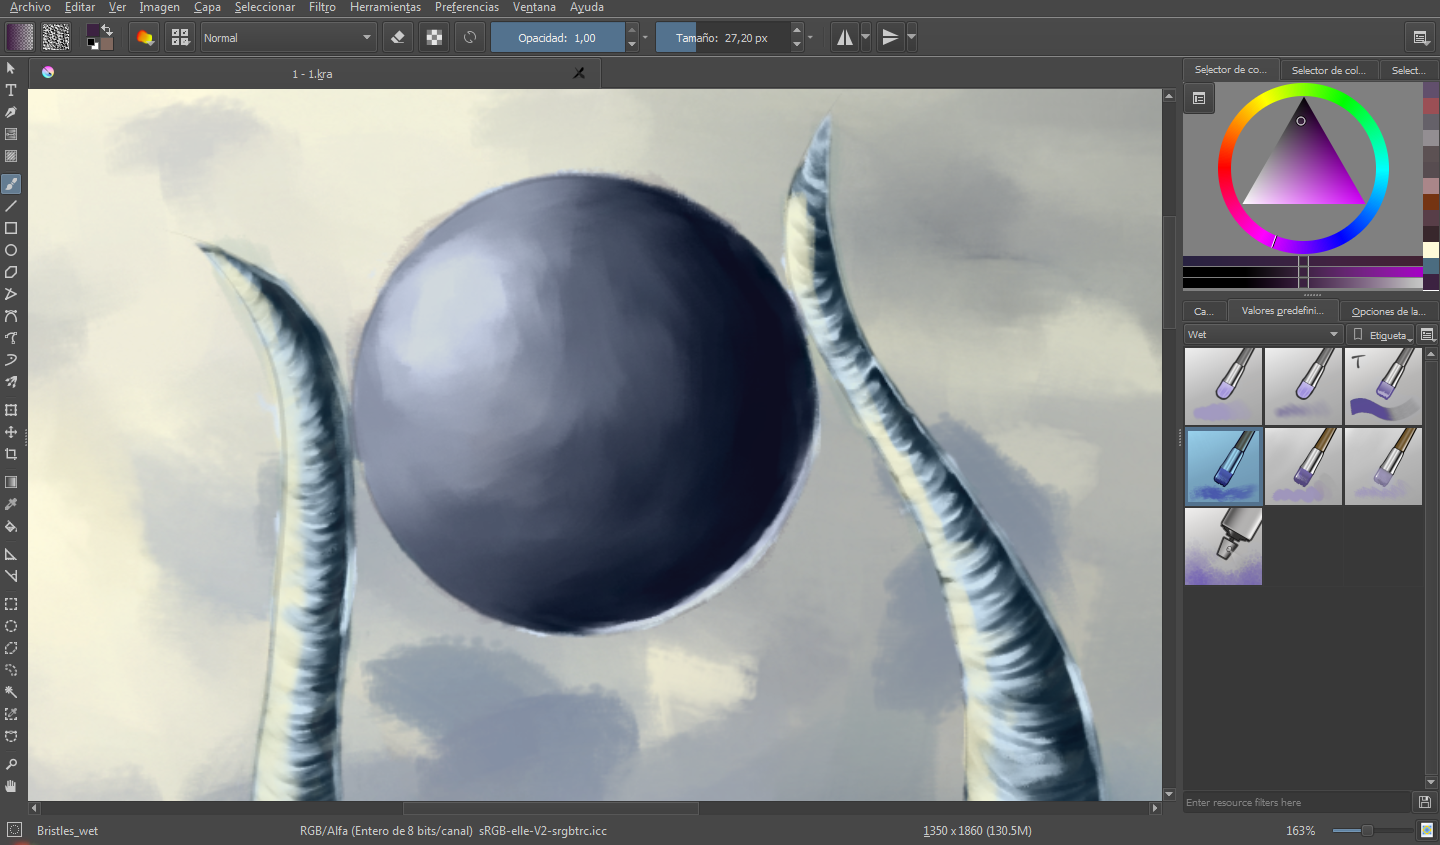
Continué añadiendo color a la esfera.
I continued adding color to the sphere.
15.
Añadí matices rosados a las alas.
I added pink hues to the wings.
16.
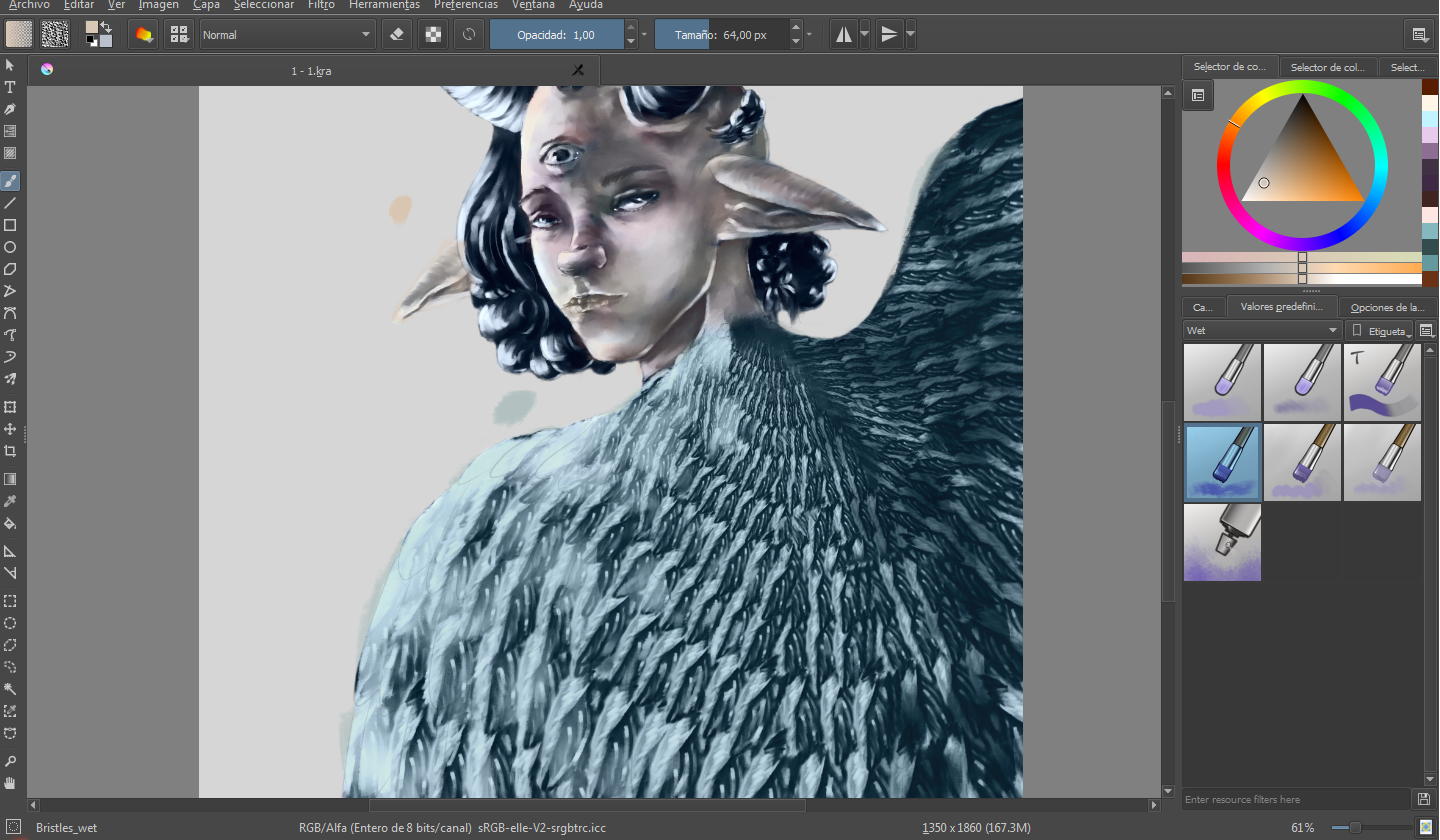
Continué trabajando el fondo con el pincel bristles wet, definiendo las rocas heladas, así como el hielo que se ha formado alrededor.
I continued working the background with the brush bristles wet, defining the frozen rocks, as well as the ice that has formed around.
17.
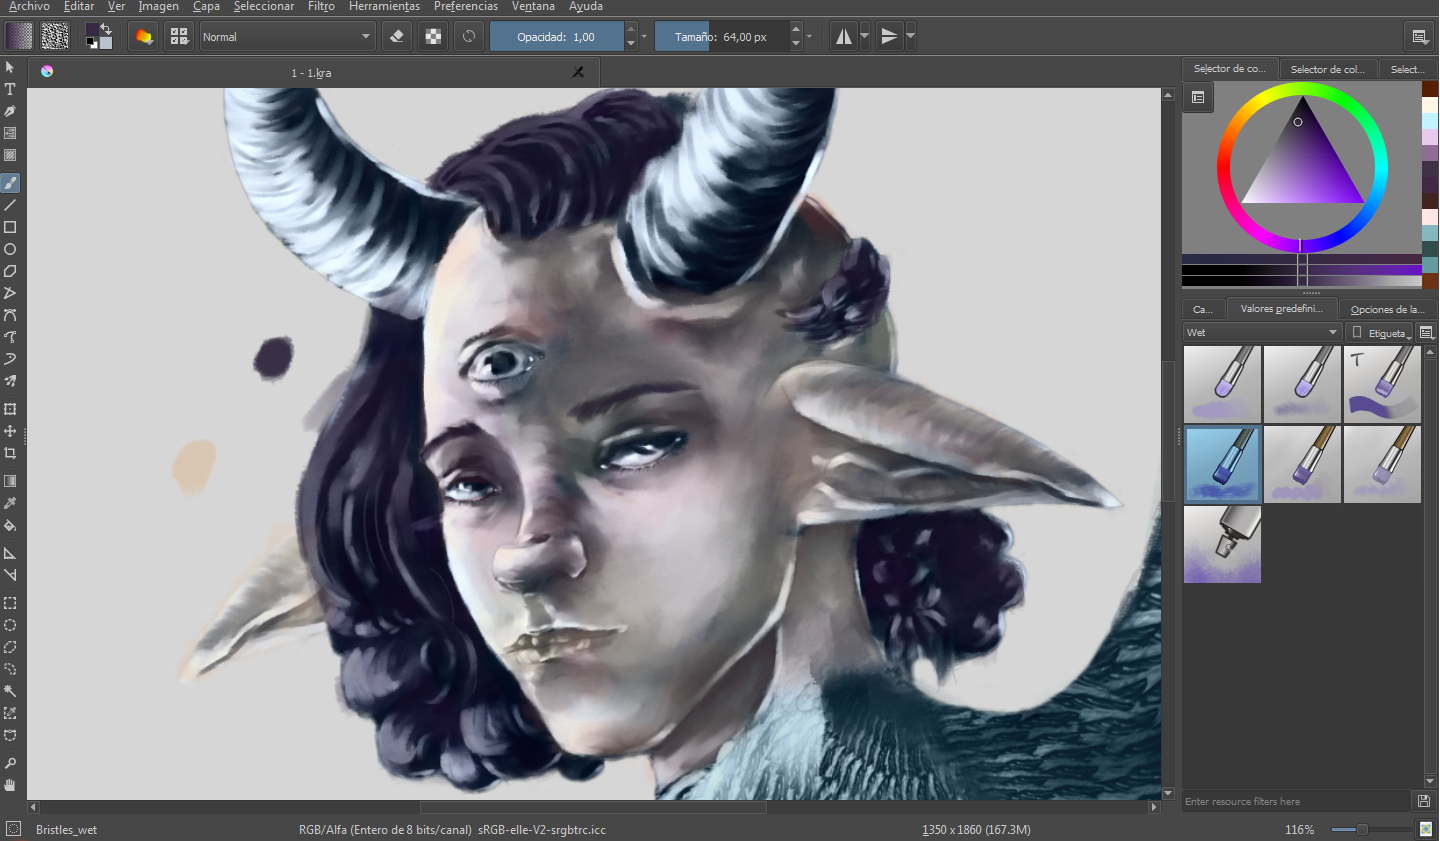
Comencé a matizar los cuernos, con colores rojizos, en un sentido envolvente.
I began to shade the horns, with reddish colors, in an enveloping sense.
18.
Para el cabello dibujé unas delgadas lineas con un color morado de un tono muy alto, con el fin de que denotasen, y por consiguiente ayudaran a la textura.
For the hair I drew thin lines with a purple color of a very high tone, in order to denote, and therefore help the texture.
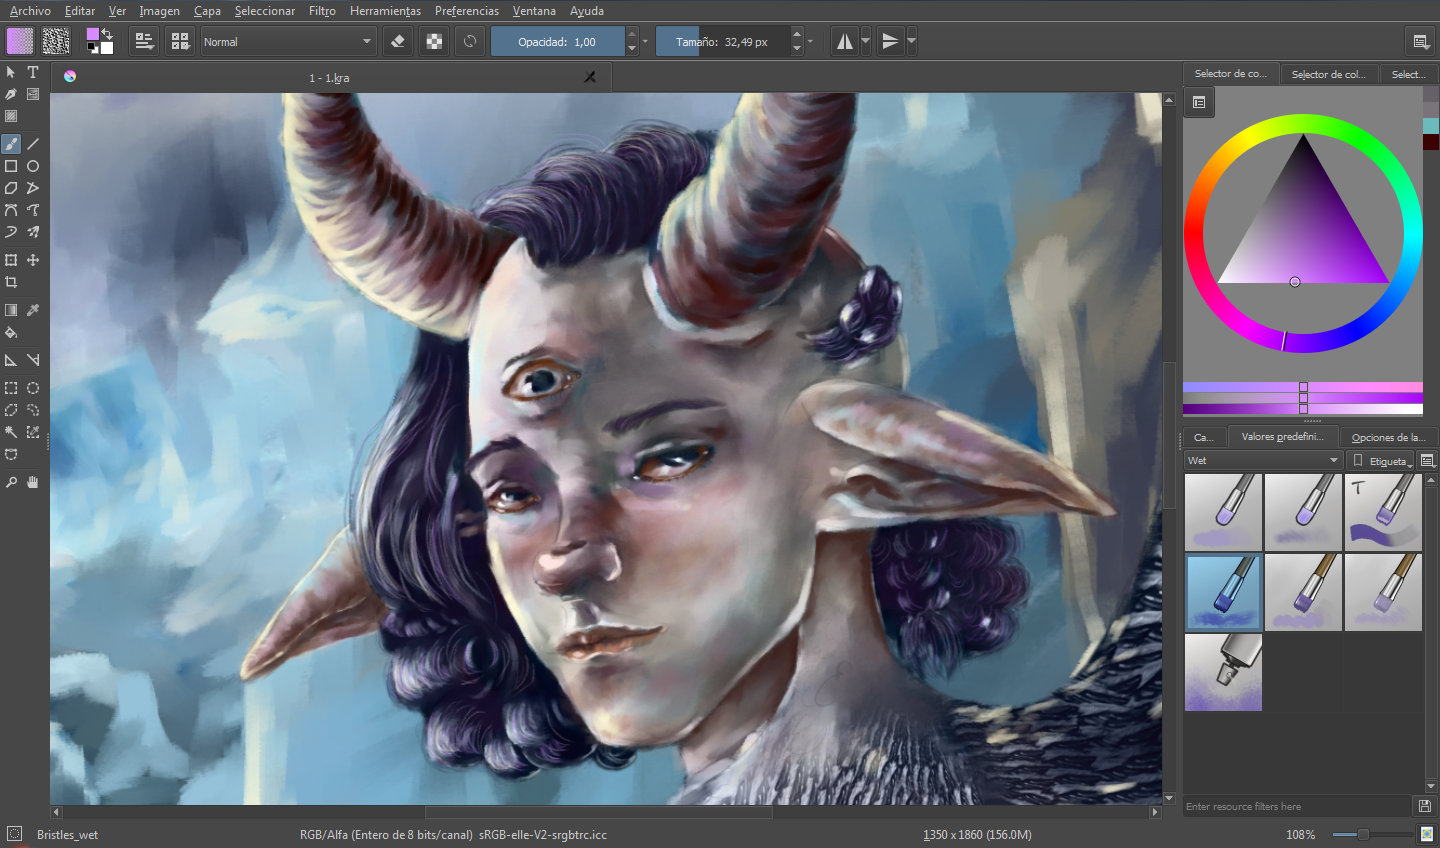
19.
Asimismo, continué definiendo los elementos del fondo.
Also, I continued defining the elements of the fund.
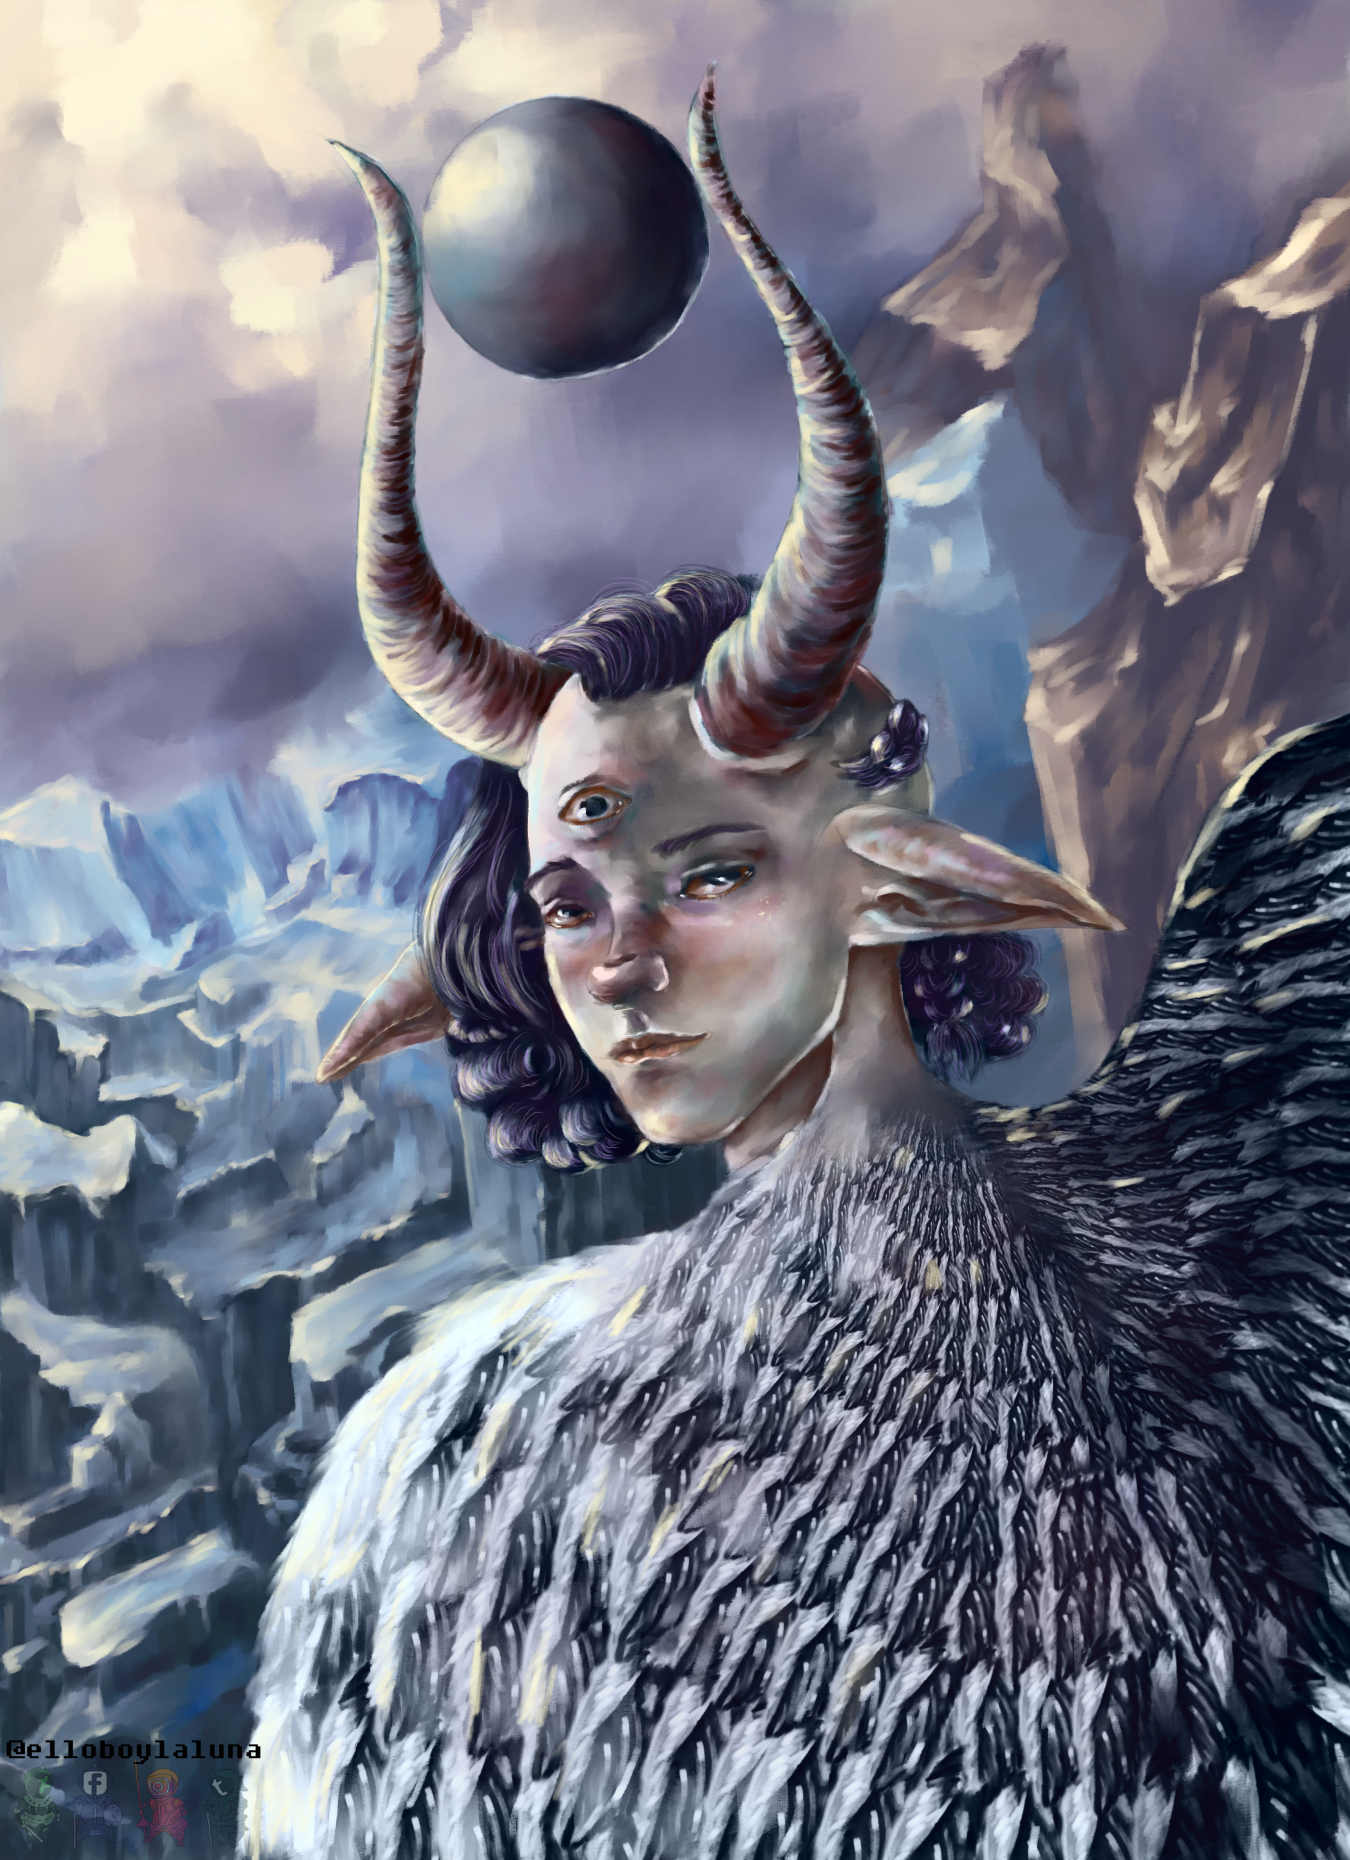
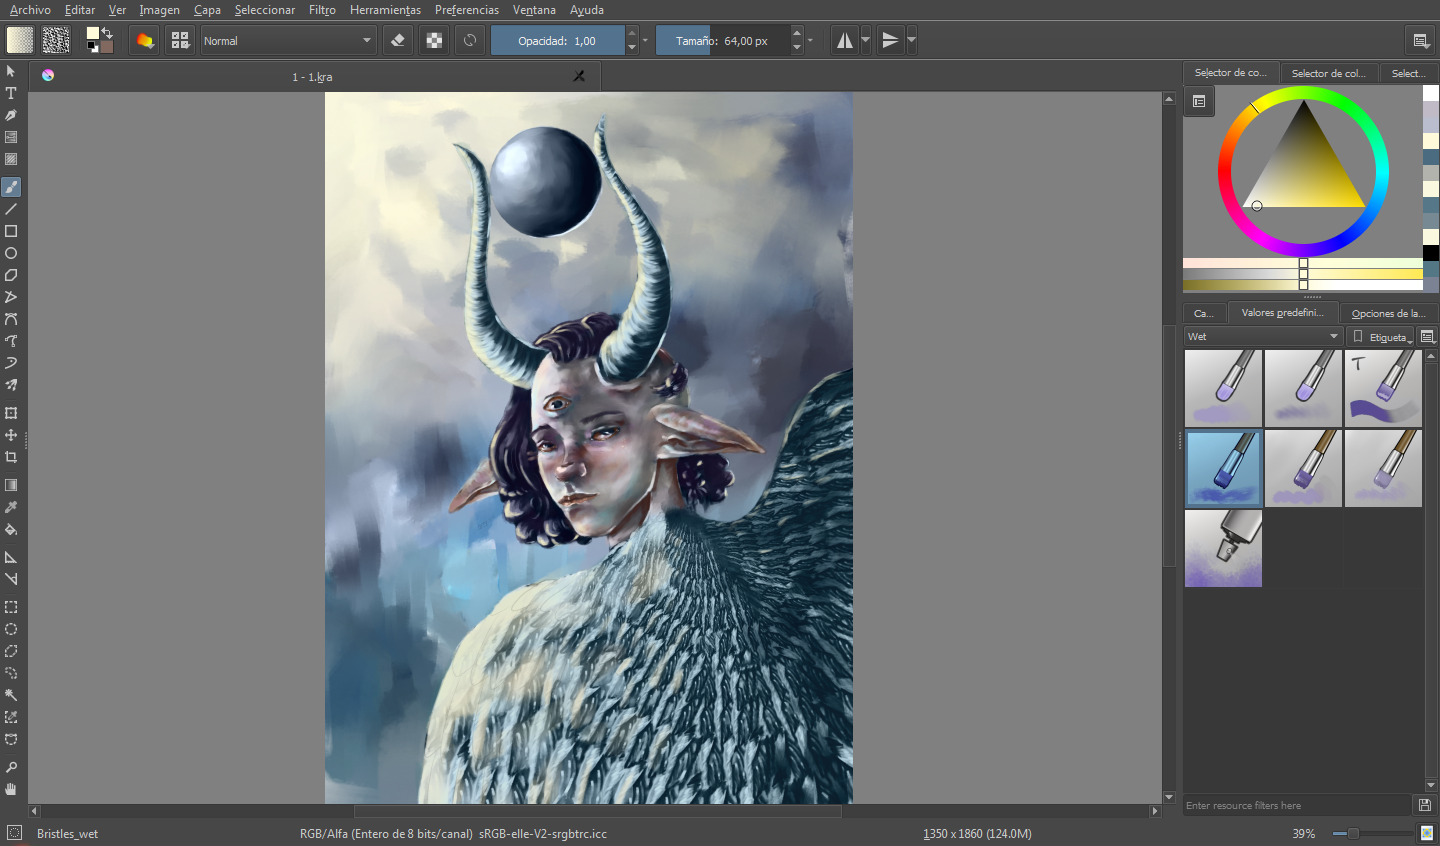
Y para recordaaar, ¡aquí tienen nuevamente la ilustración finalizada! Personalmente, me he sentido realmente feliz con el resultado que he obtenido. Gracias por leer hasta el final, viajeros. Recuerden que aún continuaremos subiendo entradas de este tipo, estén atentos. Se despiden con cariño, el Lobo y la Luna <3.
P.D.: La ilustración fue realizada en el programa Krita, versión 3.1.3
And to remember, here they have the finished illustration again! Personally, I have been really happy with the result I have obtained. Thanks for reading until the end, travelers. Remember that we will continue to upload posts of this type, stay tuned. They say goodbye with love, the Wolf and the Moon <3.
P.D .: The illustration was made in the Krita program, version 3.1.3
Facebook
Tumblr
Instagram
Deviantart
"This work is licensed under a Creative Commons
Attribution 4.0 International License"
Copyright @elloboylaluna - All Rights Reserved
