
Quilling Tutorial
Quilling is twisting long strings of paper forming 3d paintings. It's a very relaxing and fun hobby.
I got a starter pack with a bunch of strands and a hook/needle thing that has a gap in between to help latch on the edge of the paper. Here's what I ended up making:
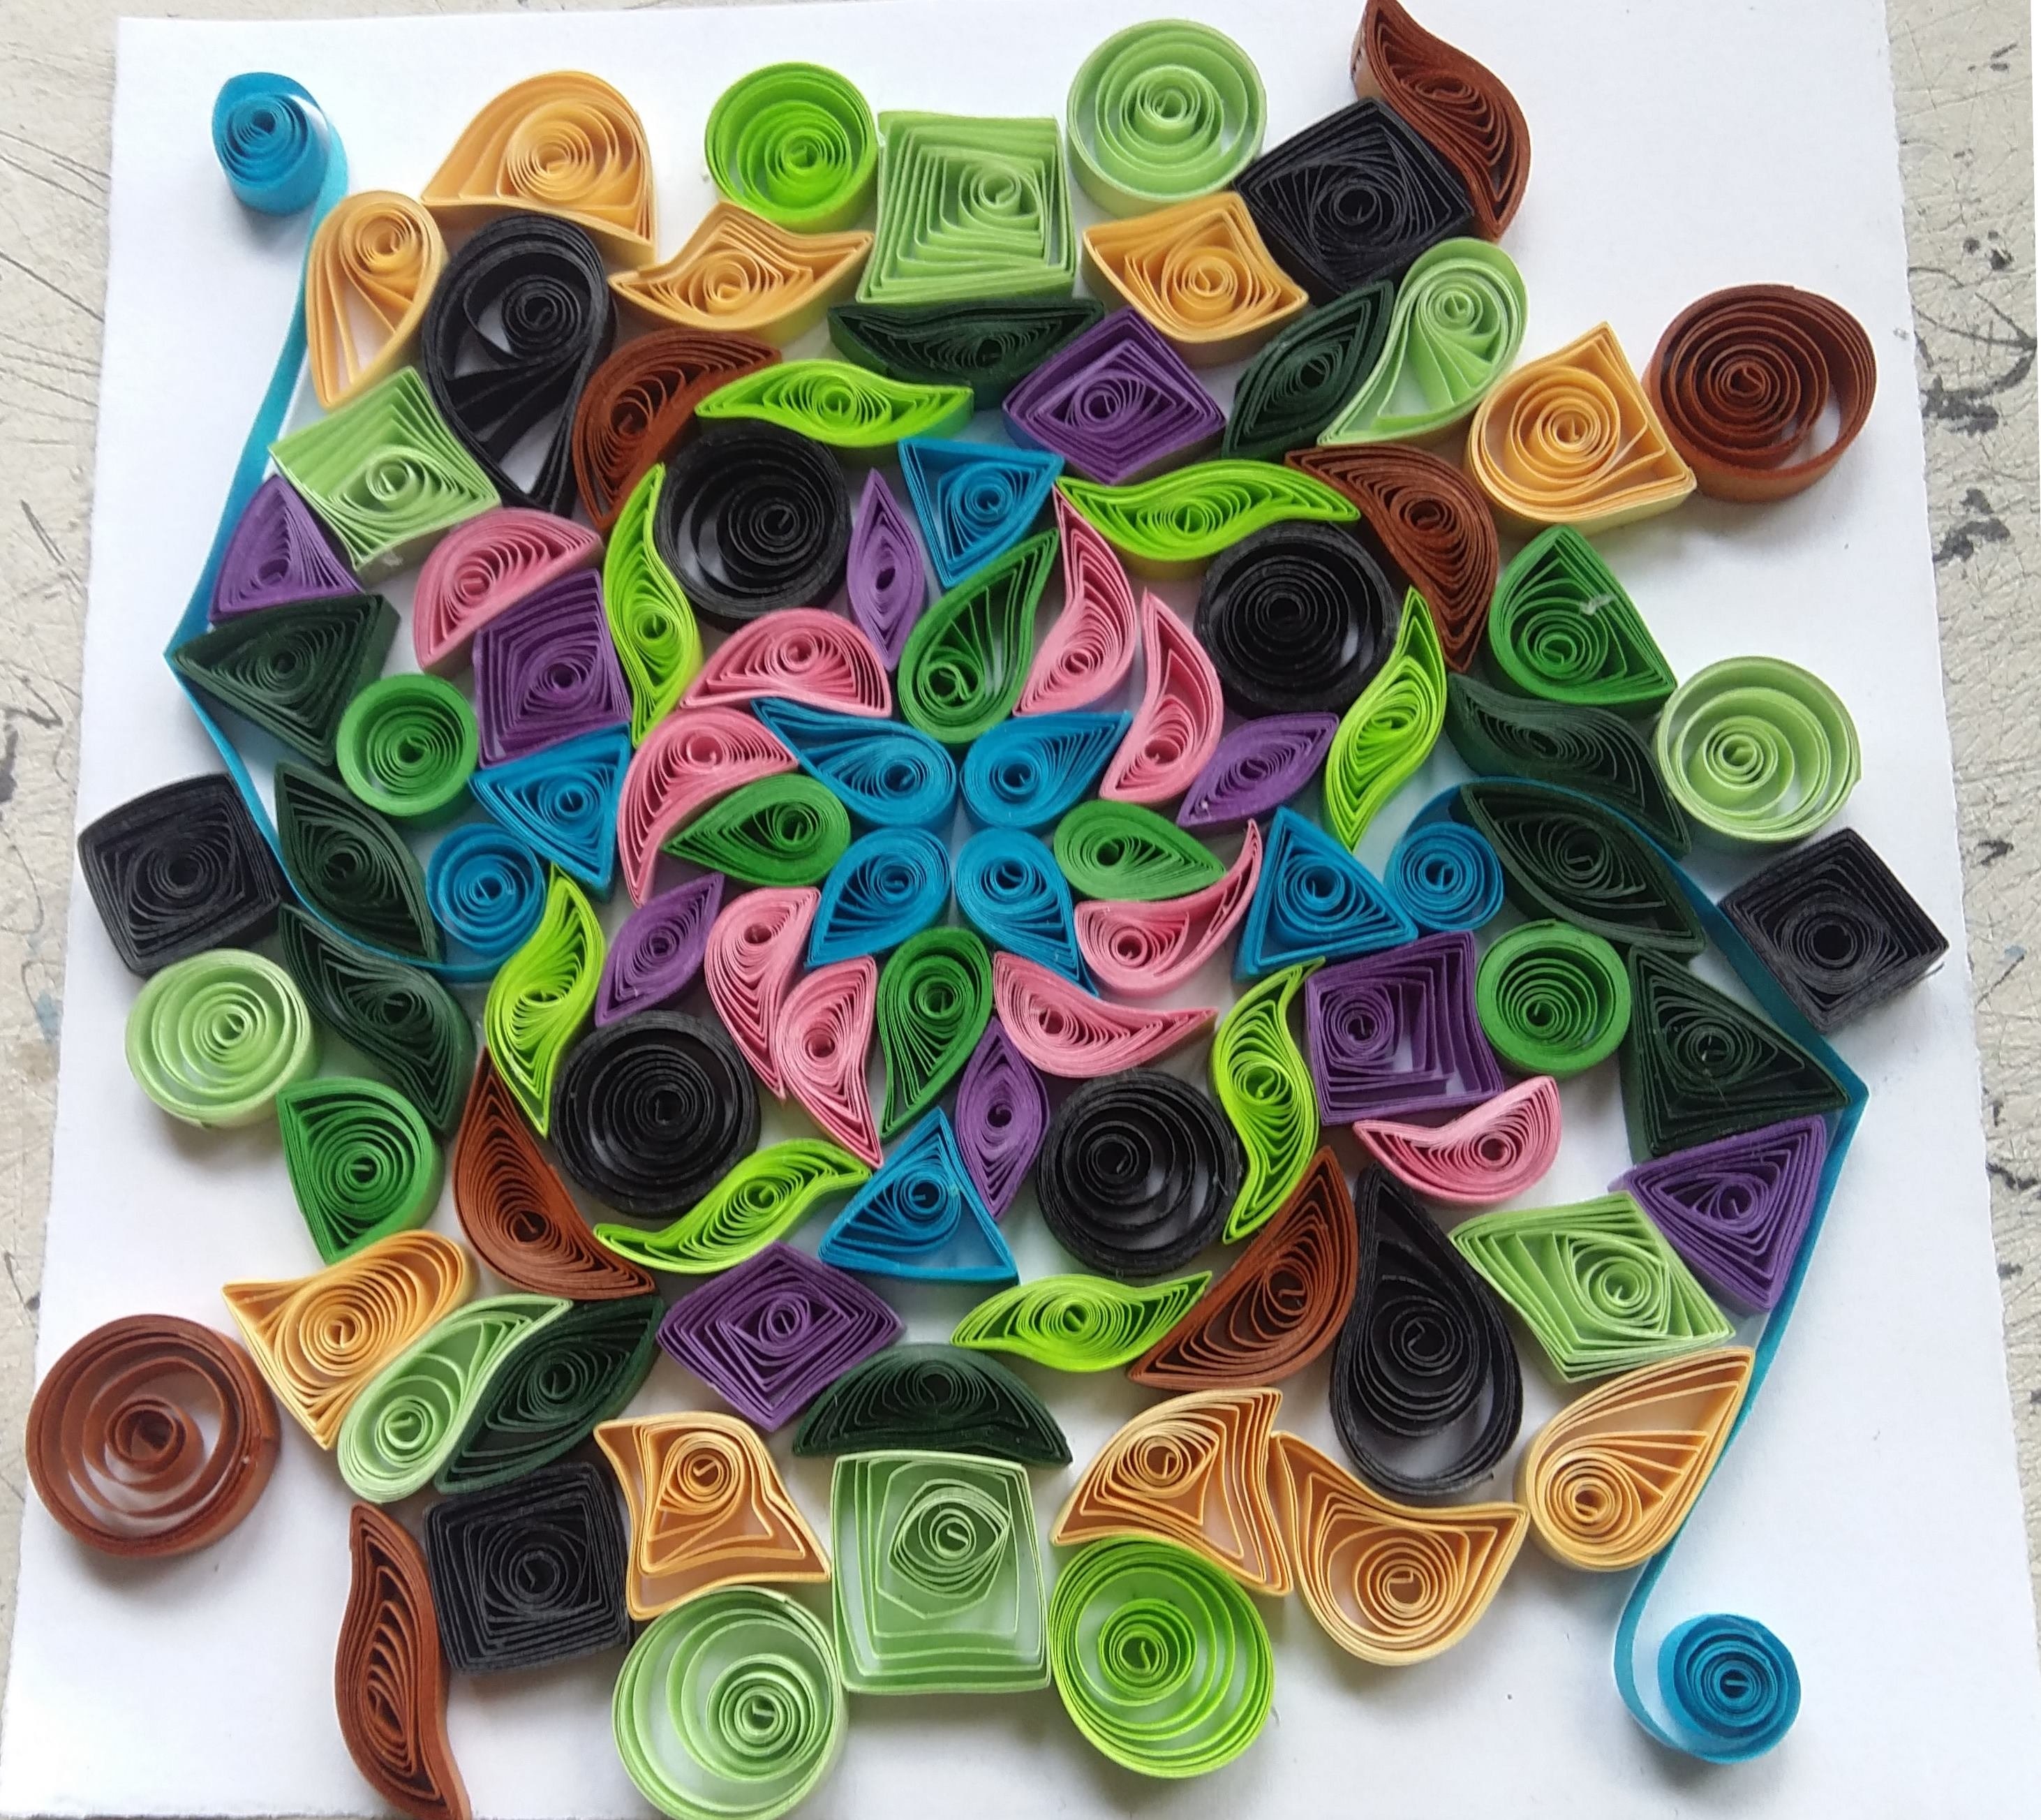
This was my first quilling project, used up almost all the paper in the set. I started at the center working outward horizontally symmetric.
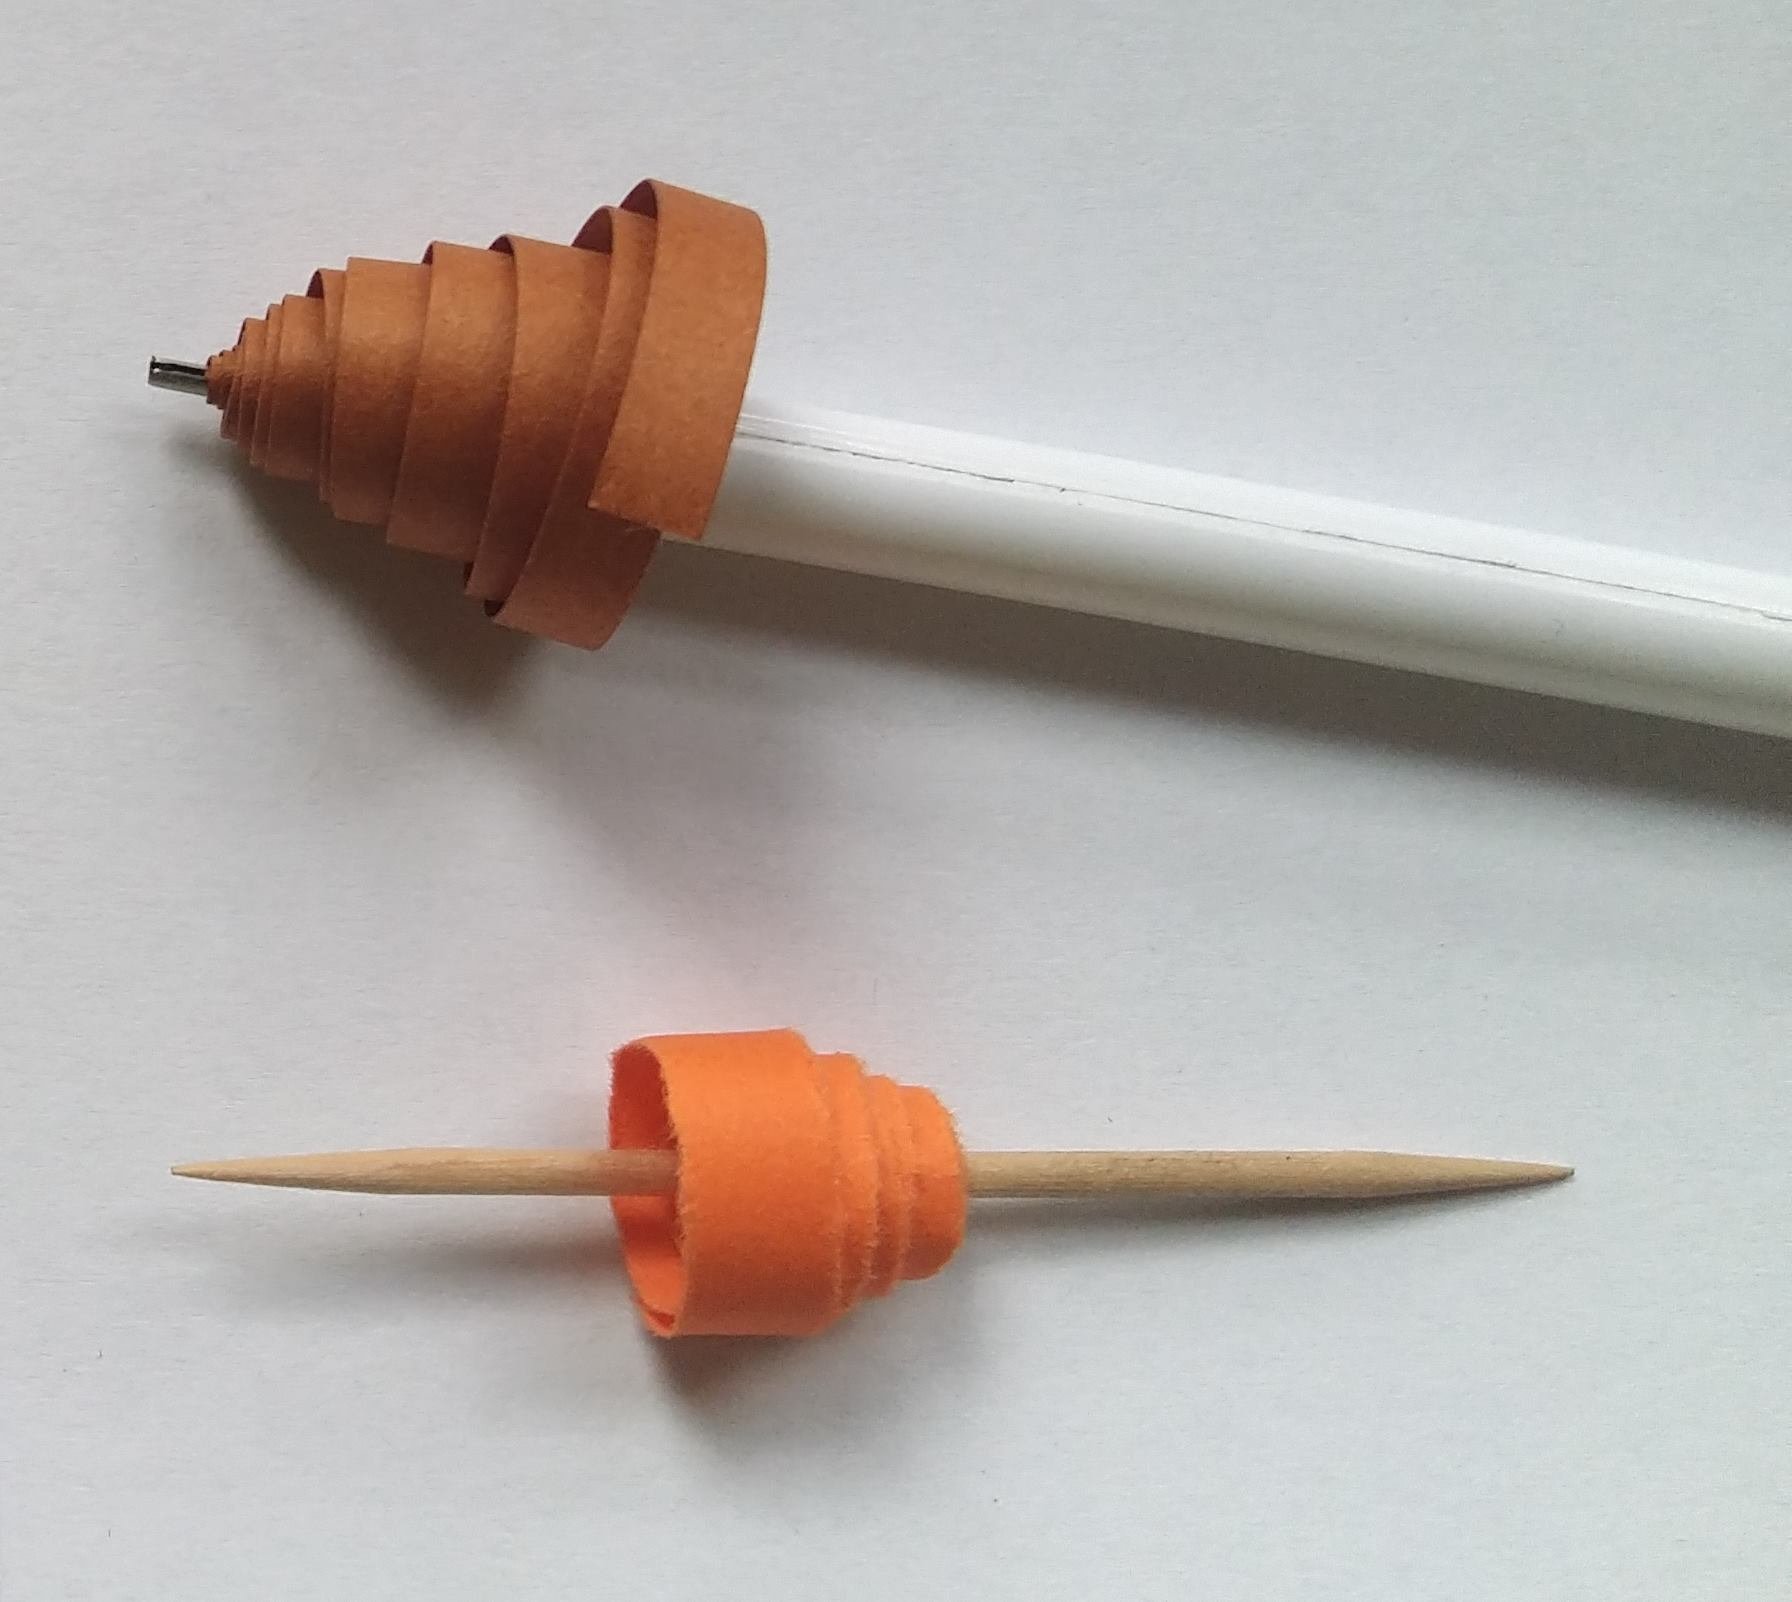
The set isn't really mandatory for quilling, you can make the same art with a toothpick and standard printer paper, with A4 you can get a similar width by dividing the paper into 32 strips or 64(kinda hard to divide by hand), could be easier with a cutter. To start you wrap the strip around a toothpick tightly, after removing it you adjust the size of the ring. After picking the right size you glue the outer edge so it stays in place. The shapes are made by pinching sides, pushing to form angles and so on, get creative :)
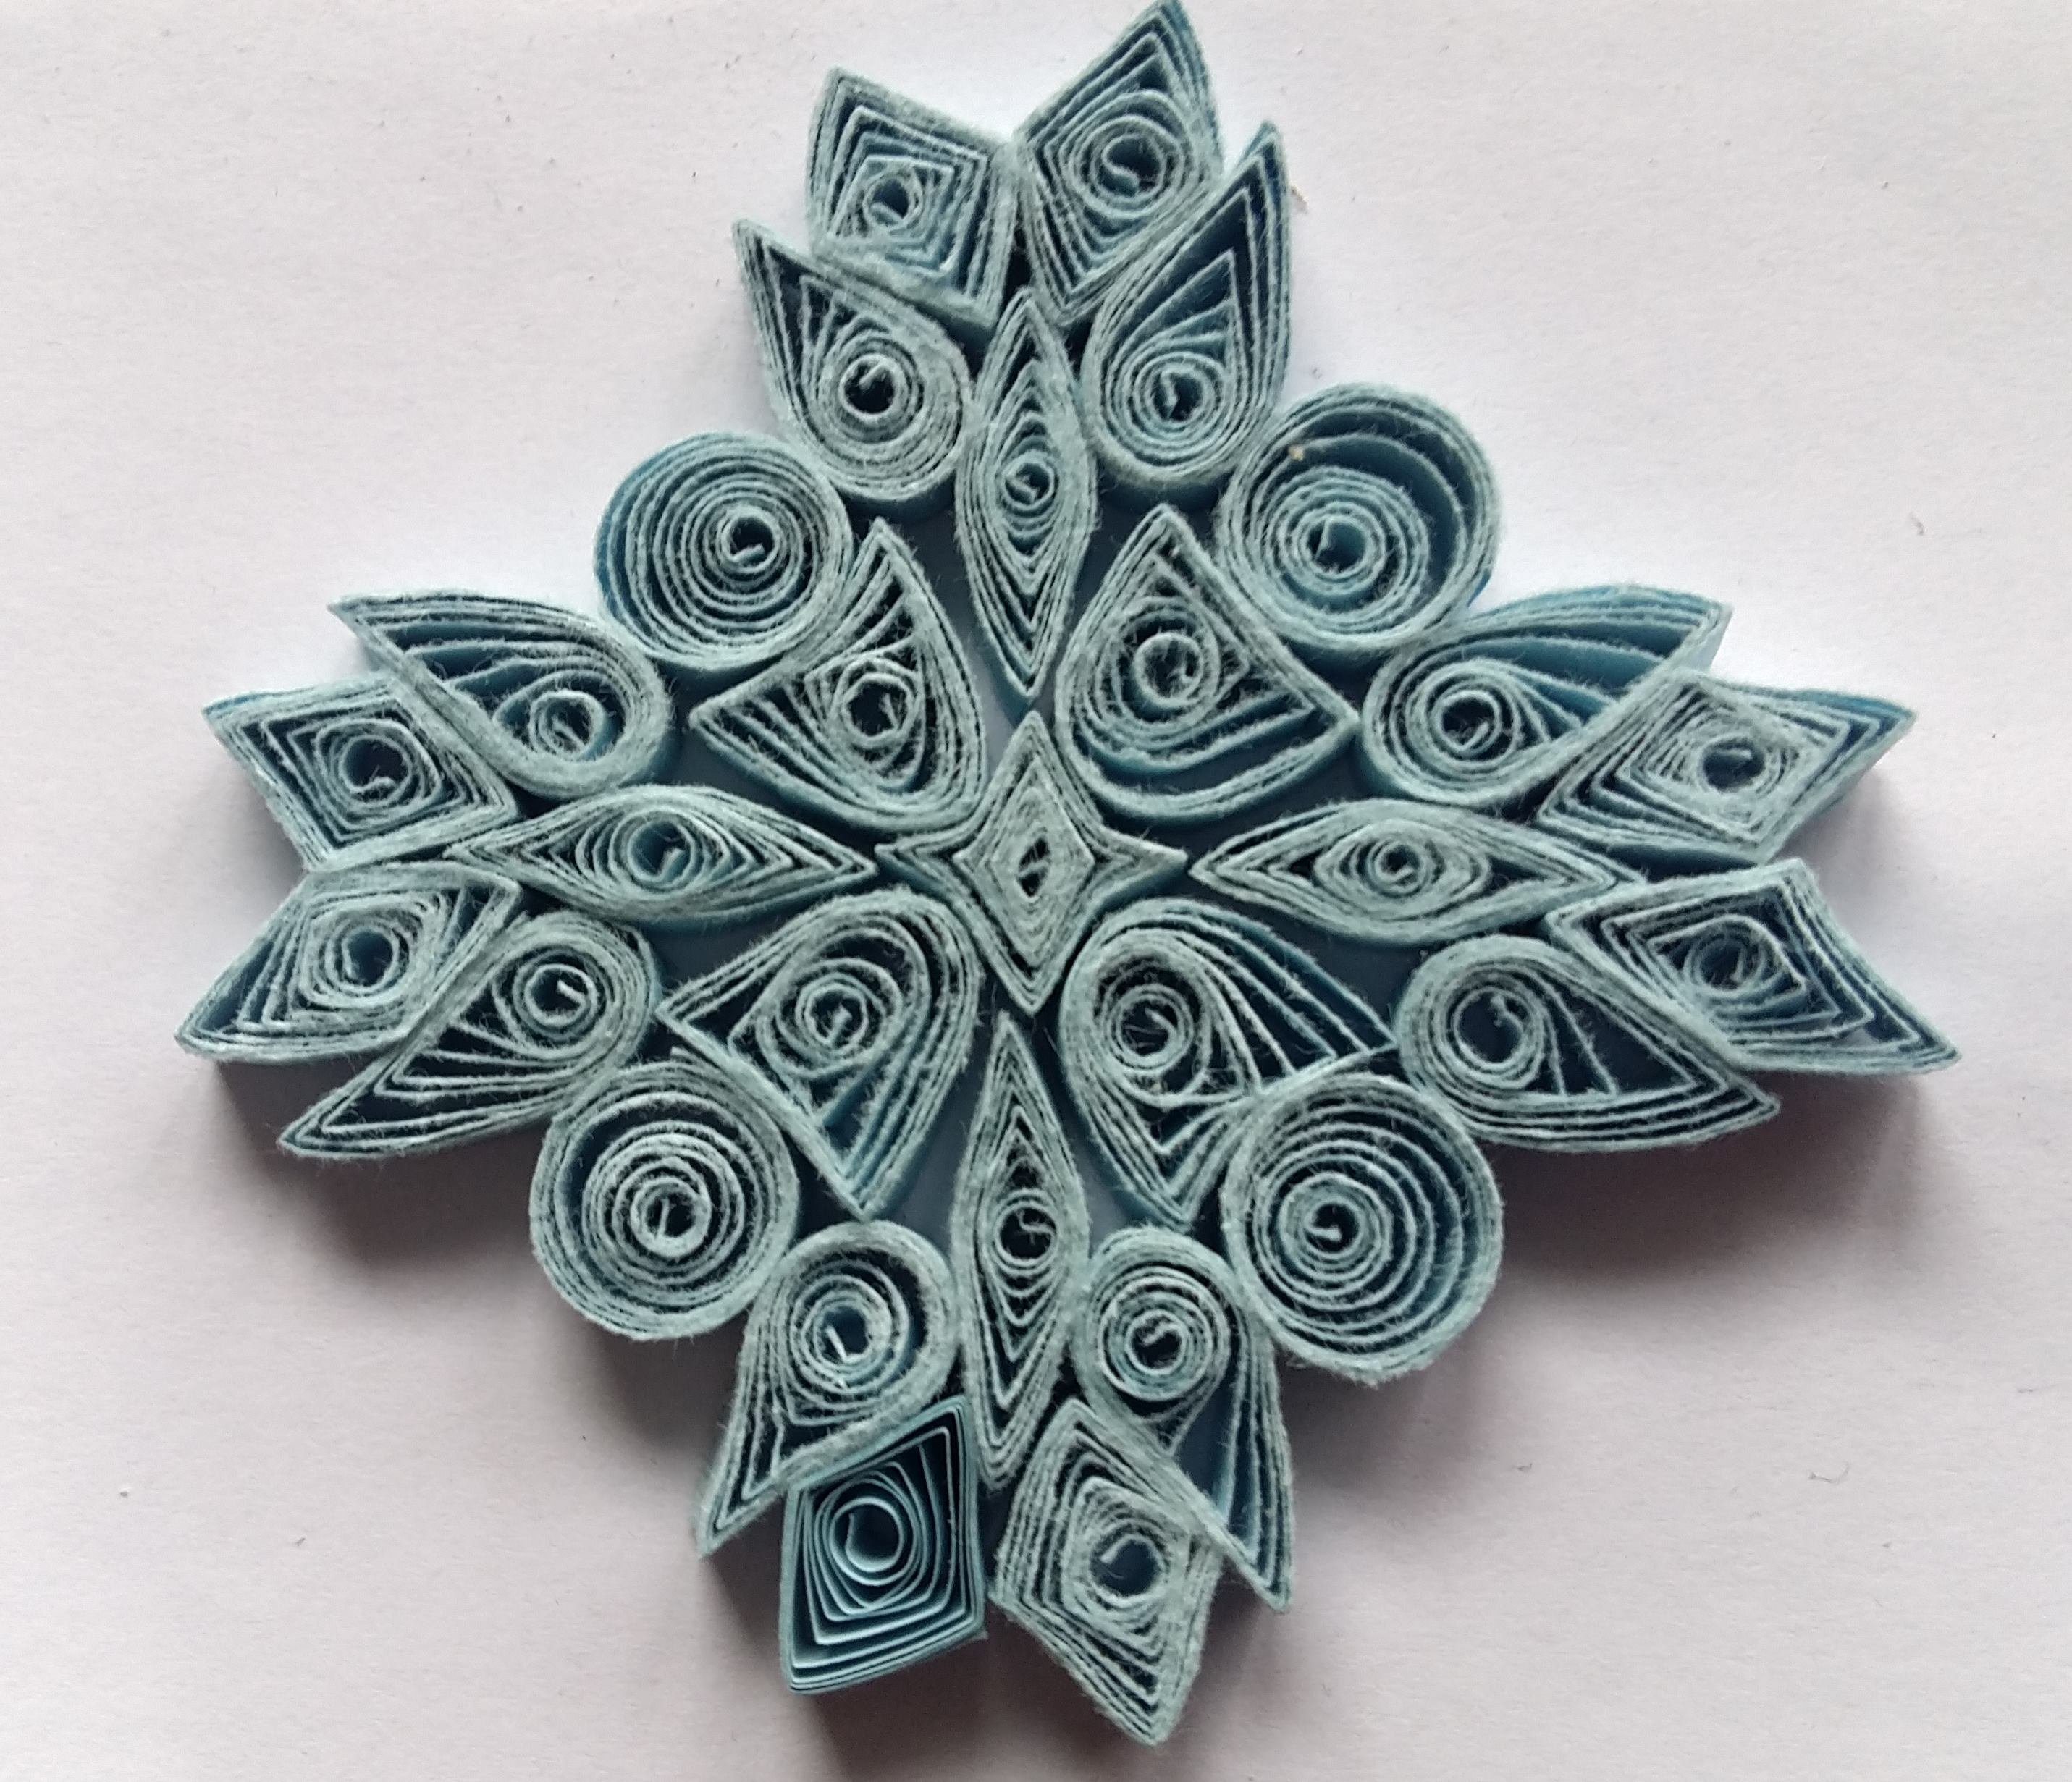
Here's one I made by dividing an A4 by hand, the bottom left piece was an edge piece, you can see the difference in shade and roughness, It's better to use some sort of cutter or scisors, the width of the paper is 1/32 of an A4.
Your opinion is celebrated and welcomed, not banned or censored!